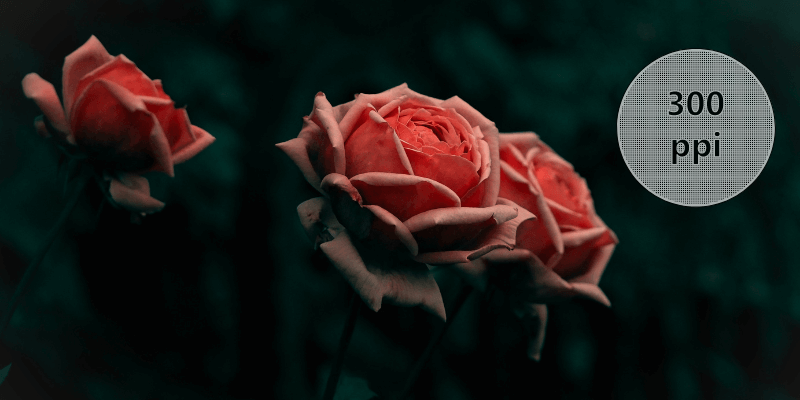
PPI stands for pixels per inch and refers to the picture’s resolution. If an inch of your image contains more pixels, its resolution will be higher. High-resolution images can be printed in better quality.
PPI was created especially for architectural photography and other building-related pictures (where perspective distortion frequently needs to be fixed), though you can also use it to manage perspective concerns in composite editing, product photography, and more.
I have over five years of Adobe Photoshop experience and am Adobe Photoshop certified. In this article, I’ll teach you how to change the PPI (Pixels Per Inch) in Adobe Photoshop.
Key Takeaways
- The higher the PPI, the clearer your image will be because the pixels will be denser.
- Resolution is the number of image pixels assigned to each inch when an image is printed – measured in pixels per inch (PPI).
I’m sure some of you might be confused about the difference between PPI and DPI resolutions. Well, here’s a quick explanation.
DPI vs PPI
Before we go changing anything, let’s make sure you understand what you’re doing. If you already understand DPI feel free to skip down to the next section.
DPI stands for Dots Per Inch and PPI is Pixels Per Inch. There is a 1:1 ratio between the two, but they are not exactly interchangeable. DPI governs printed images whereas PPI has to do with digital ones.
You only need 72 PPI for a digital image to look great on a screen. However, you should aim for 300 DPI for printed images. Because of that 1:1 ratio, the printed size of your image is limited by how many pixels are present in the image.
How to Change PPI Resolution in Photoshop
Follow the steps below to change image resolution in Photoshop.
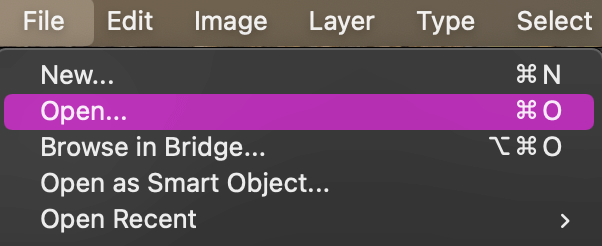
Step 1: Pick a photo that needs its PPI value to be increased to get started. By using the File > Open menu item, you can open it in Photoshop. Additionally, you can import any image using the Photoshop keyboard shortcut Command + O (or Ctrl + O on Windows).
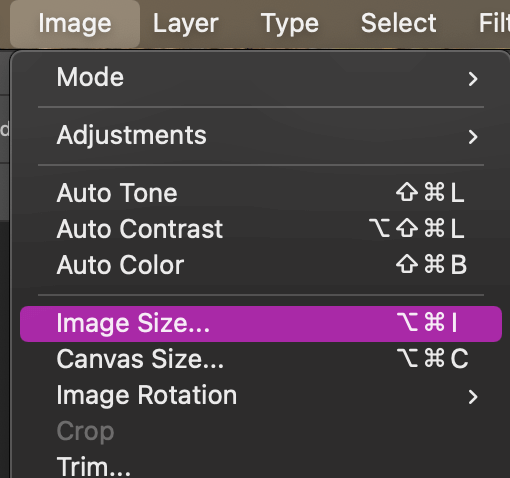
Step 2: In the Image > Image Size menu in Photoshop, you may obtain a preview of the image size and resolution. The key combination Option + Command + I or Alt + Ctrl + I is another option.
Step 3: In the Dimensions area, pick Pixels by clicking the arrow next to it. The program will show the image’s actual size in pixels. The picture’s pixel density is displayed in the text section labeled Resolution.
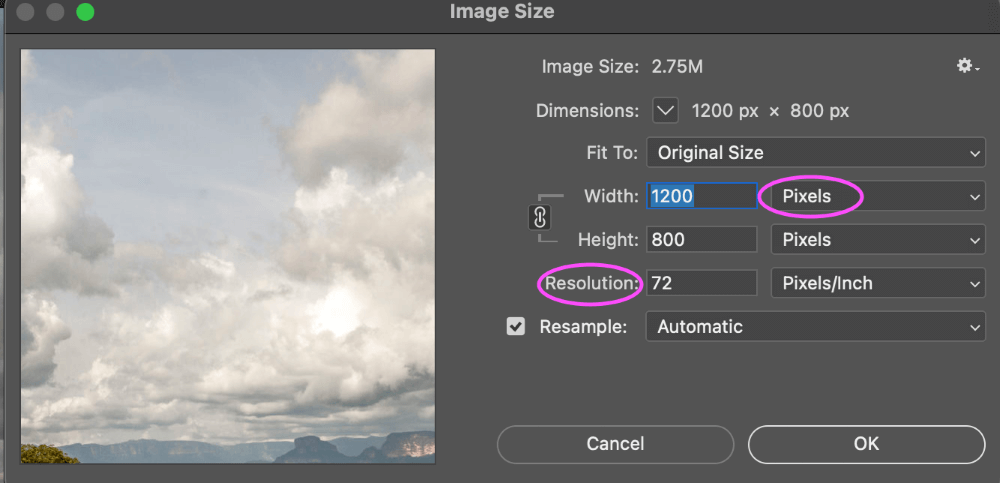
Step 4: If you wish to increase the number of pixels per inch, enter a high number in the Resolution text area. To resize the image or increase the number of pixels, check the Resample field and press OK.
Photoshop also allows you to change the width and height of your image in addition to the PPI. Remember that if you modify one of them, all the others will follow suit.
To know what’s best for your image’s PPI you will need to decide what you are using your image for. I’ve created a list below of what PPI works best for certain types of uses.
Images in High Resolution
With photographs sized at 100% or less, 300 PPI is the ideal resolution for printing. The final PPI of an image will decrease as its size increases. An image will appear clear and clean at 300 PPI. This is regarded as having a high resolution.
Images in Low-Resolution
Low-resolution or low-res images are those with less than 200 PPI. Even while low-resolution photographs may appear flawless on your computer screen, they will print blurry and distorted. The reason for this is that there aren’t enough pixels per inch to keep the image sharp.
Step 5: There is no need to alter the total amount of pixels in your image if you wish to improve resolution in Photoshop. All you have to do is decide how many pixels each inch will hold. You’ll see an improvement in image quality after changing the resolution.
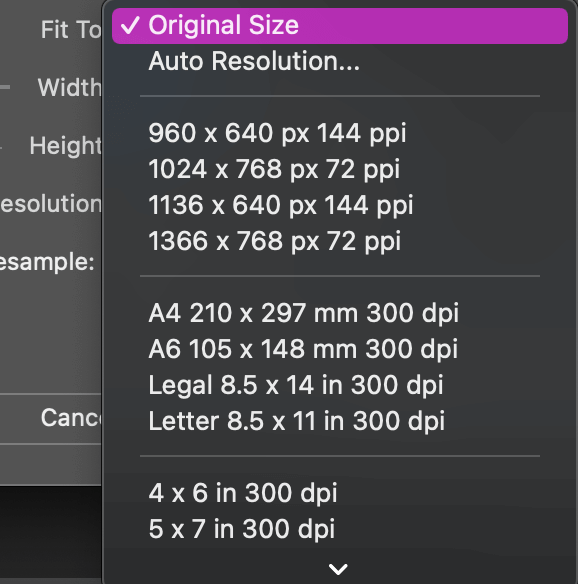
You can pick a certain format with an appropriate resolution for greater convenience. To accomplish that, use the Fit To option to view all of the PPI possibilities that are available.
You can see mine is just on the default of Orginal Size but go ahead and see which one works best for you. For individuals who don’t want to make manual settings adjustments, this is the ideal answer.
Step 6: To make the changes, click the OK button. After that, you can either save the adjustments or continue to edit your image by choosing File > Save or using the Save keyboard shortcut Command/Ctrl + S.
If you are still determining what PPI your image needs to be at, just look up online as there are many resources that will help you to decide the pixels per inch.
Final Thoughts
It’s that simple! The resolution of your image can be increased by adjusting PPI. When you need to obtain a shot of good quality that can be printed or used in online promotional materials, it will be useful. But there are other things you should focus on as well if you want to take photographs that draw people’s attention.
Any questions about changing your PPI (Pixels Per Inch) in Photoshop? Leave a comment and let me know.
About Aly Walters