
The crop tool in Photoshop is pretty self-explanatory. The box pops up, you drag the corners around, and boom! crop the image where you want it.
But…what about when you want to crop to a specific size in Photoshop? Perhaps you’re putting in a collage or printing it to fit a certain frame. Not only do you want to crop it at the best spot for the image, but also size it so that it will print correctly.
Hello, I’m Cara! I find that sometimes Photoshop tools are deceptively easy to use. But when you never investigate further, you never learn some of the awesome and time-saving features built right into the tool.
For example, you’d never learn how to crop in Photoshop to a specific size. So, let’s talk about it and I’ll show you how!
Note: The tutorials and screenshots below are from Photoshop CC for Windows, other versions can look different.
Table of Contents
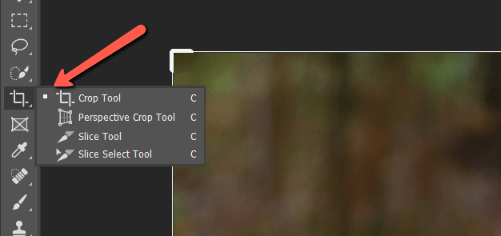
Step 1: Open the Crop Tool
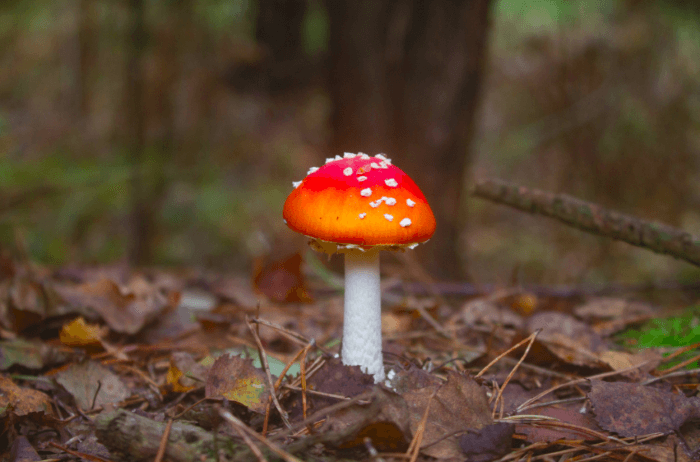
Start by opening an image in Photoshop. We’re going to use this one.
Open the Crop tool by clicking on the Crop icon in the toolbar on the left or pressing C on the keyboard.
A box appears around the image. You can drag this box around as you please to crop the image. Notice a little box that appears telling you the width and height in pixels of your crop.
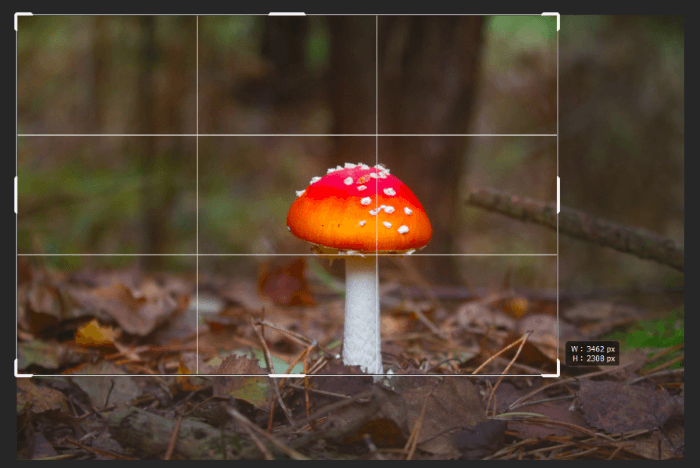
However, trying to crop it to an exact size requires a very steady hand. This is especially true if you are changing both the width and height independently of one another.
It’s so much easier to simply enter the values you want and press the checkmark!
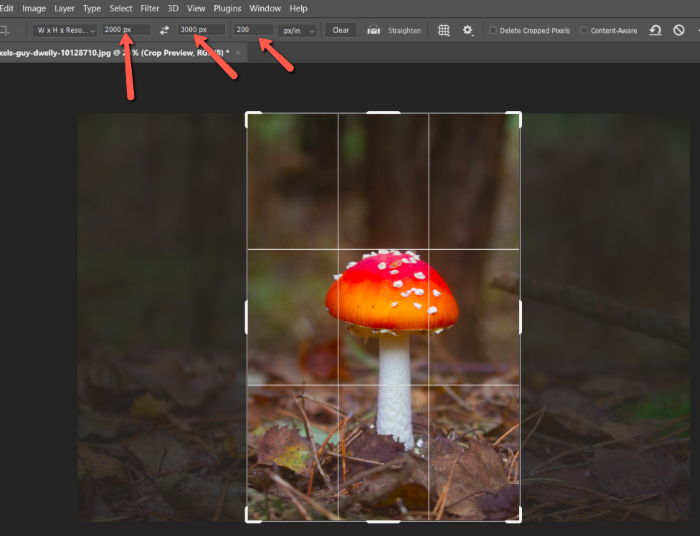
Step 2: Switch to W x H x Resolution
To pick the values you want, you first need to set up the tool. Click the dropdown menu on the left side of the Options menu.
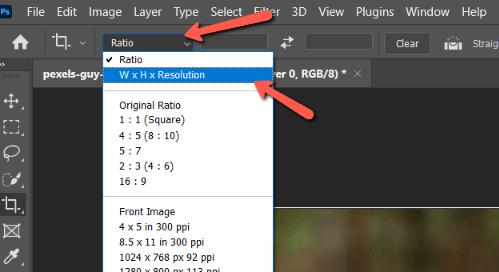
Choose W x H x Resolution from the available options and enter your values. The first box on the left is the width and the second box is the height. Choose the resolution (how many pixels per inch). Don’t forget to pick a unit of measure in the 4th box.
I put in 2,000 pixels wide by 3,000 tall with a resolution of 200 pixels per inch.
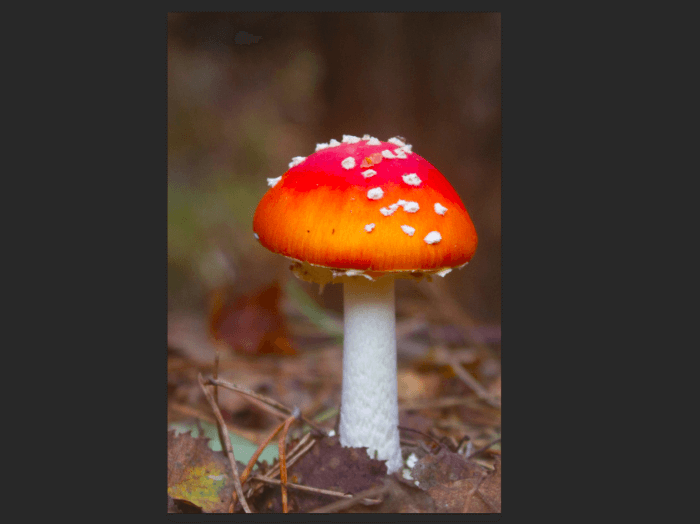
Step 3: Crop the Image
Now you can slide the handles around all you want. When you make the cut, you will be able to crop the image to a specific/exact size.
When you’re happy with the positioning, press Enter or Return or click the checkmark on the right side of the Options bar.
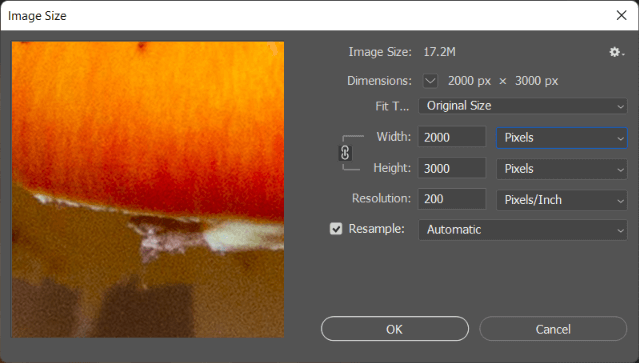
To see how it turned out go to Image in the menu bar and select Image Size. You can also press Alt + Ctrl + I (for Windows) or Option + Command + I (for macOS).

In the box that opens, we can see that the cropped image is the exact size I picked, 2000 x 3000 pixels and the resolution is 200 pixels per inch.
Pretty simple! Are you excited to learn more about cropping in Photoshop? Check out how to create a circle crop here!
About Cara Koch
Ben
Hi
Hope you can help. I have a 36X24 inch poster at 200 dpi. I want to do some test prints at 4X6 at 200dpi on some sections. Every time I try it puts the cropping tool over the entire image then I have to mess around trying to get the 4X6. I do not want any resizing. What I am missing. I have used Photoshop for years and this is one thing I never figured out. My current work around is to dump it into Affinity Pro which does this very easily.
Thank you.
June
Hi Ben,
How about creating a new file of 4×6 in and placing the same artwork in that file and scale to fit? Another option is to export it and then scale the image size to see the test print?