
Photoshop does amazing things! But does it only do them slowly to one image at a time?
Nope!
My name is Cara and though I love playing with images in Photoshop, I also hate wasting time. Batch editing speeds up the editing process considerably when you want to make the same edits to several similar photos.
Check out how to do it here!
Note: the screenshots below are taken from Photoshop CC for Windows, the Mac or other versions can look slightly different.
Table of Contents
Step 1: Choose the Photos You Want to Edit
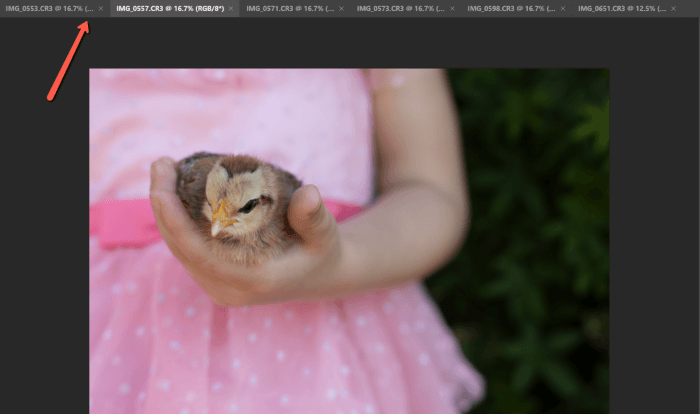
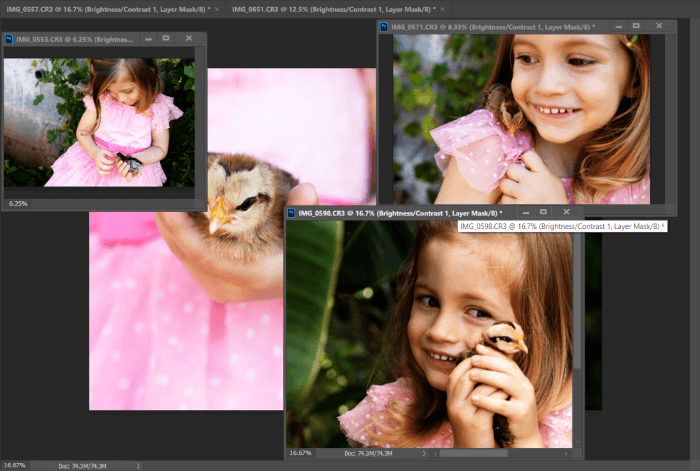
It’s a good idea to organize and choose your photos before you begin. You can either open all the photos in Photoshop or place them together in one folder on your computer.
For my example, I have opened various photos in Photoshop and you can see them across the top here.
Step 2: Record Your Action
To batch edit, we’re going to edit one of the photos and then apply all the same edits to the other photos. To do this, we need to create a Photoshop action out of the edits on the first photo. You can learn more about creating Photoshop actions in this post.
The basics for this tutorial is to make sure you start recording your new action before making any edits.
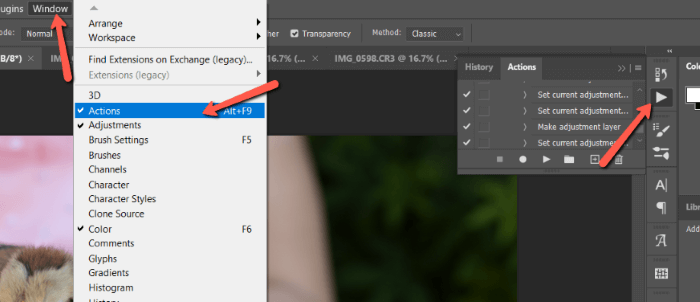
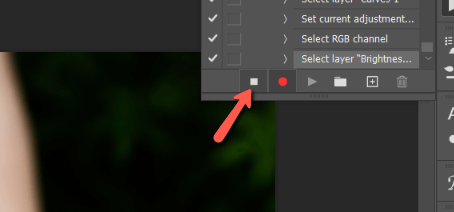
Open the Actions panel by clicking on the icon that looks like a “play” button. If you don’t see this icon in your workspace, go to Window and click Actions to make the checkmark appear and the panel open.
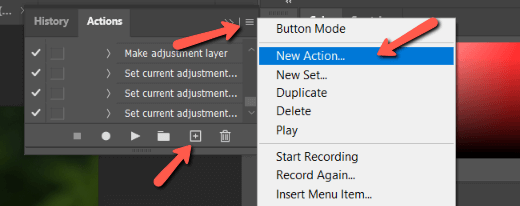
Create a new action by clicking the icon that looks like a square around a plus sign. Or click the three horizontal lines in the top right corner of the Actions panel and choose New Action from the menu.
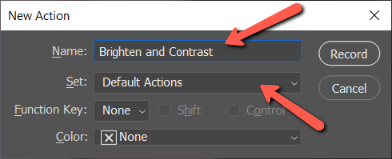
Either way, you’ll end up with the box below where you can name your action. You’ll be picking this action from a list later so it’s a good idea to give it a name that is related to the effect you’re creating. Or at least something that you’ll remember.
I’m going to call mine Brighten and Contrast because that’s what I plan to do to these images. In the next box, you can choose the folder where this action will rest. This is helpful for organizing groups of similar actions.
Press Record when you’re ready. You can verify that you’re recording with the red circle recording button at the bottom of the Actions panel.
Make the edits to your image. Remember, everything you record in the action will be added to the other images as well. Make sure you only make universal edits to be applied to all images while recording.
Once you’ve finished your edits, press the stop button directly to the left of the record button.
Step 3: Run the Action on a Batch
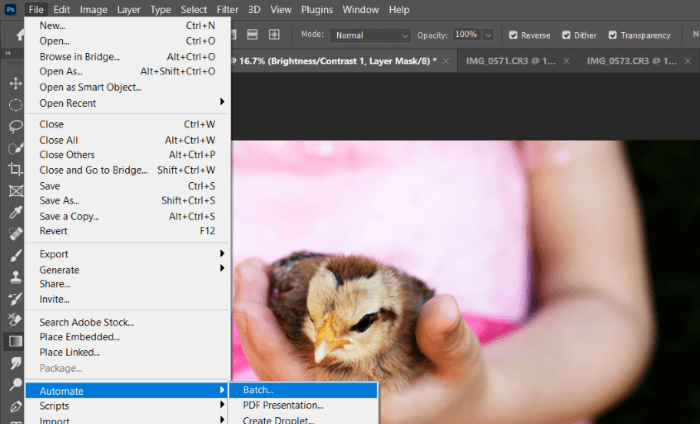
Open the Batch Processing feature by going to File, hovering over Automate, and choosing Batch.
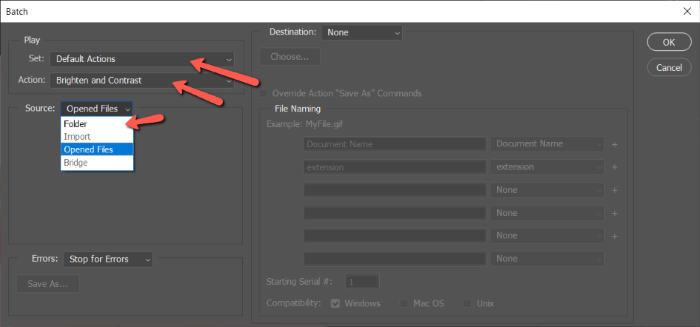
In the box that opens, choose the set where you saved your action. From the dropdown menu beneath, choose the action that you just created.
In the Source box, you have a few options. I’m choosing Opened Files because I opened all the images I wanted to edit in Photoshop. If you placed them in a folder together, choose Folder, then navigate to the correct folder on your computer.
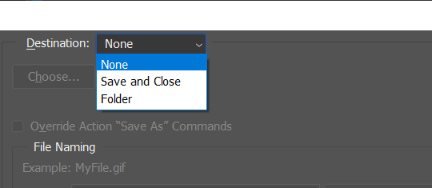
You can also choose a destination for your files. This can either be None, Save and Close or Folder. When you choose Folder, you can specify the folder.
Once everything is set, press OK and the action will run on the other images. Look at how much time you just saved! Afterward, you can open each individual file and make adjustments as necessary but the bulk of the process will have already happened.
This makes a huge difference when editing various images taken in similar lighting conditions or to which you want to apply the same effect, etc.
Anything you do in Photoshop can be recorded and applied to other images. It’s just one more amazing thing about Photoshop!
Excited to learn more amazing features in Photoshop? Check out our tutorial on how to make a collage with your rapidly edited photos!
About Cara Koch
Benzo
Thank you so much, that is very helpful information. May the universes bless you
Dorice
Thanks Cara! Helpful information!
wayne osmond
Thank you for the info’ it will save me hours of work, I’ve batch edited in LRC but didn’t know it was possible in PS, You’ve gone to the top of my Christmas card list 🙂
June
You’re welcome, Wayne!