Looking for a stone/rock background? Why not make your own texture in Photoshop? If you have an image, great. It’ll only take you a minute. If not, you can create a rock texture using a couple of filters. Doesn’t sound that bad either.
You’re going to turn clouds into rock patterns. Yeah, I was doubting when I first tried this method years ago, but it all makes sense. You’ll see.
In this tutorial, I’ll show you two easy ways to add a stone/rock texture in Photoshop.
Table of Contents
2 Ways to Add a Stone/Rock Texture in Photoshop
The easiest way to add a rock texture to Photoshop is obviously making an image pattern, but it’s always a good idea to make your own unique texture from scratch.
Note: the screenshots are taken from Adobe Photoshop CC Mac version. Window and other versions can look different.
Method 1: Define Pattern
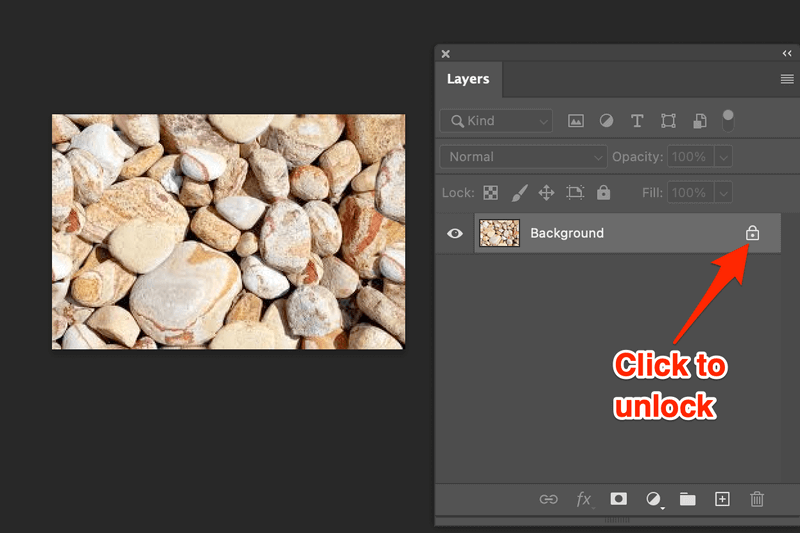
Step 1: Open a stone image in Photoshop. You can download an image from some stock image sites but make sure you check the license if you want to use it for commercial purposes.
Step 2: Unlock the background image and make it a layer.
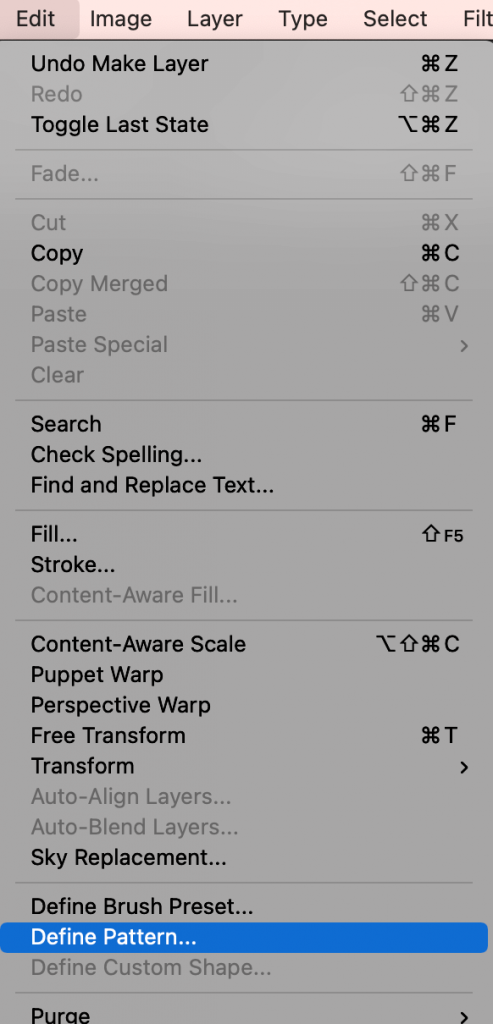
Step 3: Go to the top menu and select Edit > Define Pattern.
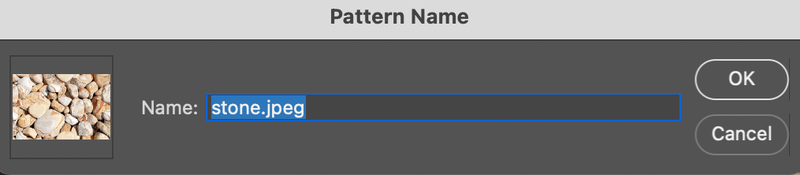
Name the pattern and click OK.
Method 2: Make Stone Texture from scratch
Step 1: Create a new document. I recommend setting it to 1200 x 1200 pixels.
Step 2: Create a new layer.
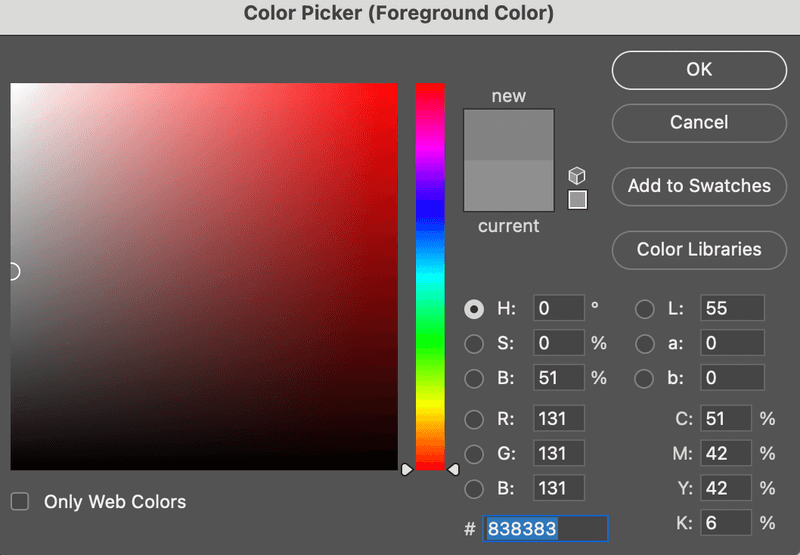
Step 3: Select a grey foreground color, and leave the background color white.
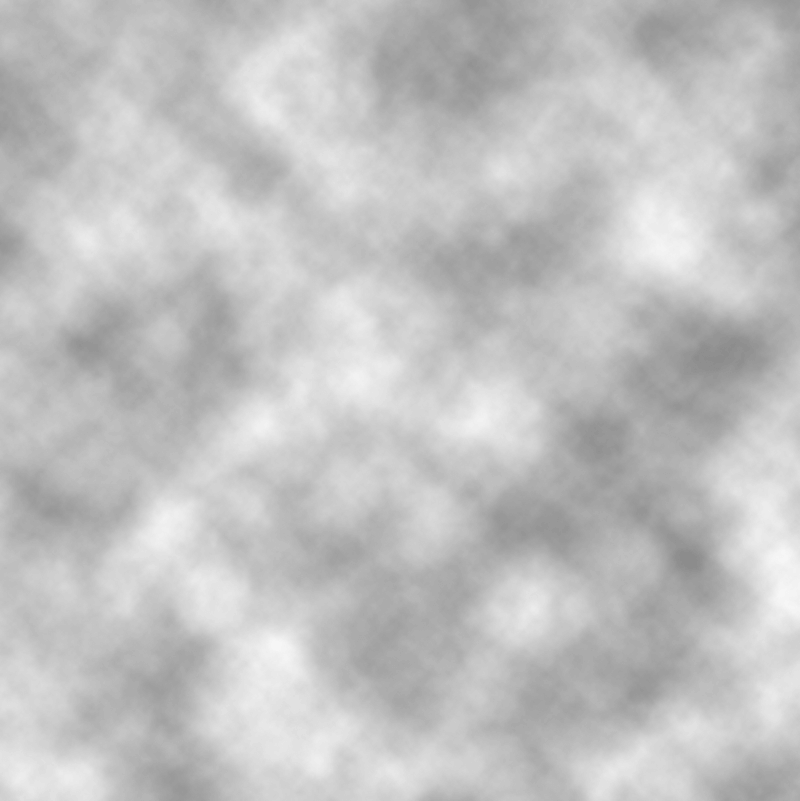
Step 4: With the layer selected, go to the top menu Filter > Render > Cloud. Layer 1 should look like this.
Step 5: Open the Channels panel (usually, it’s right next to the Layers panel) and create a new channel. It’ll automatically be named Alpha 1.
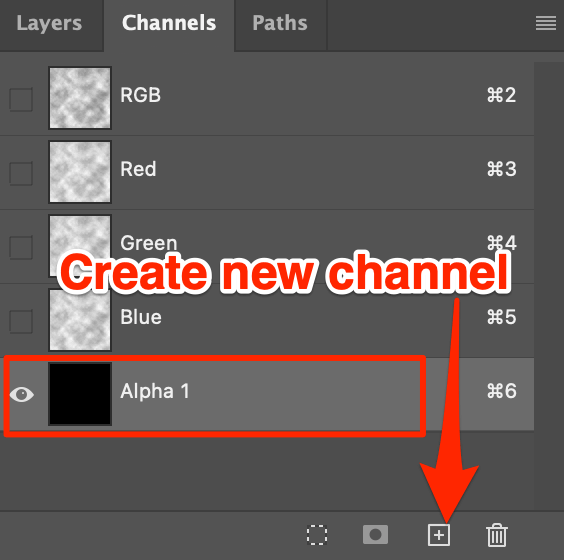
Tip: If you can’t find it, you can quickly open it from the top menu Window > Channels.
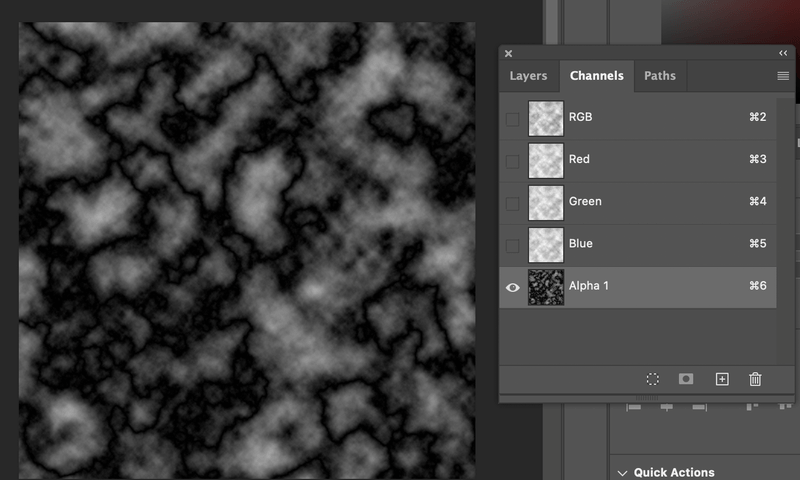
Step 6: Go to the top menu Filter > Render > Difference Clouds. Repeat this step twice.
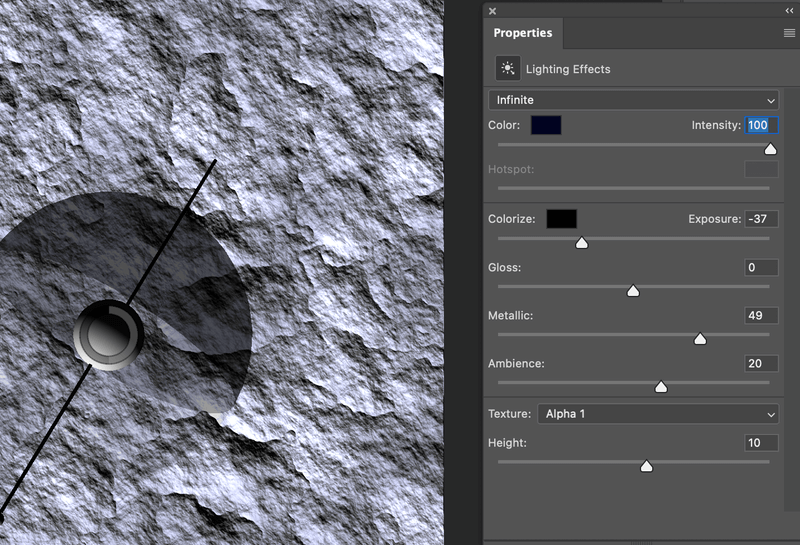
Step 7: Go back to the Layers panel and select layer 1 and go to the top menu Filter > Render > Lighting Effects. Change the presets to Parallel Directional.

As you can see the color is blue and white. If you look at the right-hand side of the window, you can change the color to black and set the Intensity to 100.
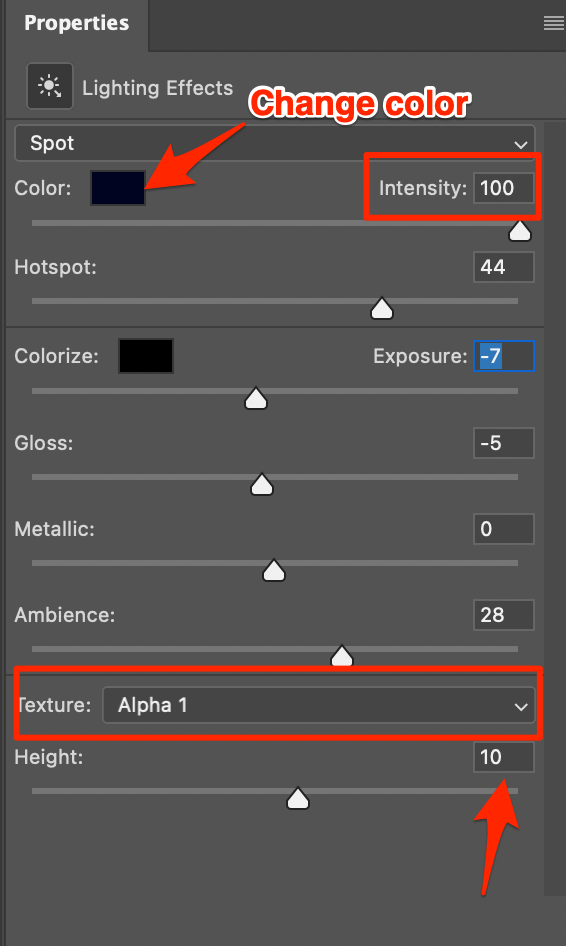
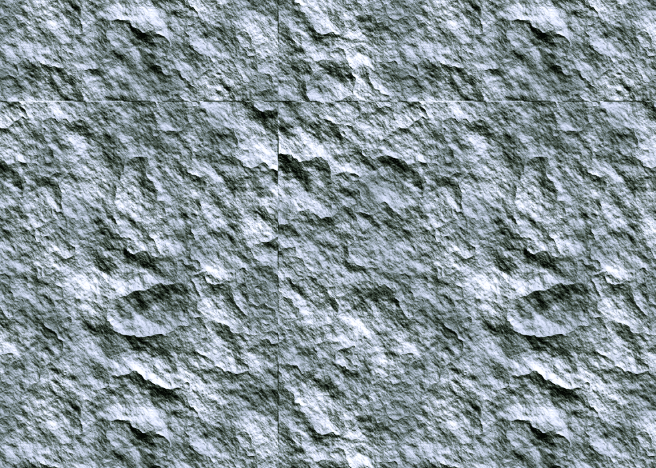
Change the texture to Alpha 1, and increase the Height to about 10 you should see a rock texture. Once you are happy with the texture, click OK on the top toolbar.
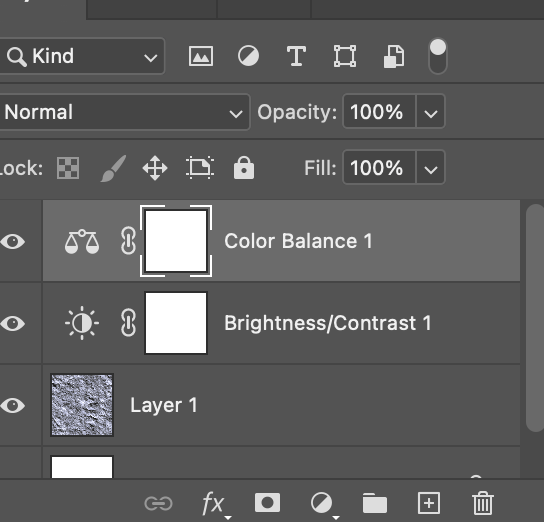
You can add adjustment layers to adjust the image.
That’s All
If you have an awesome stone image that you want to make a pattern, method 1 is your quick solution. If not, creating your own is not difficult, and you can use method 1 to make it a seamless pattern. If you want to see how it works, open a new document, and select Edit > Fill.
Brijesh
Cool…
Tavi-Ann
how did you create this, im trying to do the same with pebbles