Light makes or breaks a photograph. There’s no way around it. The word “photography” itself literally comes from the Greek words for “light” and “draw.” In other words, drawing with light. So if you really want to create amazing images, you have to become a master at manipulating light.
Hey there, I’m Cara! One of the many cool things about digital photography is that we have more flexibility and freedom than our photographic forefathers did when developing their images in a darkroom.
They had to physically block parts of the image to change the way the light fell as they were developing the image. Yet we can add and remove light in seconds and easily undo our changes if we don’t like them.
One such powerful tool (often underused in Photoshop) is the Dodge tool and its companion Burn tool. So let’s take a closer look.
Note: I use the Windows version of Photoshop. If you are using a Mac, the workspace will look slightly different from the screenshots displayed here.
Table of Contents
What is the Dodge Tool in Photoshop
The Dodge tool is named after the darkroom technique of the same name. It involved blocking light with objects of varying opacity so that portions of the image would receive less light than others and thus be lighter in the final image. (Remember it’s a negative-to-positive process).
The Dodge tool’s companion tool, the Burn tool, is equivalent to the opposite darkroom technique. Burning the image involved using objects to block the light from most of the image while allowing extra light to fall on specific parts, resulting in a darker area of the image.
Why is this important?
Even lighting is great for taking gorgeous pictures (especially portraits). But it is easy for the image to look flat. Without the depth and contrast of well-placed shadows or highlights to draw your eye to a specific part of the image, the image seems bland.
But, if you expertly apply a touch of light here or deepen the shadows there, suddenly the image comes alive. There is depth to the image and the highlights help draw the eye to where it is supposed to rest.
In short, when used well your images can sing!
This is especially true with black-and-white images. With the lack of color, it’s so easy for black-and-white images to be dull and flat. But a little bit of dodge and burn will make the image come alive.
Of course, these tools can be used with color photographs as well. We’ll look at a couple of examples in a moment to see how it works.
How to Use the Dodge Tool in Photoshop
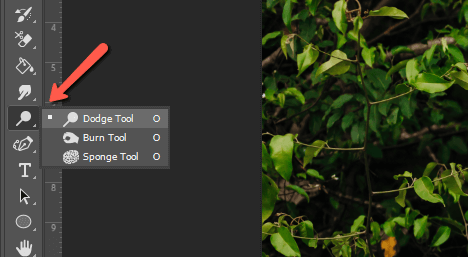
First off, let’s find the Dodge tool. The icon over on the toolbar to the left kind of looks like a lollipop. Or you can press O on the keyboard to activate the tool quickly.
Now let’s look at the Options bar. It’s important to understand the settings for the tool so that you can use it properly.
First up, we have the brush’s shape and size. Click the little down arrow next to the brush preview to open the brush settings. You can use any of your brush tips, though a soft round brush will most often give you the subtle results you’re looking for.
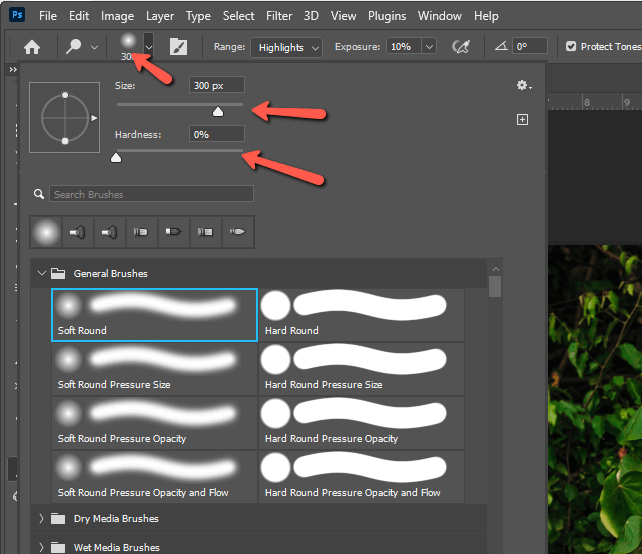
You can choose the size here, but remember you can also change the brush size on the fly with the bracket [ ] keys on the keyboard.
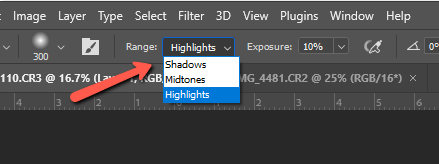
Next, we have the Range. This dropdown menu allows you to choose whether you want to affect the highlights, mid-tones, or shadows of your image.
The Exposure box allows you to control how much light is added as you work. This option runs from 1-100%. Check the Protect Tones box to protect the colors in the image. We only want to change the light, not the color hues (which, of course, are affected by light).
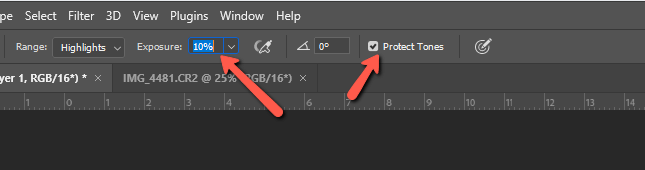
Once you’ve chosen your settings, you’re ready to start painting light on the image.
Examples Using the Dodge Tool
The Dodge tool is a destructive tool, meaning you can’t come back and easily make changes later. So always start by making a copy of the image by pressing Ctrl + J or Command + J on the keyboard. That way you can always delete the layer and start over if you mess up.
To give you an example, here’s my original image. I took this image as part of a senior portrait session for a lovely young woman on the beach here in Costa Rica.

Look at the difference after I brighten some of the highlights with the Dodge tool. I also darkened some of the shadows with the Burn tool so you can get the whole effect.

Look at how she pops so much more as the subject of the image and there is a little more depth to the leaves around her! And I didn’t apply much. Use a light hand with this tool or it will look overdone quite easily.
Now let’s look at a black-and-white image because this is where the tool can really shine!
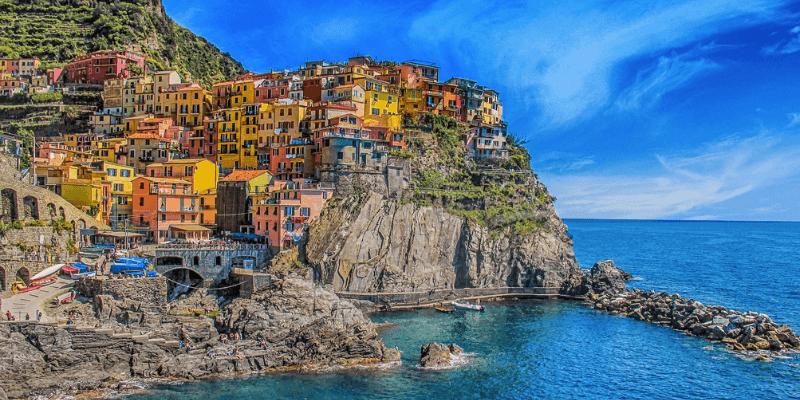
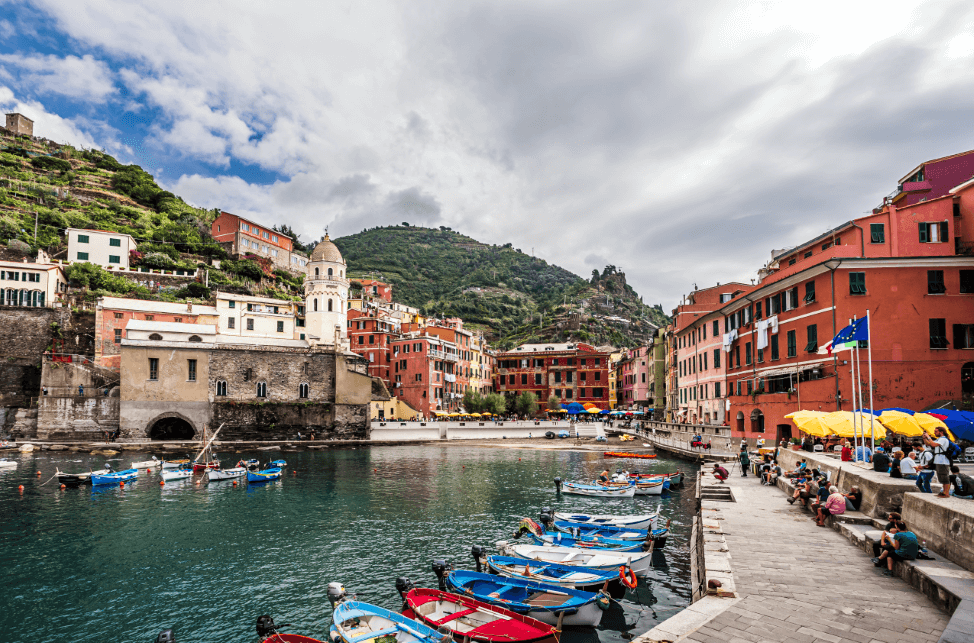
I have this colorful image I took while visiting Vernazza, Italy a few years ago.
When I turn the image black-and-white, it honestly becomes quite lackluster and bland. There’s still some natural depth and the leading line of the dock helps draw the viewer into the image, but the eye is confused about where to rest. There isn’t anything in particular that stands out.
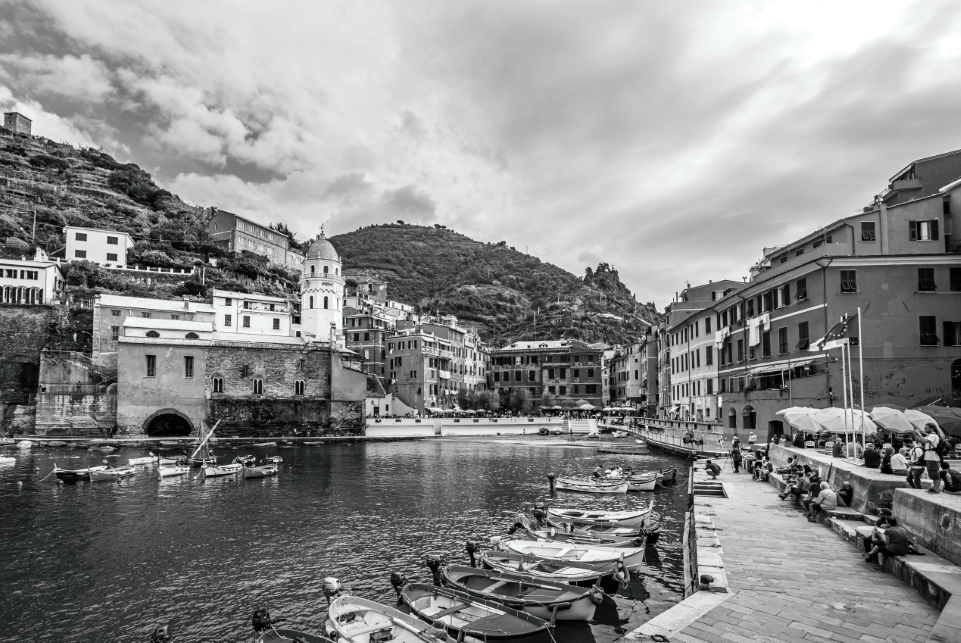
So let’s fix that with a little dodge and burn.
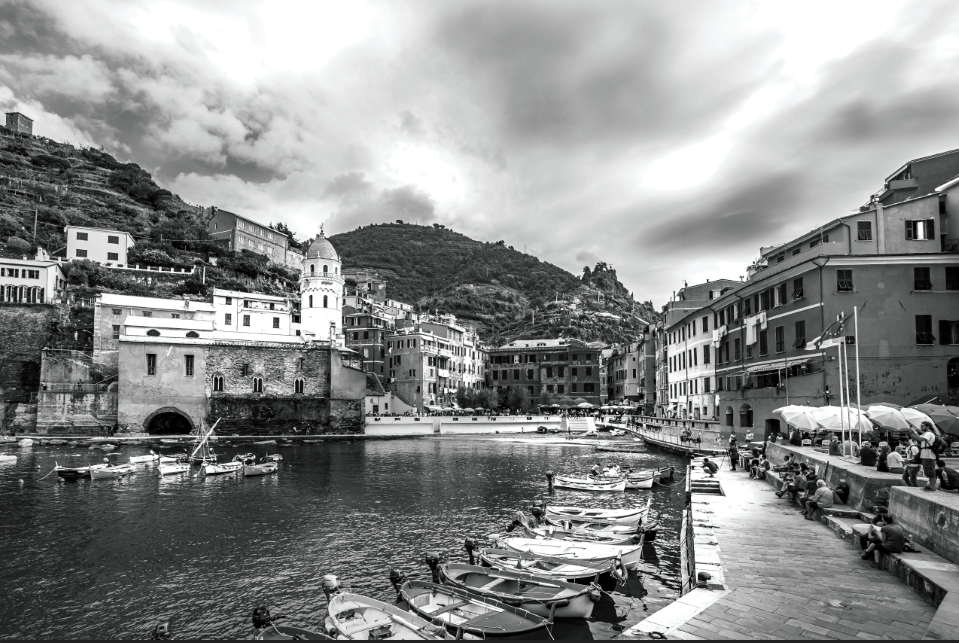
Just look at the difference it makes! The photo is so much more alive. It’s amazing how far a little light and shadow can go in making your image really pop.
So have fun with the Dodge tool and its companion Burn tool! You may have just discovered what you’ve been looking for to give your images that little extra sweet sauce.
You’re welcome. Curious about some of the other lesser-known tools in Photoshop? Check out how to use the Levels feature here!
About Cara Koch