How do some designers draw so well on digital that some illustrations just look perfect? Well, the truth is, many of them are drawn on paper and reworked on design programs!
I always had the struggle drawing on digital but luckily I learned the trick soon enough to save myself tons of time and energy. So what’s the trick?
In this article, you will learn how to convert your awesome hand drawing to a vector in Photoshop and how to save it for future use.
Good news Adobe Illustrator fans! Any vector shapes created in Photoshop can be copied and pasted into Illustrator, so you can use this process too!
Extra Bonus! If you like the icons in this tutorial, you can download these free hand-drawn icons I created and use them in your design!
Table of Contents
How to Turn a Drawing into a Vector: Step-by-Step Guide
Now back to the topic, you can vectorize your hand-drawn style icons in less than five minutes by following the steps below.
Note: Screenshots are taken from the Adobe Photoshop CC Mac version. Windows or other versions might look slightly different.
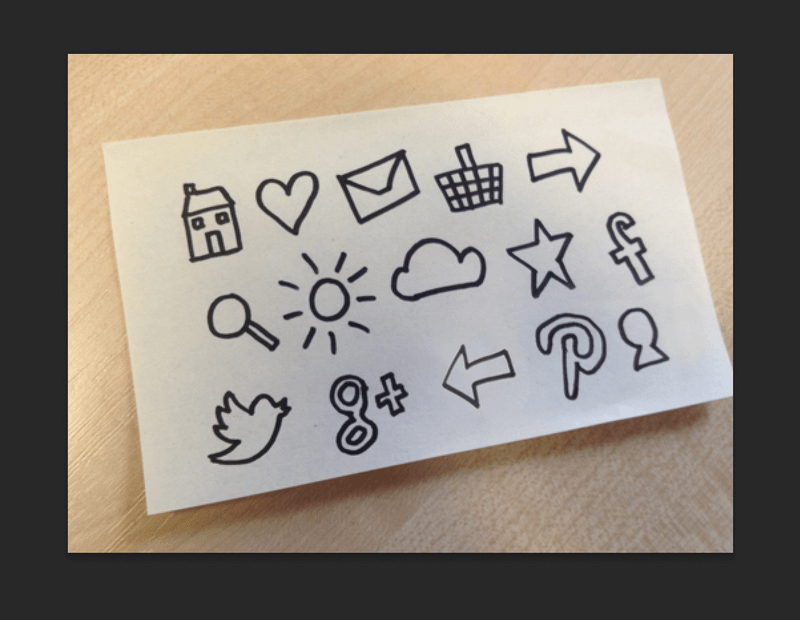
Step 1: Draw your shapes out on paper. The larger the better. If you are drawing multiple shapes, it’s a good idea to leave some white space in between because you still have work to do in Photoshop.

Tips: Dark lines on light paper will be the best – black on white is perfect!
Step 2: Scan your lovely hand drawing on your computer. If you don’t have a scanner, taking a good picture of it is fine as well. Open the image in Photoshop.
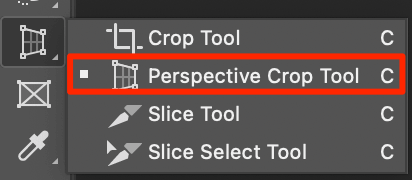
Step 3: Select the Perspective Crop Tool from the toolbar, usually, it’s in the submenu of the Crop Tool.
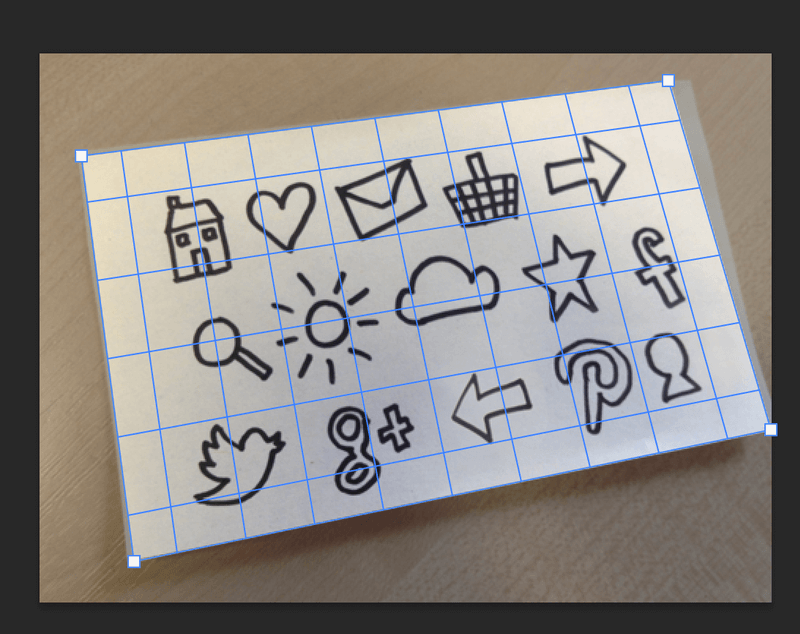
Click within the white area on the corners to crop out the area you need. For example, here I’m cropping out the area within the white paper.
Your image will straighten up automatically.
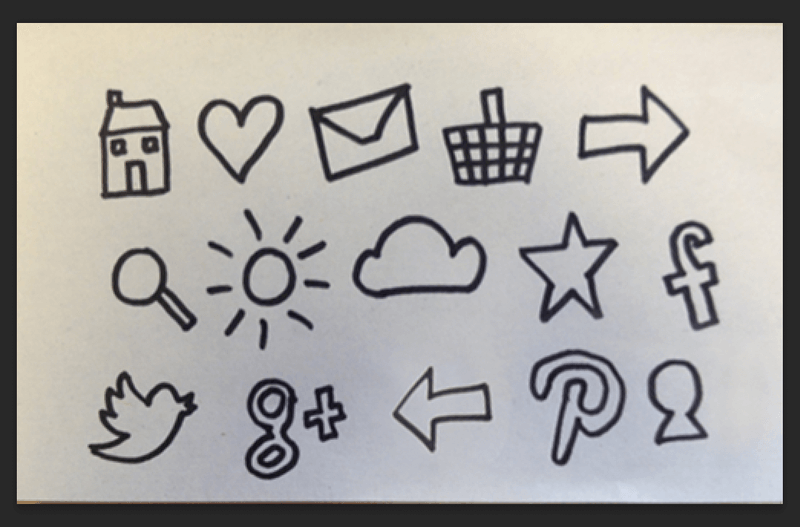
As you can see the lighting of the image is not that great. So the next is to adjust the brightness and contrasts.
Step 4: Go to the overhead menu Image > Adjustments > Brightness/Contrast. You can turn up both the brightness and contrast which helps to reduce the yellow or uneven lighting of the background and made the icons stronger.
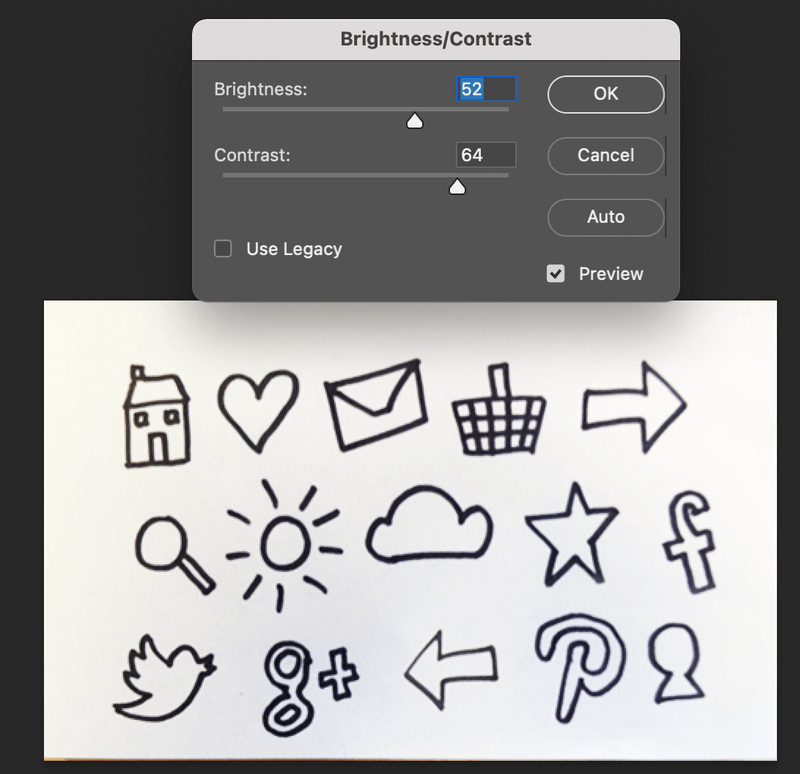
Sometimes only adjusting the brightness and contrast is not enough. If this is your case, use Levels to brighten the whites and darken the blacks. Go to Image > Adjustments > Levels.
In the Levels adjustment window, you can select the eyedropper tool on the right and click on the white area on your canvas to set a white point, and move the slider to adjust the lighting of the drawing.
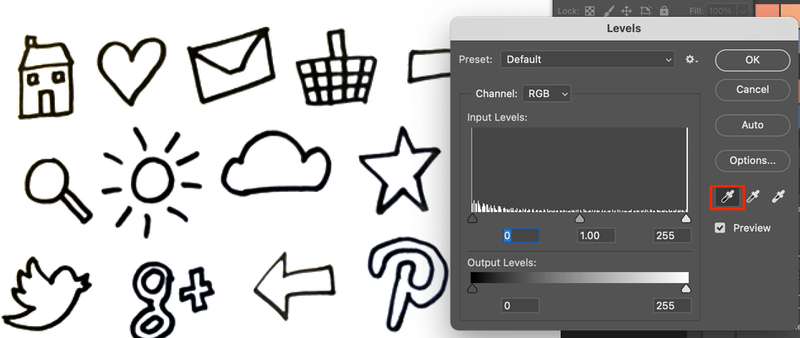
If your background is still not white enough, you can select the eyedropper tool on the left side and click on the dark point to select a sample color, move the slider to adjust the levels.
The goal is to make the background as white as possible, and your icons’ strokes visible.
After adjusting the lighting, you might see some strokes are pretty weak, and others are a bit rough.
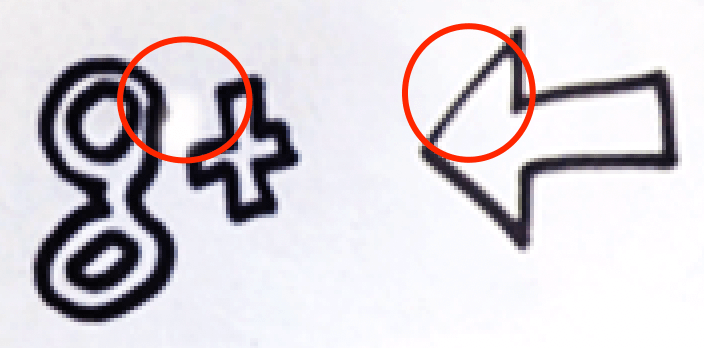
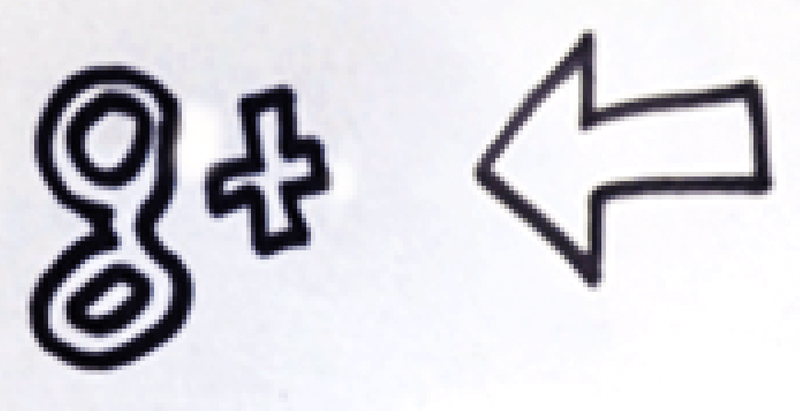
You can actually use the brush and eraser tool to fix that. Simply choose the tools and directly draw on the existing icons.
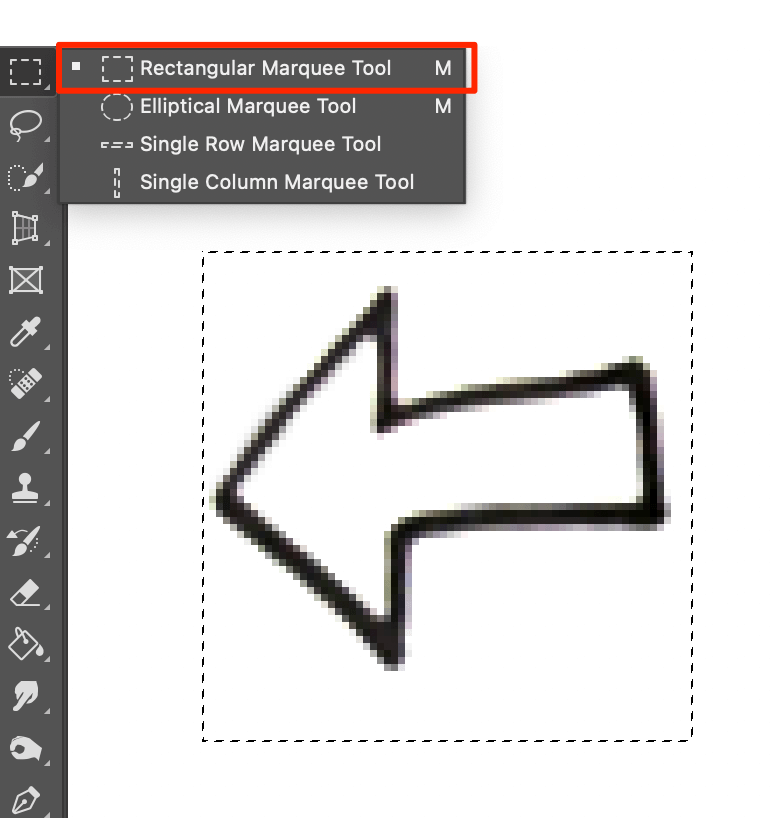
Step 5: Select icons individually and use the Rectangular Marquee Tool to draw around an icon. For example, I’m going to select this arrow.
Step 6: Copy the icon using the keyboard shortcuts Command + C, and open a new document by hitting Command + N. Since you just copied something within Photoshop, the new window will be created at the size of the object you copied.
When the new New document is created, hit Command + V to paste the icon you just copied.

Step 7: Select the Magic Wand Tool to click on part of the icon.

Set the Tolerance to 100. The tolerance settings can be found in the options bar at the top of the screen (You can toggle this on and off in the Windows menu).

Step 8: Open the Paths panel. Go to Window > Paths and click on the drop-down icon and choose Make Work Path.
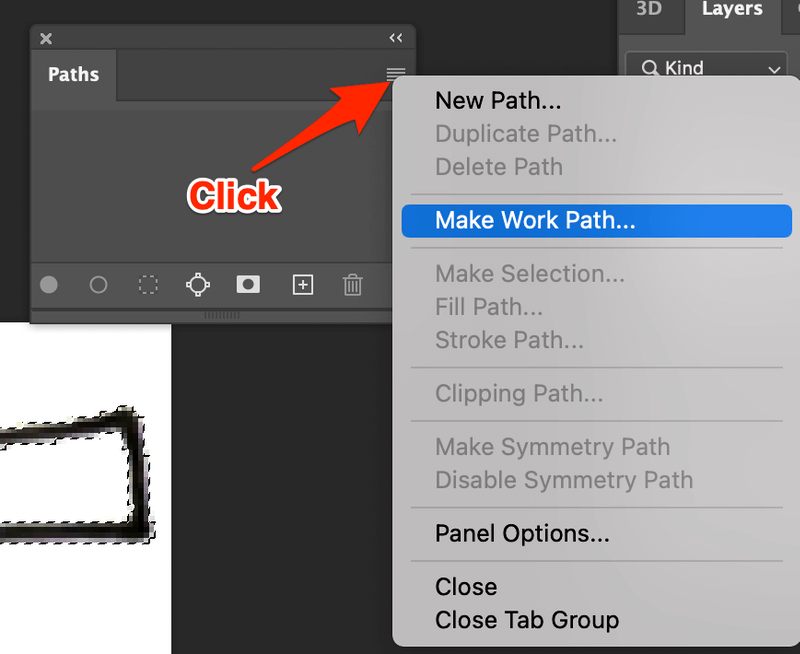
Set the tolerance to 0.5 pixels. 0.5 is the smallest value you can enter here, by using this setting the path will stick closely to the original lines of your icon.
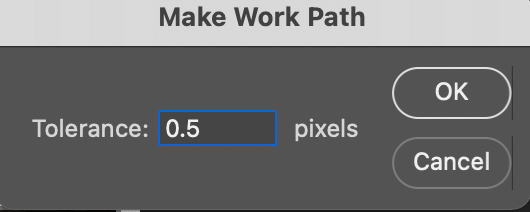
Tips: The larger the number the fewer path points will be used and so you will end up with a smoother icon with softer lines and therefore lose some of the hand-drawn feels.
Step 9: You can now turn the path into a custom shape by using the main menu: Edit > Define Custom Shape. Give your new shape a name and that’s it!

FAQs
Where to find custom shapes in Photoshop?
You can find the vector you created or the existing custom shape when you select Custom Shape Tool at the toolbar, usually in the submenu of the Rectangular Tool.
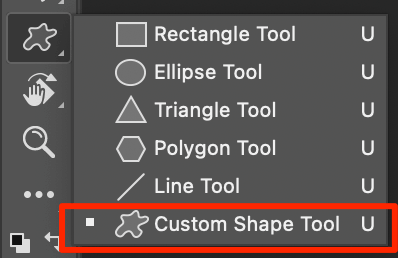
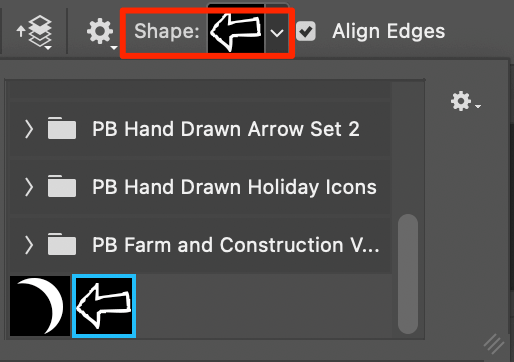
When you have the Custom Shape Tool selected, you can find the shapes at the top toolbar and apply them to your design.
How to change the color of custom shapes in Photoshop?
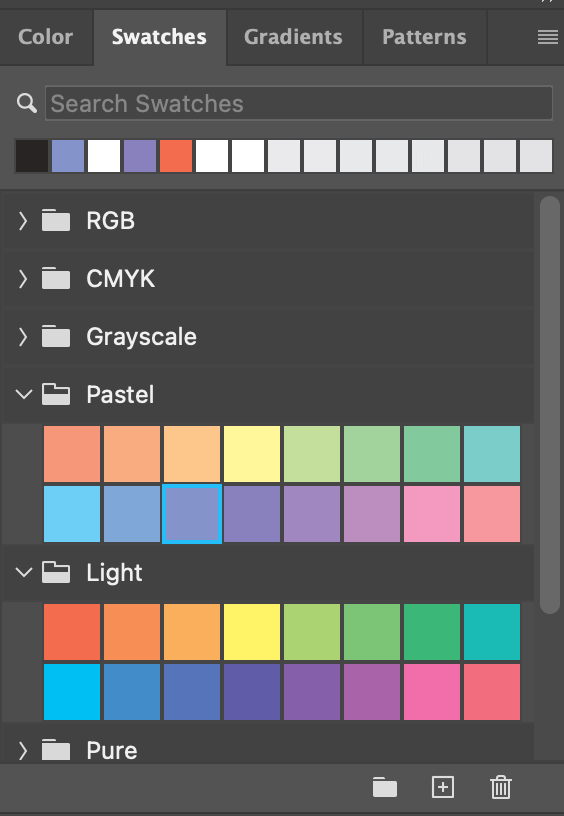
It works the same as changing the color of any other shape. Simply select the shape and choose a color from the Swatches panel, or you can add Color Overlay to your layer.
Can I fill line shapes in Photoshop?
You can fill line shapes, but you’ll have to use the Pen tool to trace the line first. When you close the pen tool path, you can fill the shape with color.
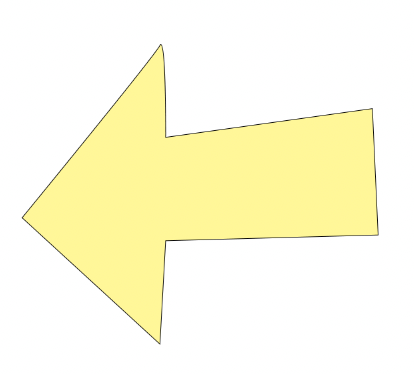
When you trace the image with a pen tool, it’s most likely to lose the hand-drawn feeling.
Conclusion
It’s super easy to convert hand-drawn shapes to vector custom shapes in Photoshop. Keep in mind that is important to take a good photo of the hand drawing if you don’t have a scanner because lighting can be a big factor in your vector result.
About June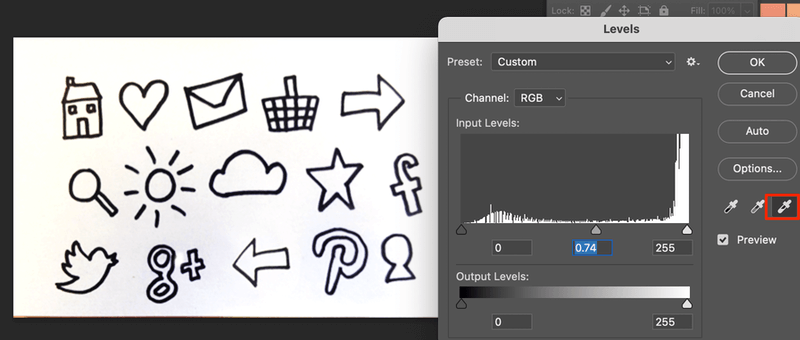
A Davey
Thanks for a very clear tutorial 🙂
June
You are welcome 🙂
p
What you made were shapes not vectors. Vectors store vector based information and mostly come in the SVG format.
megan
Thanks so much this is perfect.
Lara Queiroz
Muito obrigada pelo Tutorial… muito prático, andava buscando a muito tempo !!! Um abraço,
Milanche
Awesome, thanks June. Nice name 😉
Hamza
thank you very much “buzz” really i liked your site
Every thing i need from photoshop i can find here ……
thank very and very muchh
iva
thank you so much!!!!