
I wish her sweater was just a touch more vibrant. Wouldn’t it be nice if the color of those flowers were stronger? I wish Photoshop had an easy way to selectively add saturation to my images!
Hello! I’m Cara, and today I’m here to grant your Photoshop wish. Well, I guess I’m not really granting it, but showing you how Photoshop has already granted it. But I digress.
The point is, there is a nifty little brush tool for selectively saturating and desaturating parts of your image and today we’re going to check it out. So let’s look at how to use the Sponge tool in Photoshop!
Note: I use the Windows version of Photoshop. If you are using a Mac, the workspace will look slightly different from the screenshots displayed here.
Table of Contents
Where is the Sponge Tool in Photoshop
The Sponge tool is in the same tool family as the Dodge and Burn tools. If you’ve read my tutorial on the Dodge and Burn tools, you know you can use these tools to add light and shadow to your images.
The third tool in this set is the Sponge tool. Right-click on the Dodge or Burn tool to open the menu and choose the Sponge tool.
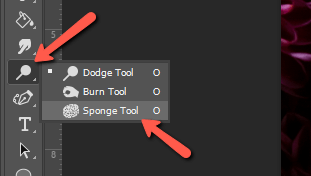
Once the Sponge tool is on top, you can simply press O on the keyboard to activate the tool.
Sponge Tool Settings
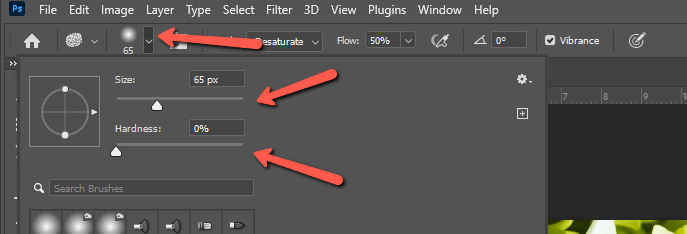
Before we start painting an image, let’s look at the options we have in the Options bar.
First, as with any brush tool, you’ll notice that you can click the arrow next to the brush tip preview to adjust your brush settings. Though you can use any brush tip, you’ll typically want a soft round brush. Remember you can change the size on the fly with the bracket [ ] keys.
Next, you have the option to either Saturate or Desaturate. You can switch between these options on the fly with the shortcut Shift + +. Next, choose the strength of the technique by adjusting the Flow percentage.
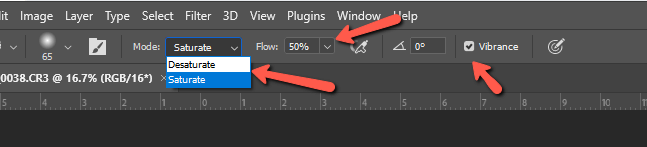
Finally, checking the Vibrance box helps to minimize clipping on colors that are fully saturated or desaturated.
How to Use the Sponge Tool
Once you’ve chosen your settings, it’s simply a matter of painting your image.
The Sponge tool is destructive, which means you can’t come back later and adjust your changes. I always recommend duplicating your image before making destructive changes. That way, you can start over if needed (as well as toggle back and forth to see the changes).
So press Ctrl + J or Command + J to make a copy of your image before you start painting.
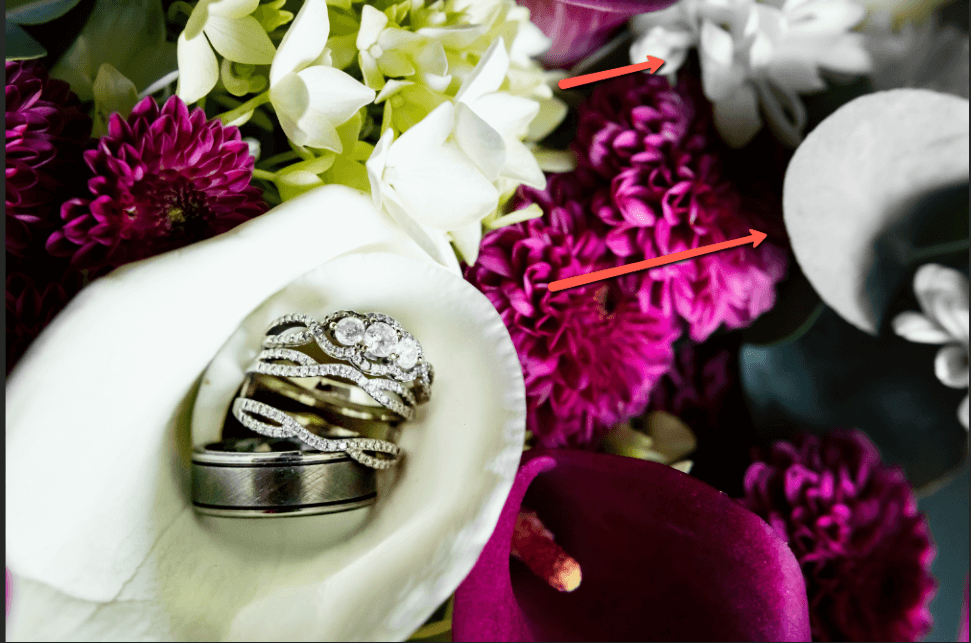
Now, let’s see this tool in action. Here’s my original image, which I took at a wedding this past weekend.
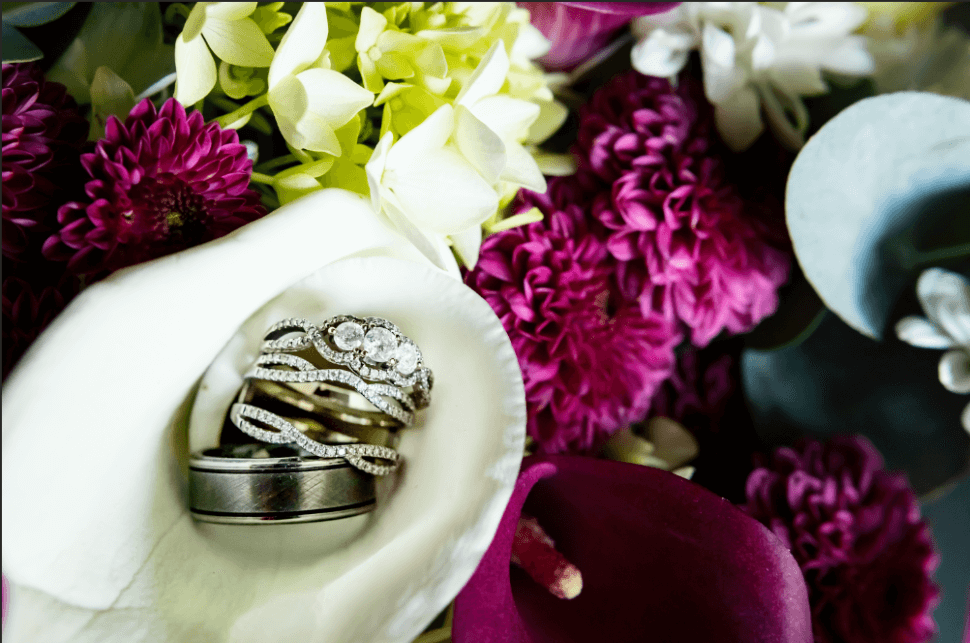
Here, I boosted the Saturation by 50% on only the purple flowers.

It’s a touch too much, but I wanted you to be able to see the difference. To make it more natural, I would choose a lower percentage in this case.
In this next example, I used the desaturate brush in the upper right corner. In this case, I turned this part of the image to black and white, but you can also use this tool to remove an unwanted color cast or something similar.
So you can see how this tool would be helpful for creative effects. Have fun with it and discover different ways to make your images stand out from the crowd.
Curious to learn more about other tools in Photoshop? Check out how to use the mixer brush here!
About Cara Koch