
Photoshop makes it simple to round corners to your shapes and pictures with only a few clicks. Since you only need to click and drag your mouse to round the corners of a shape or image, the process has become very simple.
I have over five years of Adobe Photoshop experience and am Adobe Photoshop certified. In this article, I’ll teach you how to round the edges of an object or image in Photoshop.
Table of Contents
Key Takeaways
- Rounding edges takes seconds and is very simple for Photoshop beginners.
- By rounding your edges you can create a new perspective on your image or shape.
- Make sure you are saving your work every so often to ensure you don’t lose your work.
How to Round Edges in Photoshop
With any task you need to do in Photoshop, there are usually multiple different ways to achieve that, so I am going to show you two ways to round your edges.
Method 1: Using shape anchor points
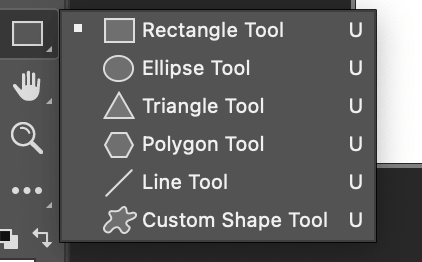
Step 1: Pick a shape from the toolbar to start. I selected the rectangle as my example. In the toolbar, the default shape is a rectangle. Click and hold the rectangle symbol to select another shape. Then, choose the required form using the flyout menu that appears.
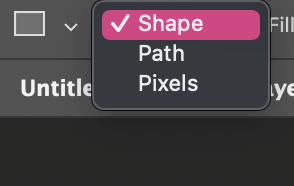
Step 2: At the top of your screen you will see the options bar, click it and set the option to Shape.
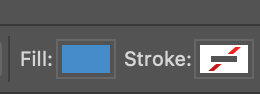
Step 3: If you would like your shape to have a fill (fill a selected object, area, or layer with color.) or stroke ( paint a colored border around a selection or layer in Elements.) Go ahead and choose your colors.
Step 4: Click and drag to build your shape on the canvas after adjusting its settings.

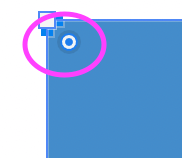
Step 5: Hold Shift while creating the shape on the canvas if you want to keep the proportions consistent, like when making a circle or square. You’ll see little blue dots on each corner of your finished shape after you’re done generating it.
Step 6: Click and drag any of the shape’s blue dots toward the inside to give it rounded corners. This will simultaneously round each corner of the shape. The corners of the shape will become more rounded as you draw the blue dots further inside.
Additionally, each individual corner’s roundness can be altered separately. Select the corner you wish to round in order to do it. Then, while holding Alt (Win) or Option, click on one of its blue dots and drag it toward you (Mac).
When you are satisfied with the outcome, confirm the action by pressing Enter/Return on your keyboard, which will deselect the shape. Easy enough right?
Method 2: Changing the properties of your shape
Another method of rounding a shape’s corners is to do so using the properties panel. Create a shape first, as was demonstrated earlier in this article.
Step 1: Find the corner radius icons in the properties panel. If you can’t see the properties panel, go to Window > Properties.
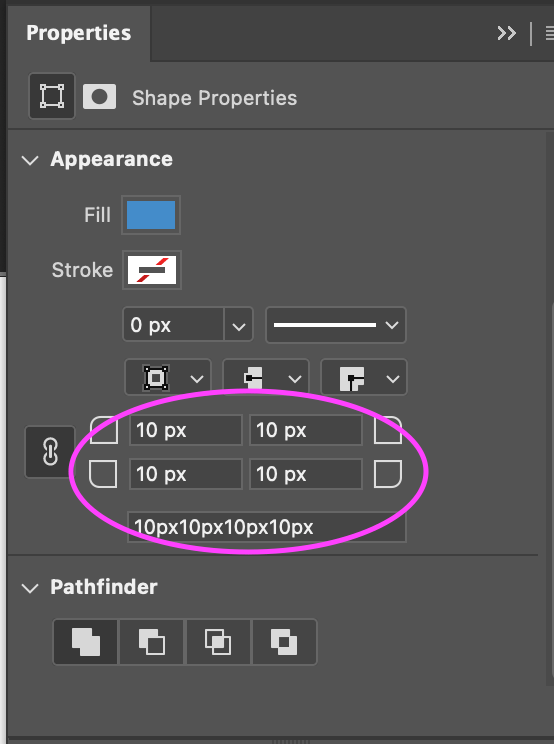
Step 2: Hover over one of the corner radius icons until your cursor changes to a hand icon to change the corner radius values in the properties panel. Just like the image above.
Step 3: Next, drag the corner radius to the right to make it larger or to the left to make it smaller with your mouse. Or, enter any value in a corner radius box.
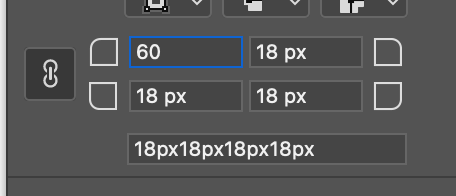
Photoshop automatically adjusts the values of all the corners when you alter one of them. This is a result of the properties panel’s links between each corner of the shape. This is indicated by the chain icon next to them.
You can change a particular corner without impacting the others by clicking the chain icon to unchain the shape’s other corners.
You can use the methods learned here to round the corners of any shape you create in Photoshop.
How to Round Edges of a Photo in Photoshop
Step 1: Bring the required image into Photoshop first before attempting to round an image’s corner. Go to File > Open or press Ctrl + O (Windows) or Command + O to accomplish this (Mac).
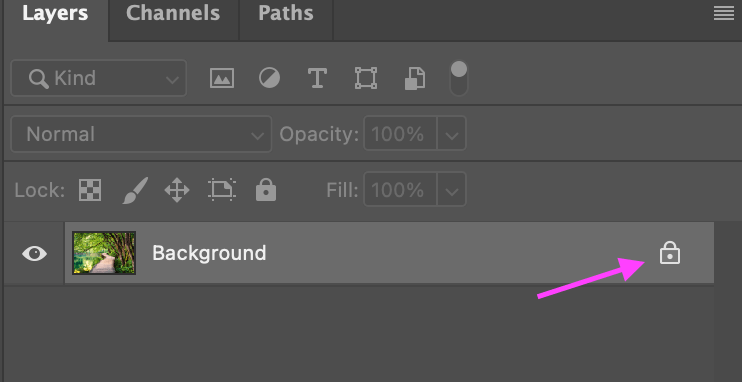
Step 2: The image can then be unlocked by going to the Layers panel and double-clicking it while holding Alt (Windows) or Option (Mac).
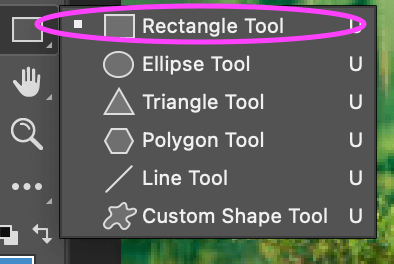
Step 3: Next, choose the Rectangle Tool from the toolbar (keyboard shortcut U).
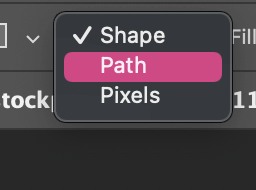
Step 4: Now, change the drawing mode to Path in the Options bar.
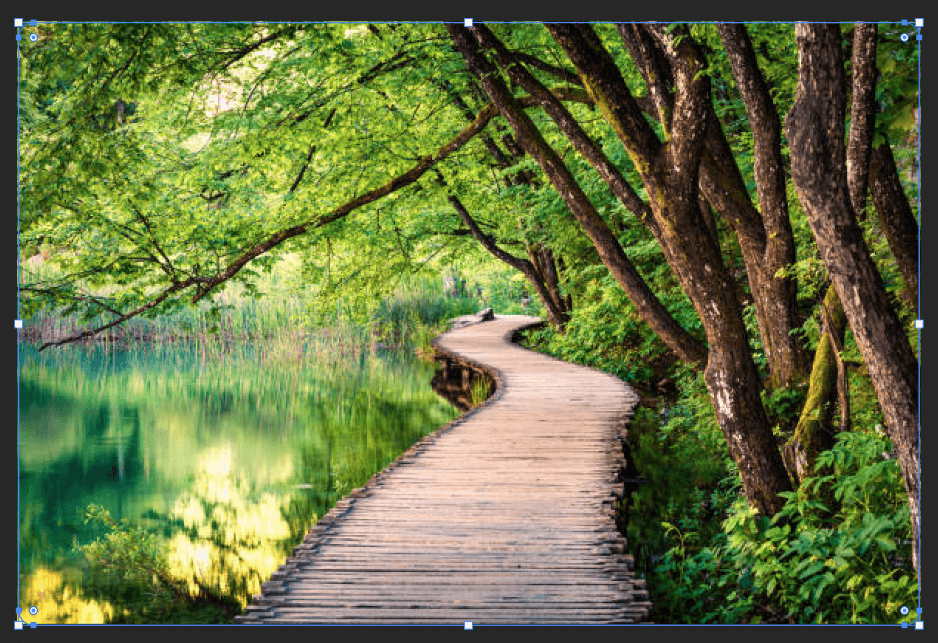
Step 5: Next, draw a rectangular path across the image by clicking and dragging. Draw the path as closely as possible to the boundaries of the image, but not too closely, as this will leave insufficient room for your image’s corners to be rounded.
Step 6: If you want to curve all of the borders at once after drawing the path, click and drag one of the blue dots inward.
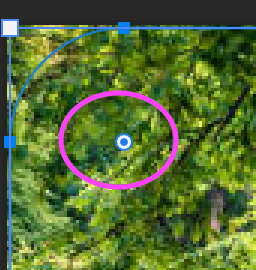
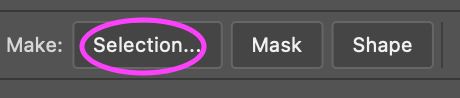
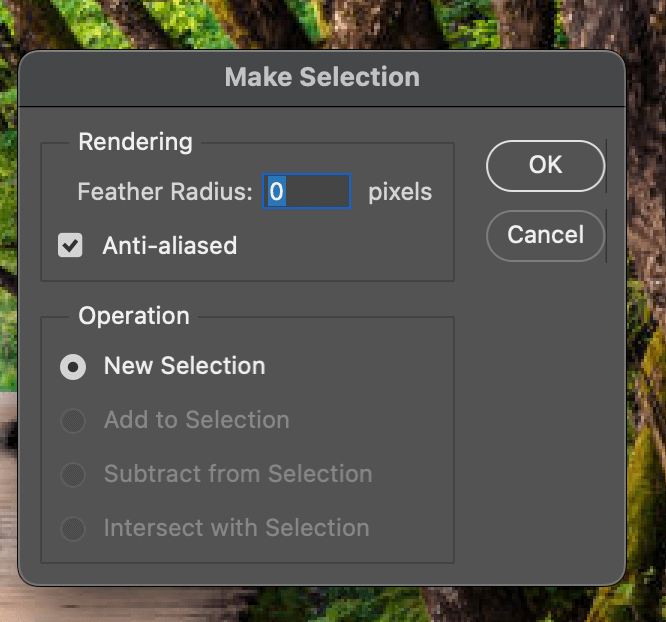
The image boundaries will become more rounded the further down you pull the blue dot. When you’re satisfied with the outcome, click Make Selection in the Options column.
Step 7: Lastly, pick a feather radius value. The feather radius feature in Photoshop softens the edges of brushes, pictures, objects, and other items. The edges of your image will be softened by a high feather radius and sharpened by a low feather radius.
Since crisp edges perform better than fuzzy edges in photographs with rounded corners, I advise setting the feather radius to zero for the best results. To confirm your selection, click OK.
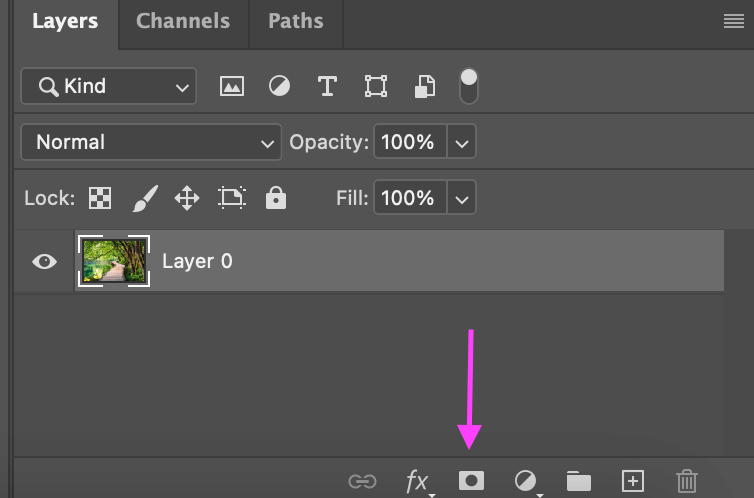
Now click the layer mask button in the Layers menu and it will crop your image with the rounded corners and you’re finished!
Pro Tips
- Remember always to save your work, you don’t want to start over from scratch.
- Make sure your image is unlocked if it’s not you will have to repeat the above steps.
Final Thoughts
Creating rounded edges on images or shapes is very simple and easy for anyone to learn. Photoshop makes it even easier since there are multiple different ways to get a result. Play around with the different ways and see which method works best for you.
Any questions about rounding edges in Photoshop? Leave a comment and let me know.
About Aly Walters