Printing from Photoshop is a lot like other tasks in the program. There are a lot of customization options, which means you can get your image printed exactly the way you want. You can add borders, watermarks, graphics, and other elements to your image when printing.
However, to allow that level of customization, simplicity is sacrificed. So you click the Print command you are met with an overwhelming list of options.
Hey there, I’m Cara! Printing from Photoshop isn’t difficult, but you do need to know how to configure your settings correctly. Otherwise, you may not end up with the results you want. So let’s take a closer look at how to set up your document for print in Photoshop!
Choose Your Printer
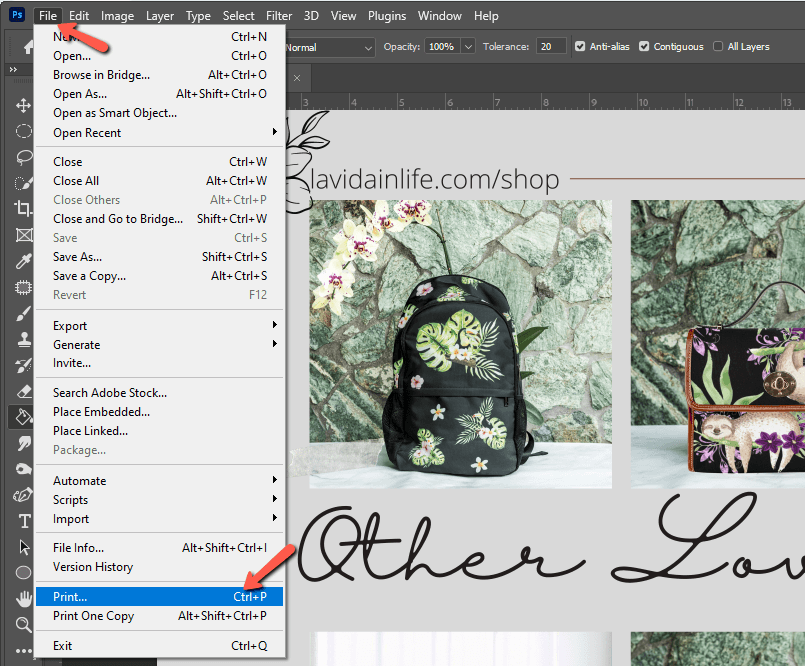
So let’s take a look at these section by section. In Photoshop, go to File and go all the way down to click on Print. Or you can press Ctrl + P or Command + P on the keyboard.
In the window that pops open, you’ll get a preview of your print project. You can see that mine is not sized correctly and that is something we’ll fix in a moment.
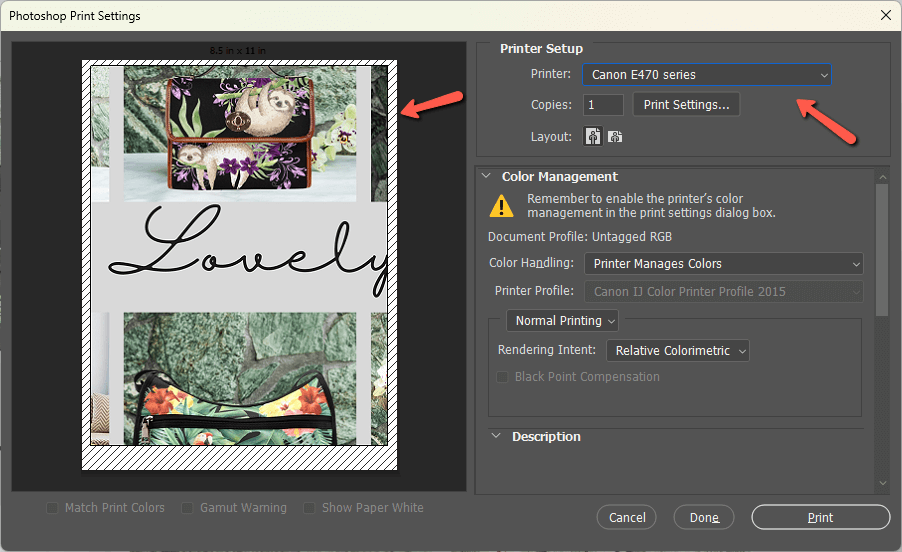
First, we want to look at the Printer Setup box. In the Printer dropdown box, make sure the printer you want to use is selected. For this project, we’ll need to switch the Layout from Portrait to Landscape orientation.
You can also click the Print Settings button to open this window. Here you can set up the paper size, media type, print quality, and other standard printer settings.
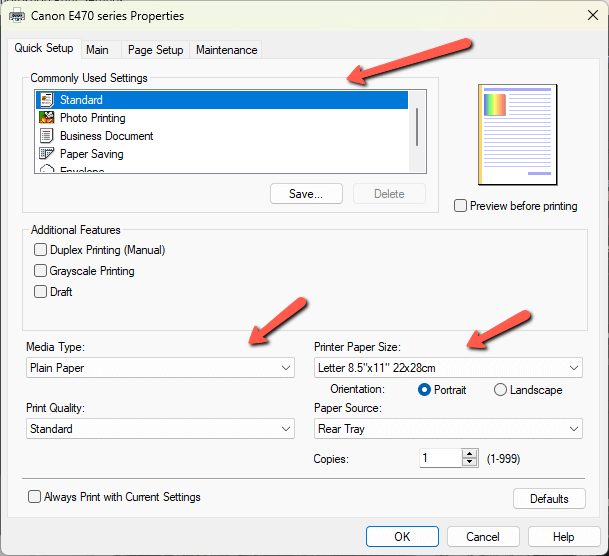
Choose from one of the presets at the top or customize the settings at the bottom. Click OK when finished.
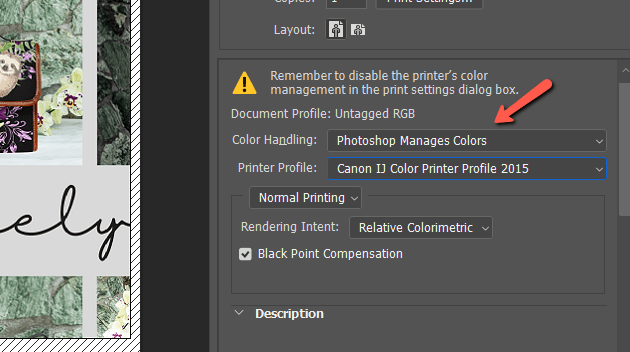
Color Management
This is where things get complicated. You may have discovered that when you have tried printing from Photoshop in the past, what you get on the paper looks somewhat different that what you saw on your screen.
You have to have your color management set up correctly to get the best results and this subject gets quite complicated.
First, you have to start with a properly calibrated monitor. You can get online software to help with this but a perfectly calibrated monitor requires buying a calibration kit, which can be expensive.
Next, every printer and paper combination will produce a slightly different result. To counteract unwanted results, you can set printer profiles, which basically explain to the printer how it’s supposed to interpret the information.
You can get printer profiles from the manufacturer, but for the best result, it’s good to create your own perfect profile for your setup.
Don’t worry, you don’t have to waste a bunch of paper trying to get this right. You can use the soft-proofing feature in Lightroom, which will simulate how the printed results will look for printer/paper combinations on your computer screen. You can tweak the profile (or the image) until you get the results you want.
In Photoshop, you can choose to either let Photoshop handle color management or the printer.
Position and Size
Moving down, now we can fix the position of our project on the page. Right now, my project is too large for one piece of paper and only part of it will print.
Let’s change the orientation to Landscape and check the Scale to Fit Media box. Photoshop will automatically resize your project to fit the paper size you’ve set. It will also show you the print resolution so you can see how it might have changed.
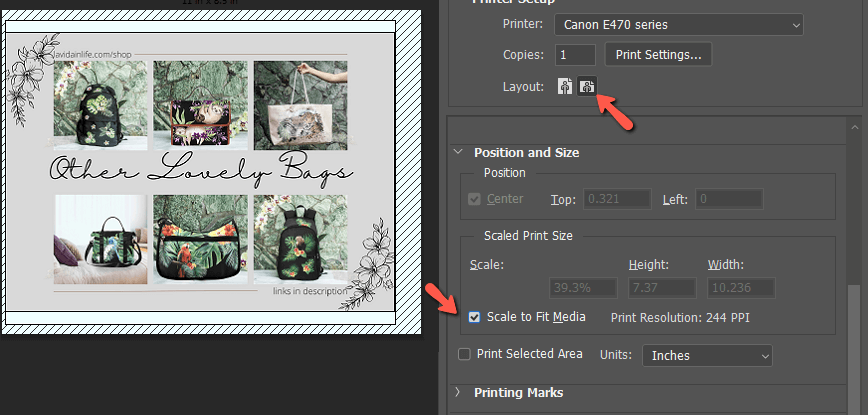
You can also uncheck the Scale to Fit Media box to put your own values in the height and width boxes.
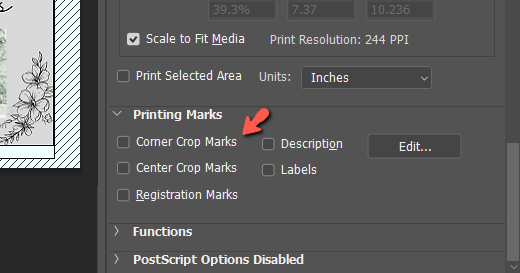
Printing Marks
In the next section, you can ask Photoshop to place little marks on the corners or center of your project. This gives you a guide for cutting if needed.
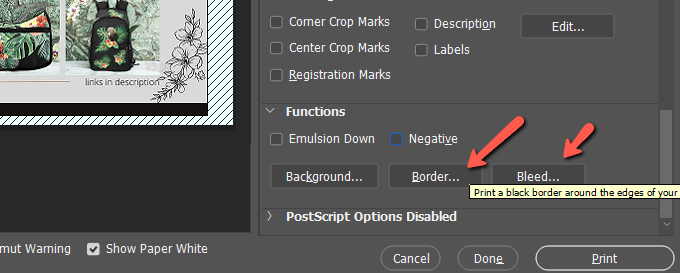
Functions
Finally, in the Functions box, you can choose to add a border to the project and adjust its thickness. Or you can move the crop marks in or out using the Bleed feature.
Once you have everything how you want it, hit Print at the bottom. If everything is set up correctly, you’ll get a nice representation of your project on paper. Curious about other technical aspects of Photoshop? Learn about the best image formats for web use here!
About Cara Koch