I got my first taste of the gaming world back in the days of 2D sprites that were heavily pixelated, from the original Mario Bros on NES to the original Wolfenstein 3D and Doom on my family’s 386 PC. Yes, I’m that old 😉
My love of gaming never faded, and even while I’m strolling through the gorgeously rendered but empty Night City in Cyberpunk 2077, I still sometimes want to play in the pixelated worlds of Stardew Valley or Rimworld.
If you’ve ever wanted to create a mod or just make some pixel art for fun in Photoshop, you’ve probably gotten frustrated with blurry images and other issues. Creating art so simple should be simple too, right? Well, you’re half-right.
The most important part about making Photoshop pixel art is configuring the interface and settings so that you retain the crisp, clear edges that are the primary distinctive feature of pixel art. Here’s how to do it!
Table of Contents
Creating Your Pixel Art Document
Working with pixel art can be confusing when you’re first starting out because the resolution you’re working at is so wildly different from the resolution of your monitor.
The best way to get around this is to work in documents that are actually quite small, usually no more than 64 x 64 pixels wide, and then scale them up to whatever size you need once you’re done drawing.
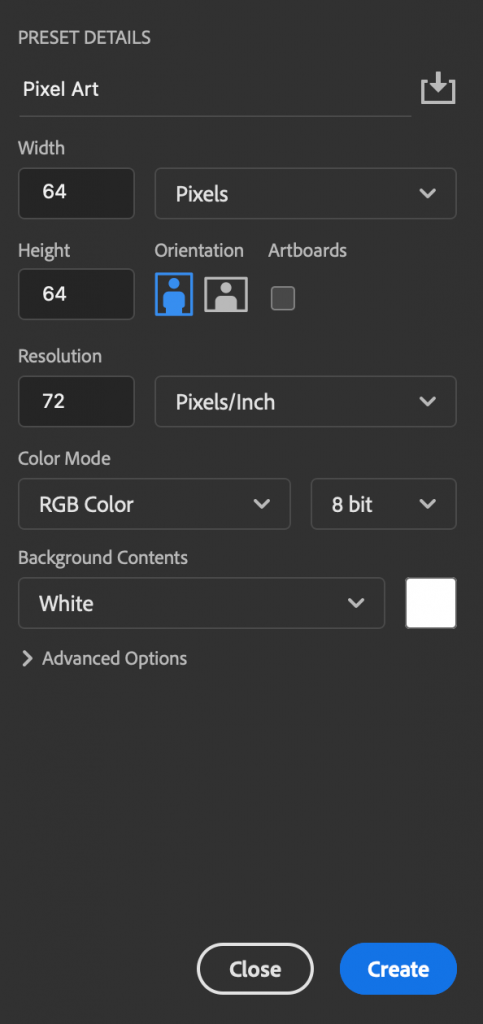
Once your document is created, press the Command + 0 keyboard shortcut to fill your screen with your document, giving you plenty of room to work. You can also use Command and + or - keys to zoom in and out quickly, giving you a quick perspective on whether your drawing is working or not.
Customizing The Interface
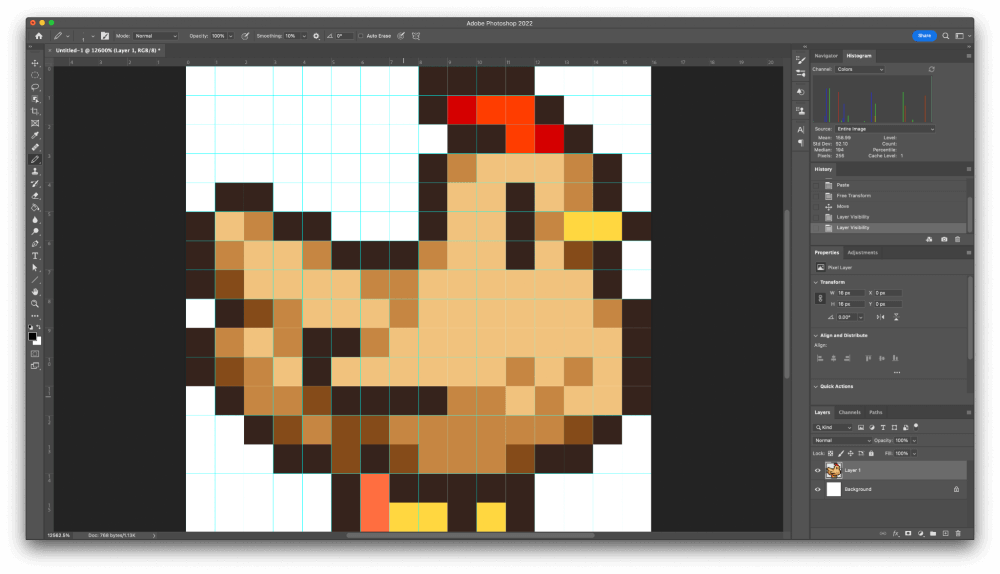
There is also a useful feature that you may have seen in Photoshop when working at extremely high zoom levels: the grid. The grid is an overlay that helps you visualize where the boundaries of each pixel are, but it may not be correctly configured for pixel art at first.
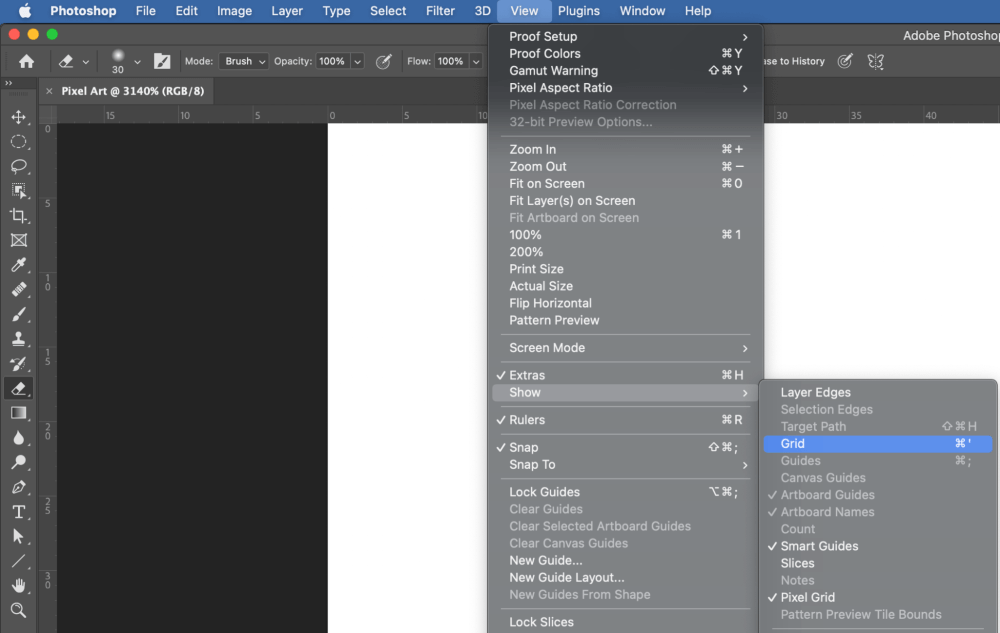
To enable the grid, open the View menu, select the Show submenu, and click Grid. You can also enable it using the keyboard shortcut Command + ‘ (use Ctrl + ‘ if you’re on a PC).
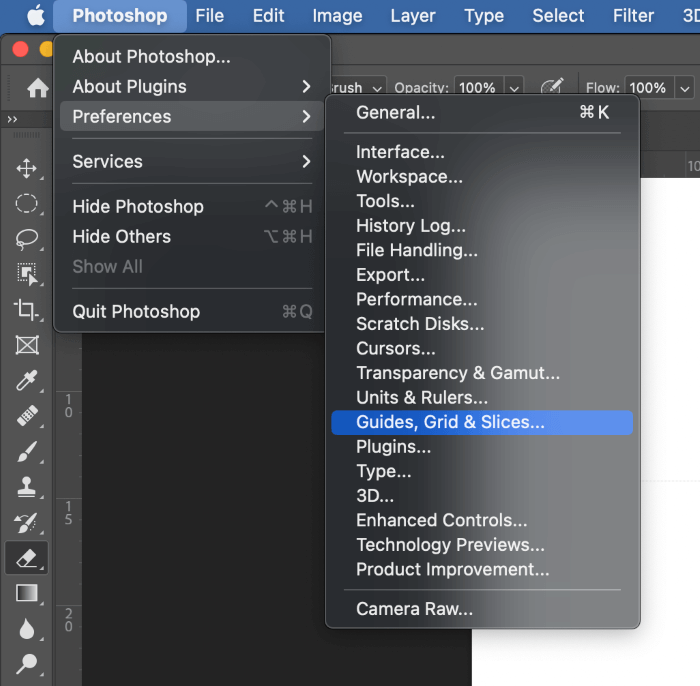
As you’ll probably see, the grid doesn’t match your pixel layout perfectly, and it’s hard to see faint gray lines against the background. You can reconfigure the grid in the Photoshop preferences by opening the Preferences menu and selecting Guides, Grids & Slices.
Once the Preferences window opens, locate the Grid section. Change the Gridline Every set to 1, and also change the Subdivisions setting to 1.
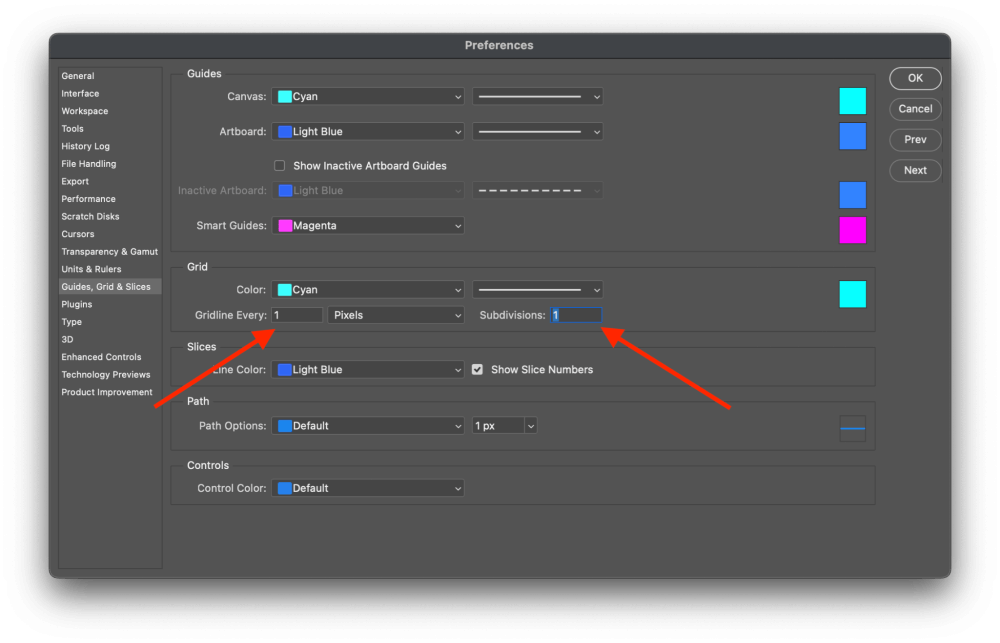
You can also customize the Color setting to something more easily visible, depending on the color palette that you’re planning to work with.
Click OK, and the grid should update itself to a much more helpful layout.
Customizing Your Tools
Now it’s time to get drawing! Well, it’s almost time to get drawing – it depends on which tools you want to use. Since Photoshop has such a huge range of options, it can be hard to choose, but to keep things simple, the Pencil tool will be your best bet for creating pixel art.
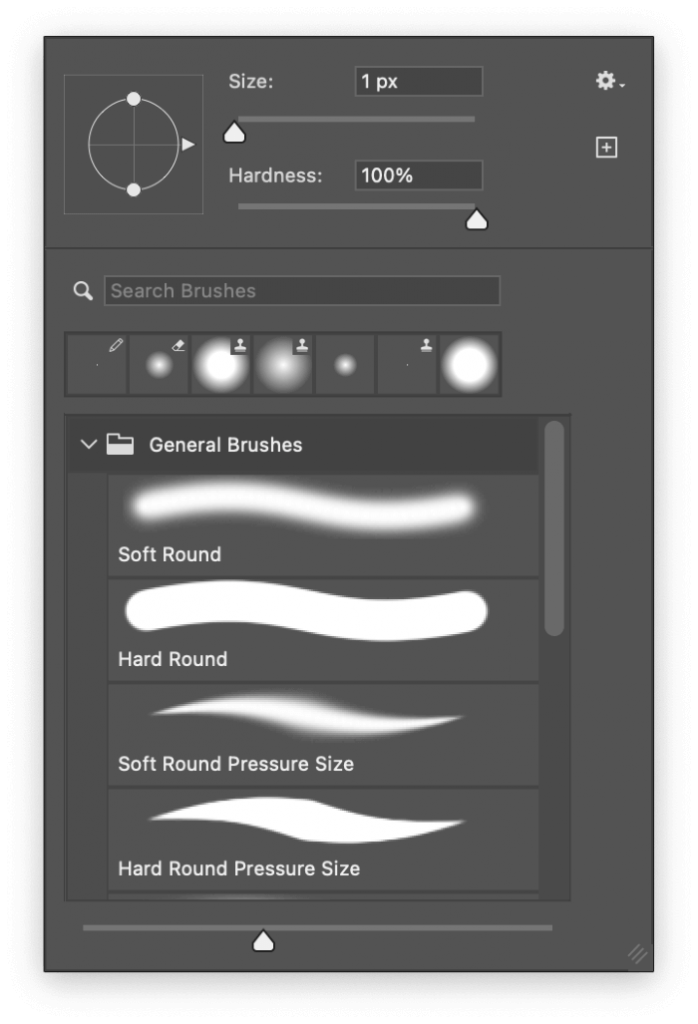
To make sure that you only paint a single pixel at a time, change the brush size to 1 and change the hardness setting to 100%. Because your brush size is so small, the actual shape doesn’t matter – it will always be a square because each pixel is a square.
If you want to quickly fill a bunch of pixels with a new color, switch to the Paint Bucket tool using the toolbox or the keyboard shortcut G. It’s nested in with the Gradient tool, so you may have to hold down the Shift key while pressing G to cycle through the tools that share a shortcut.
In the tool options panel at the top of the main document window, change the Tolerance setting to 0, and Photoshop will know to only apply the Paint Bucket tool to pixels that share the same color as the pixel you click on.
Resizing Your Pixel Art Safely
Remember that the vast majority of work done in Photoshop is photo editing, so most of the default settings are chosen to make that process as easy as possible – but they don’t always work too well for pixel art projects.
One of the most common issues is that resizing your pixel art upward using default settings can lead to blurry images.
Photoshop uses a technique called interpolation to make guesses about what should fill the new pixel areas while upscaling, but there are several different methods for doing so.
The default method is named Bicubic Smoother, but as you might guess from the name, it’s also responsible for blurring the edges of your pixel art.
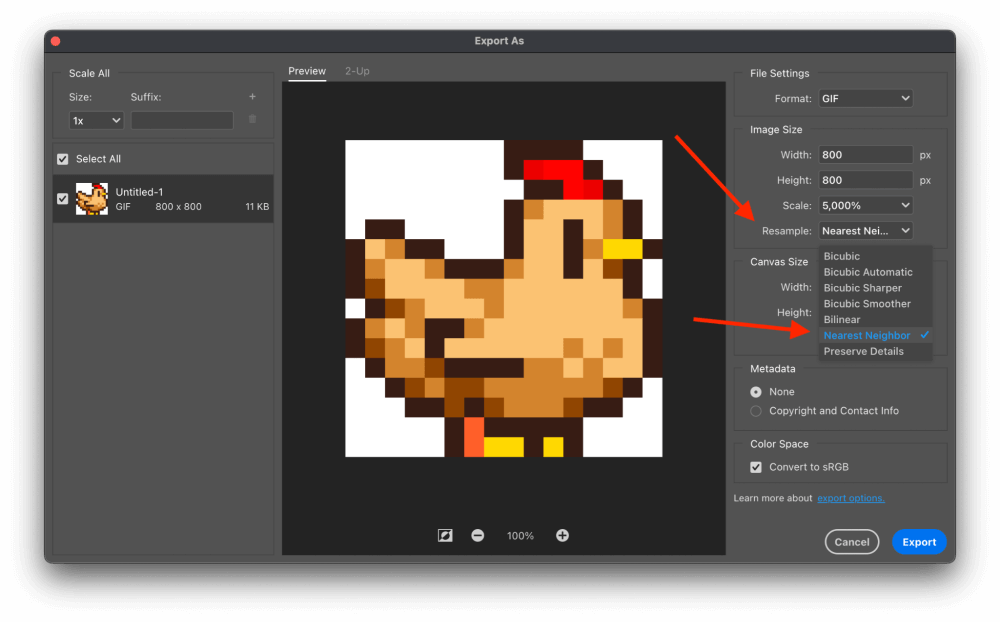
During the scaling or export process, change the Resample settings to Nearest Neighbour in order to retain the sharp edges and corners that help define the pixel art style.
A Final Word
Keep in mind that Photoshop isn’t really supposed to be used as a drawing program, so you might have to work a bit harder to get the same results as you can get from a program that’s designed for drawing pixel art. That being said, if you don’t mind jumping through a few hoops to get things set up at first, you should be able to make pixel art in Photoshop without any further issues.
Happy drawing!
About Thomas Boldt
Dakhamat
Thank you
yo donkey
Thank you. Thank you so much. Adobe assuming that I want bicubic automatic interpolation was causing major issues when it came to higher and lower detail pixel art sprites; if I were to create two different characters for a game, but used experimental and more detailed methods to make one than the other it would inevitably result in a juxtaposition in size, and not one of the desirable sort, especially when dealing with game design. Incredibly useful, and having tested it out a bit after changing the setting preference I can confidently say that that is one major Adobe-shaped hurdle the internet has helped me jump.
Yet again.