Have you ever thought, “wow! This photo would look amazing as a painting”? Or maybe you’d love to create handmade paintings to grace your walls, but your talents lie more in photography.
Hello, my name is Cara and as a professional photographer, I find myself playing around with the amazing features in Photoshop often. One of these features is turning any photo into a realistic-looking painting!
Read on to learn how to make a photo look like a painting in Photoshop!
Note: the screenshots below are taken from the Windows version of Photoshop CC. If you are using the Mac version, they will look slightly different.
Table of Contents
Step 1: Choose Your Photo
You can turn any photo into a painting with the technique I’m going to show you today. However, it won’t work as well with all photos.
Think about what a painting usually looks like. A portrait painting typically features the subject with a relatively plain background so as not to be distracting. If the background in your photo is too busy, it will become muddy and distracting as you create the painting effect.
A landscape image might have more elements, but again, think about the paintings you’ve seen. Many are minimalistic, relying more on colors and shapes to create interest and emotion in the painting.
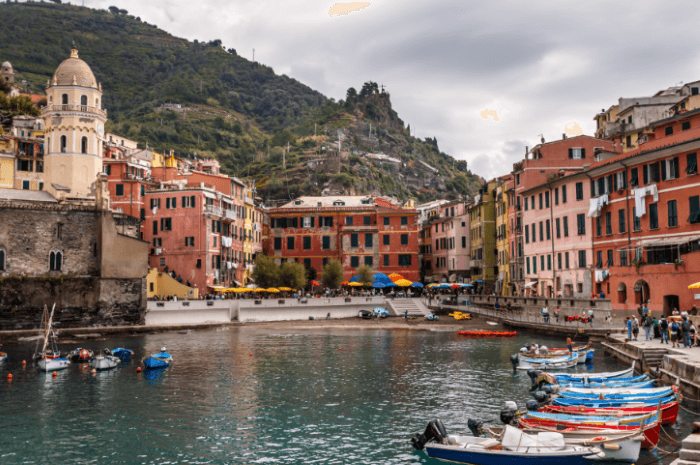
For this tutorial, I’ve chosen this image that I took while on vacation in Italy a few years ago.
Let’s get started!
Step 2: Convert to Smart Object
Once you’ve chosen your photo, open it in Photoshop. Create a duplicate layer by hitting Ctrl + J (Command + J on a Mac) on the keyboard.
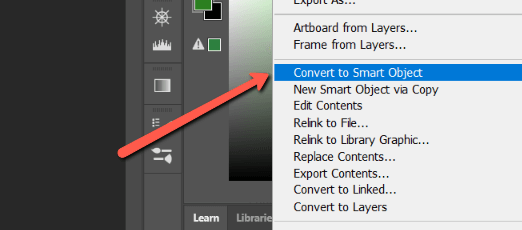
Right-click on the duplicate layer and choose Convert to Smart Object from the drop-down menu that appears.
This will allow you to come back later and make adjustments to the filters we’re about to apply.
Step 3: Apply the Dry Brush Filter
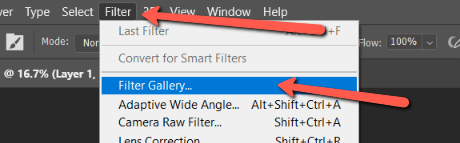
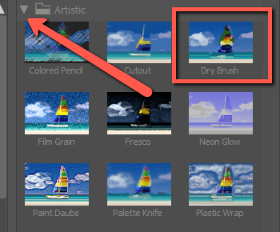
Now, we’re free to start applying our effects. Go to Filter in the menu bar and choose Filter Gallery from the menu. This opens a number of creative filters and presets that you can apply to your image.
Choose the Dry Brush filter from the Artistic folder. You might have to click the arrow next to the artistic folder to make the options appear.

To the right of the filter options, you’ll see a box appear with setting options. I’ve chosen to set the Brush Size to 7, the Brush Detail to 9, and the Texture to 1. However, feel free to play around with them to get the look you’re going for.
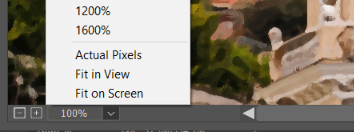
Pro tip: the preview screen to the left usually only shows a small part of the image. To see the whole thing, click the percentage in the lower-left corner of your screen. Then choose Fit on Screen. Click OK when you’re happy with the results.
Step 4: Apply a Second Filter
Paintings typically have more details in the foreground than in the background. To make this look more realistic, we need to soften more details in the background.
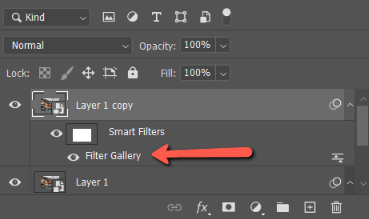
To do this, we’re going to add a second filter, but we only want to apply it to the background. So duplicate the layer by hitting Ctrl + J (Command + J). Double-click on Filter Gallery which now appears in the layers panel under the copied layer.
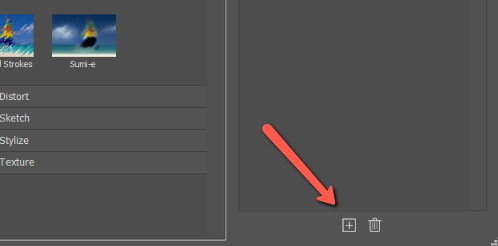
You might notice there is also a folder called Brush Strokes in the filter gallery. You can play with these different filters to get different painting effects. For this one, I’m just going to add a second Dry Brush filter.
To add a second filter on top of the first one, hit the little plus sign surrounded by a square at the bottom right side of the screen and choose the filter you want. Again, adjust the sliders until you’re happy and hit OK.
Step 5: Limit the 2nd Filter to the Background
Create a black layer mask by holding down the Alt or Option key while clicking on the Add Vector Mask button at the bottom of the Layers panel.

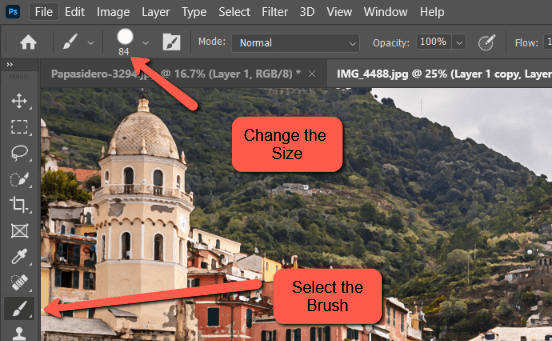
Now select a brush by hitting B on the keyboard. Adjust the size in the options bar panel to work for your image. Then, make sure you have white as the foreground color at the bottom of the toolbox area.
Now, you can paint over the areas of the image where you want the second layer effect to be applied.
Step 6: Saturate the Colors
Finally, paintings tend to have vibrant colors, so we’re going to intensify the colors just a touch. Open the adjustments panel above the layers panel by clicking the Adjustments tab.
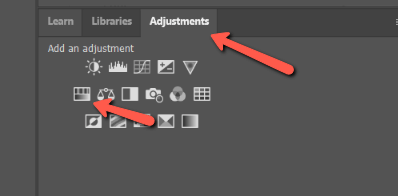
Select the Hue/Saturation icon.
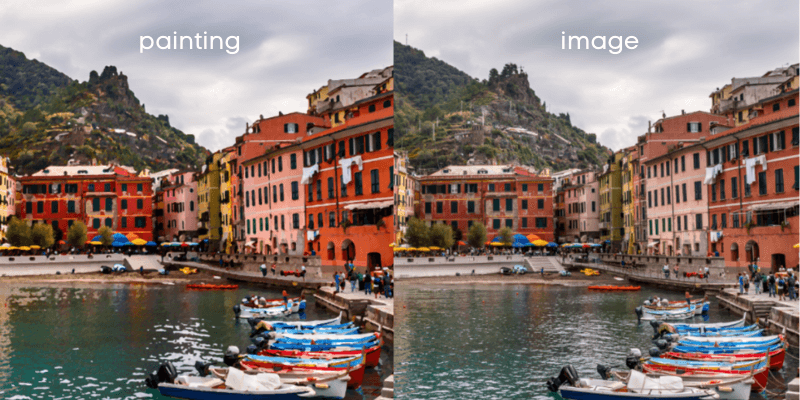
Slide the Saturation slider up until you like the look of your image. And voila! What do you think of my painting?

To see more cool effects that you can make with Photoshop, check out more of our tutorials!
About Cara Koch