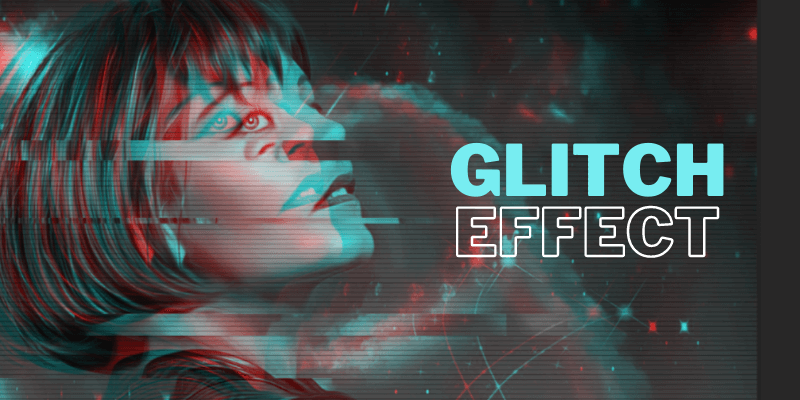
Isn’t it interesting how yesterday’s errors have become today’s art? Glitches were once nothing but annoying noise messing up your TV viewing experience. Now the glitch effect adds a futuristic feel to an image and is hailed as a unique art form.
Hey there! I’m Cara and I love to create interesting images and effects in Photoshop both for clients and my own personal masterpieces. Today I’m going to share with you how you can make a glitch effect in Photoshop.
Check it out!
Kindly note that the screenshots/steps below are based on Photoshop CC for Windows, other versions will look different.
Table of Contents
Step 1: Choose and Prepare Your Image
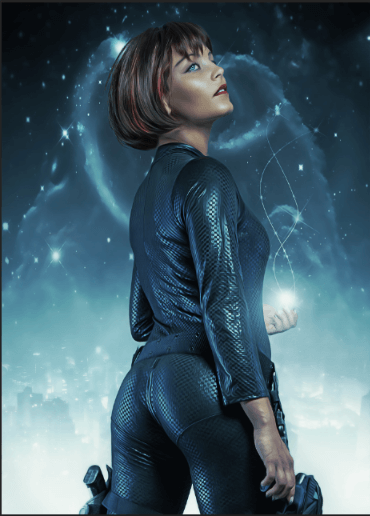
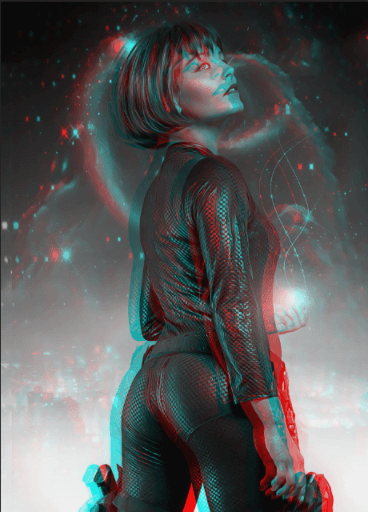
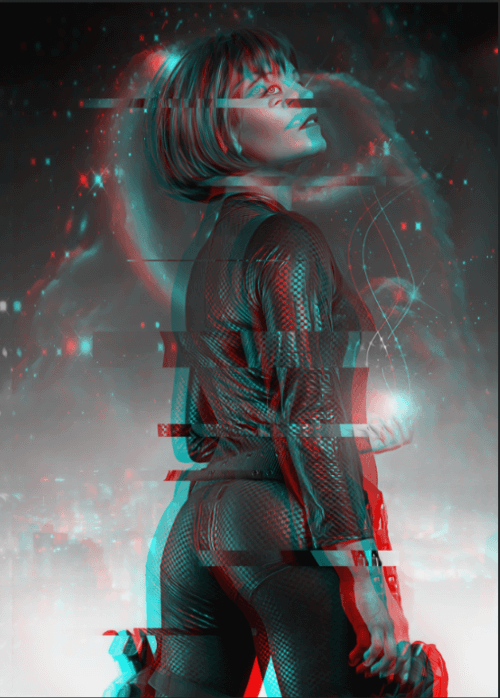
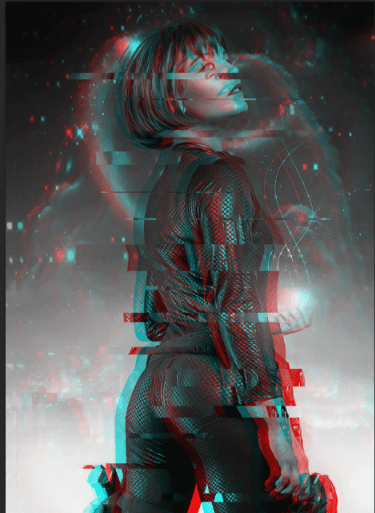
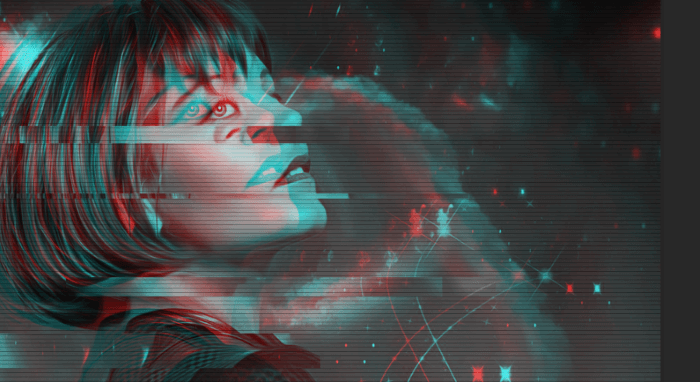
The glitch effect can be used on any image but it will work better with something that fits. It adds somewhat of a futuristic/technological feel to the image. To that end, I chose this futuristic portrait as my example image.
Open the image in Photoshop and make a duplicate by hitting Ctrl + J or Command + J.
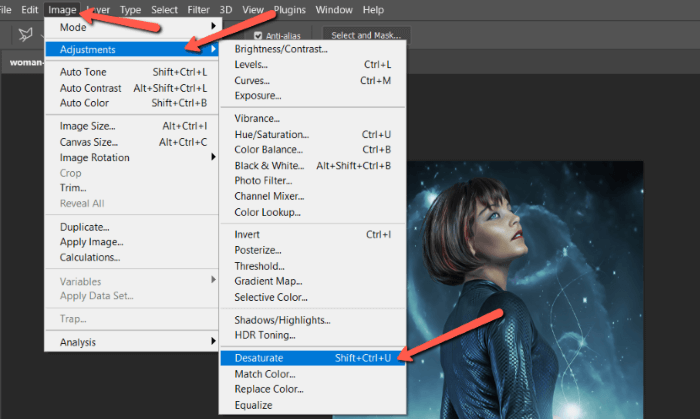
We want to turn the image to black and white. A quick way to do this is to desaturate the image. This is a destructive method, but we won’t be needing the color so it doesn’t matter.
Go to Image, hover over Adjustments, then choose Desaturate.
Step 2: Offset the Image
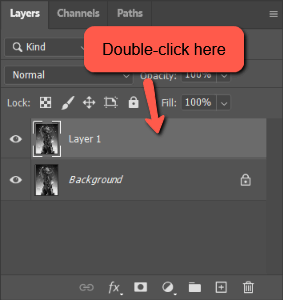
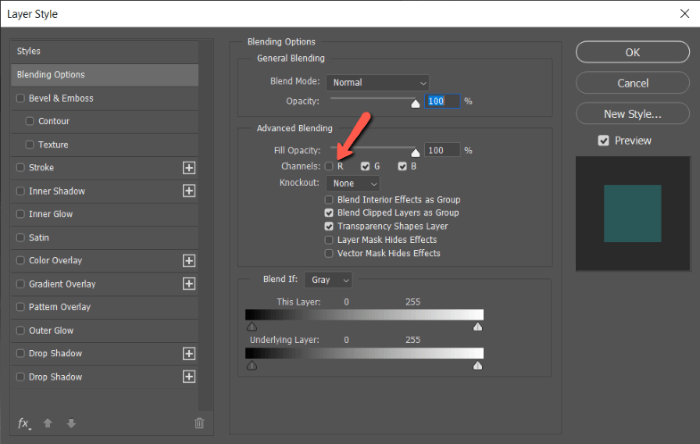
Double-click in a blank space on the layer to open the Layer Style panel.
Under the Blending Options tab, deselect the Red Channel under Advanced Blending. Click OK.
Hold down the Ctrl key or Command key and hit the arrow keys to nudge the top image either left or right. This will offset the two images slightly. Because we turned off the red channel, we’ll get this interesting color cast and double vision effect.
Step 3: Break It Up
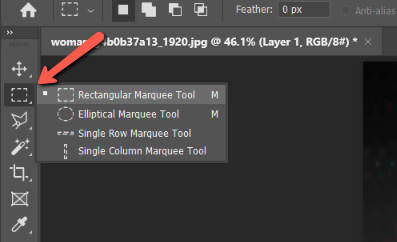
Now let’s break apart the image a little to simulate what happens as the glitch runs across the screen. To do this, select the Marquee tool from the toolbar or press M on the keyboard.
Click and drag to create rectangular sections across the image. Hold down the Shift key to make more than one selection. Vary the sizes of your rectangles and place them at random positions.
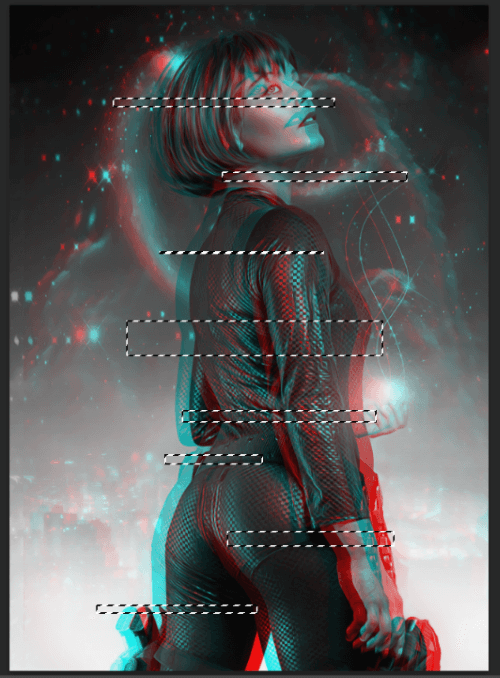
Now, let’s nudge them out of place. Hold down the Ctrl or Command key and tap the right or left arrow key until they’ve moved over.
Press Ctrl + D or Command + D to deselect the rectangles.
I nudged this set to the left. To break it up differently, let’s try a second set of rectangles and I’ll nudge these ones to the right.
Step 4: Add Screen Lines
Remember how when you got close to old TVs you could see a tiny pattern of lines? To make our glitch effect more realistic, we need some of those. Here’s how to get them.
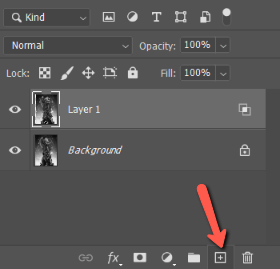
Click the Add a New Layer icon at the bottom of the Layers panel. It looks like a square with a + sign in the middle.
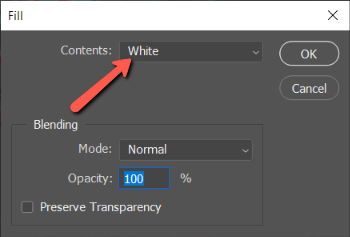
Fill this layer with white by hitting Shift + Backspace (or Shift + Delete for Mac) on the keyboard. Choose White for the Contents in the box that appears and click OK.
Right-click on the white layer and choose Convert to Smart Object. We’re going to add a filter effect and converting to a smart object first allows us to come back and make adjustments later.
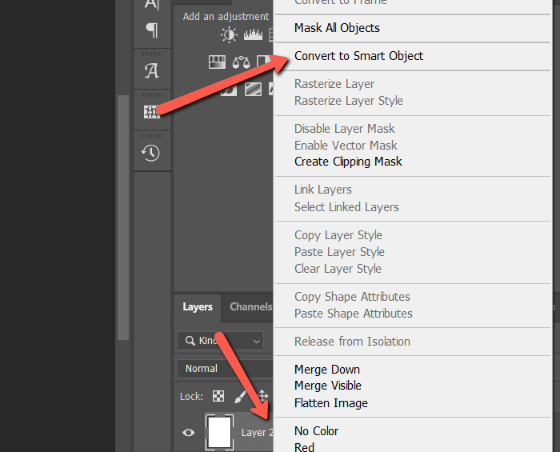
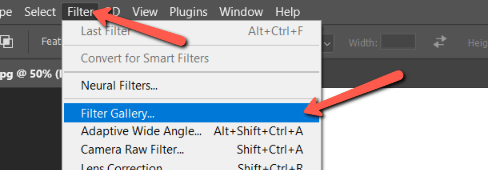
Go to Filter in the menu bar and choose Filter Gallery.
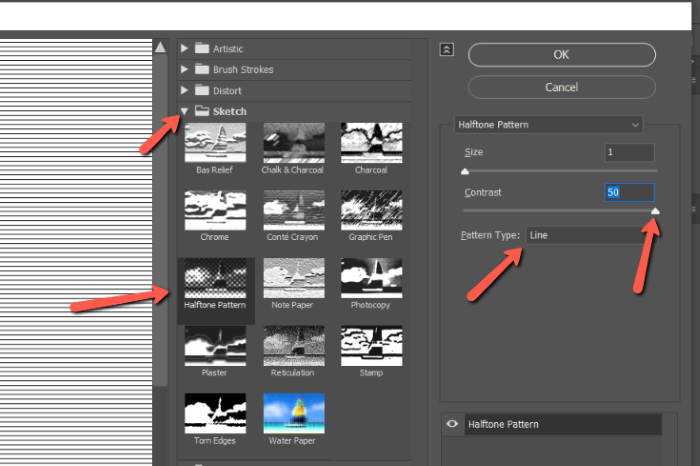
Open the Sketch folder and choose Halftone Pattern. Set the Pattern Type to Line and turn up the Contrast to the max. You can play with the Size if you wish. Click OK when satisfied.
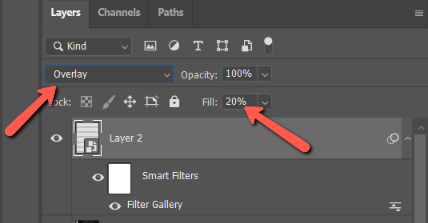
The screen lines will completely cover the image, which is not what we want. Change the blend mode to Overlay to fix this and the image will show through. The lines will still be quite strong so bring down the Fill value of the layer.
When you look closely, now you can see the screen lines.
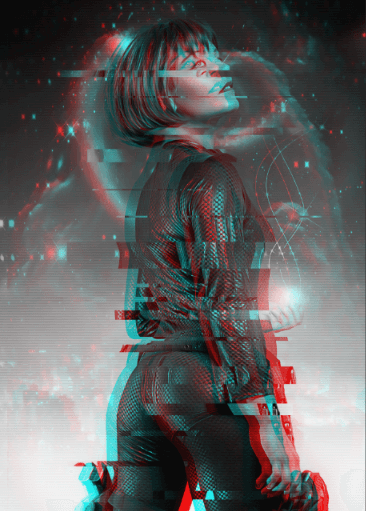
There you have it. A pretty convincing glitch effect that isn’t so difficult to create!
Interested in more things you can do in Photoshop? Check out our tutorial on how to do double exposures!
About Cara Koch