Clip. Combine. Create.
There are virtually endless ways to put images and elements of images together to create something new. The layers function of Photoshop makes this relatively simple.
Hello! I’m Cara and I’m here to share what I know about Photoshop with you. Understanding how to work with layers is integral to working with this incredible software.
Today, I’ll show you how to add images to an existing layer in Photoshop. Keeping the images on their own layer makes it easier to individually edit elements. However, putting them together is helpful when you want to make changes to both elements and for organizational purposes.
Let’s take a look!
Table of Contents
Step 1: Add the Image to Photoshop
There is more than one way to insert an image into Photoshop. To keep it simple, I’ll stick with the basic method here. If you want to learn more about adding multiple images as layers to a project, check out this post.
When you add an image to Photoshop, it automatically becomes a layer. To add a photo in Photoshop, browse your computer to find the files you want to use. Drag and drop onto the Photoshop project to add the image.
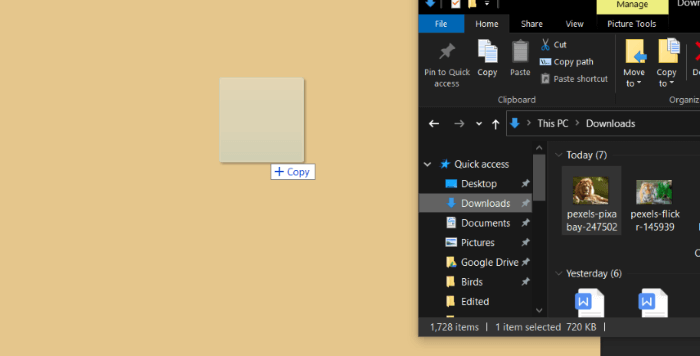
You can also go to the overhead menu and choose File > Place Embedded and choose the photo you want to add to Photoshop.
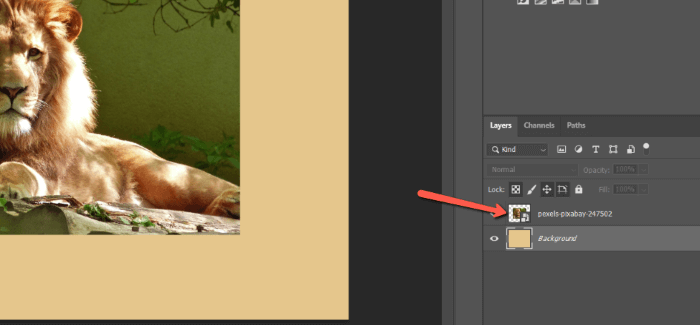
Notice how the lion appears as a new layer on top of the background layer?
I’ll do the same thing with the tiger image.
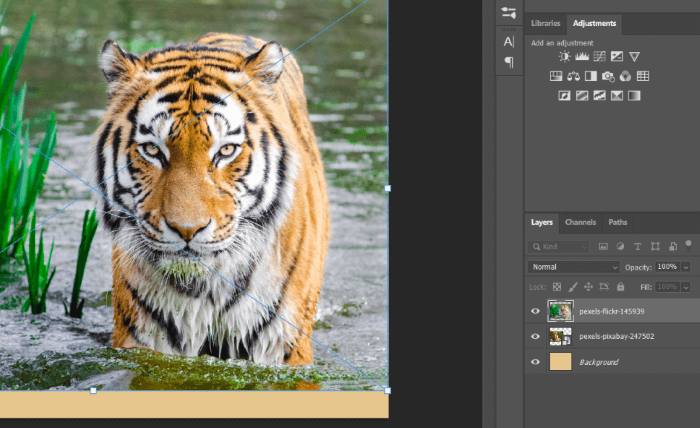
This image also appears on a new layer and it is larger than the lion image so it covers it up. The image will drop onto the project with the Transform tool active which allows you to resize and reposition the image/layer as you need.
Once you’re happy with the positioning, hit Enter or Return or click the checkmark at the top of the screen to accept the changes.
I’ve resized and positioned the tiger where I want him. I’ve also cropped a portion of the image I don’t need. Learn how to crop layers here.

Step 2: Merge the Layers
But the two cats are still on different layers. We wanted to add the tiger to the lion layer and that hasn’t happened. So we move on to the next step.
To get both images on the same layer, you need to merge the layers. Select both layers in the layers panel by holding the Shift key while clicking on each layer.
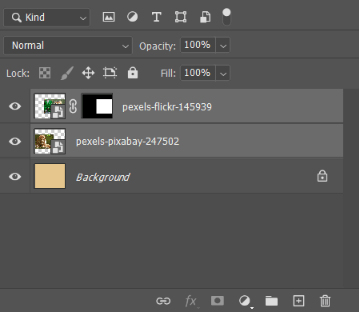
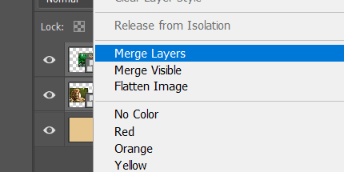
Then hit Ctrl + E or Command + E on the keyboard to merge the layers. You can also right-click on one of the layers and select Merge Layers from the menu that appears.
Now both images appear on the same layer.
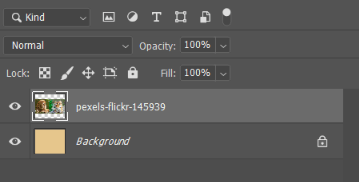
In most cases, you’ll want to leave the images as separate layers. This allows you to make changes (ahem fix mistakes!) to the individual images later on.
However, sometimes you will want to put images on the same layer so you can save time by editing them together. It all depends on your particular project.
What if you want to add a photo to fit in a shape? You might be struggling to add the photo to the shape layer, right? Well, here’s the trick.
How to Add an Image to a Shape in Photoshop
The answer is Clipping Mask! All you need to do is add the image to Photoshop, move it above the shape layer, and create a clipping mask. For example, I want to add a photo to a circle. As you can see, I have the image layer above the shape layer.
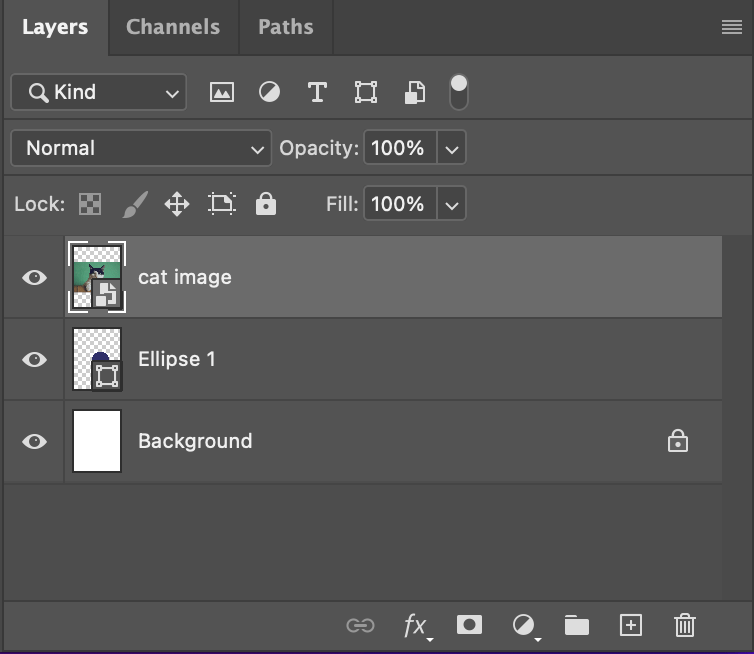
All you need to do is select the image layer, click on the hidden menu on the top right corner of the Layers panel, and choose Create Clipping Mask.
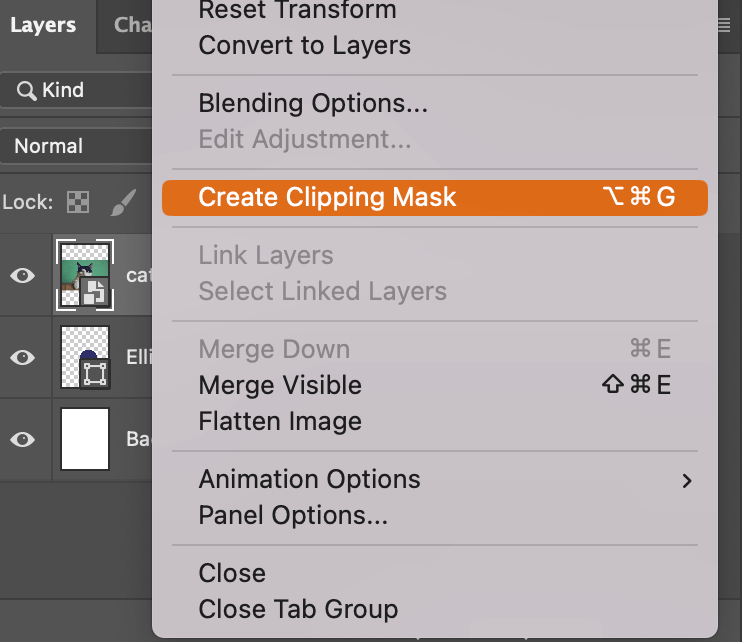
The image layer isn’t on the shape layer but you’ll see the photo already shown in the circle.
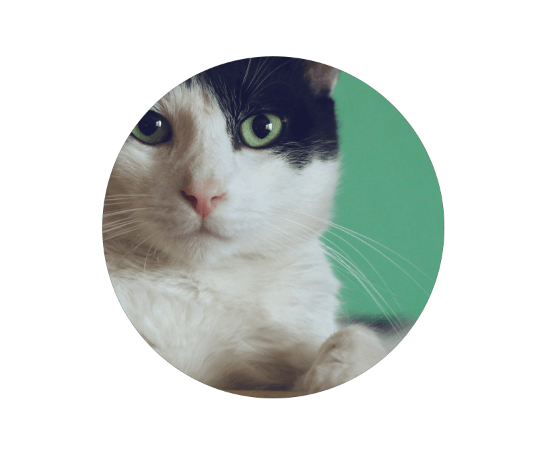
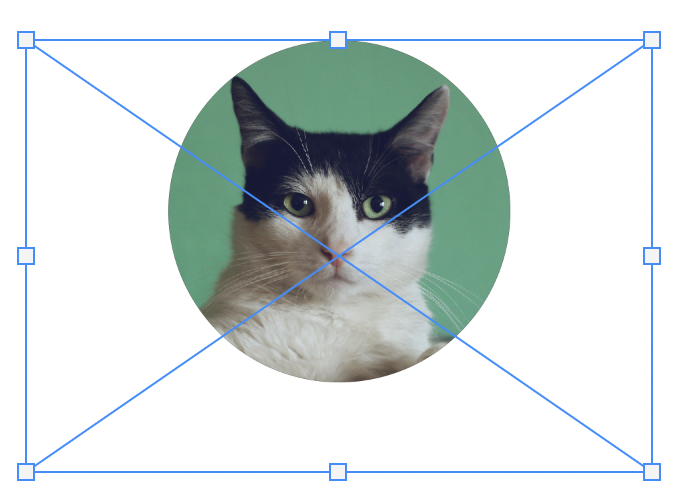
You can click and drag on the image to reposition it, or you can activate the Free Transform Tool to resize and move it.
Excited to try it? Have fun and be sure to check out more of our tutorials like how to feather a layer in Photoshop to deepen your knowledge!
About Cara Koch