Do you know how easy it is to remove all of one color in Photoshop? The program makes this process super simple. In fact, there are two easy ways of accomplishing this task.
Hey there! I’m Cara and as much as I love playing with Photoshop, I also love being efficient. Photoshop gives us two powerful options to remove certain colors in Photopshop. Let’s look at how it works!
Quick note: the screenshots and tutorial below are based on the Windows version of Photoshop CC. If you are on the Mac version, they can be slightly different.
Method 1: Magic Wand Tool
The Magic Wand tool is a selection tool that works by selecting all the pixels of the same or similar color as the pixel you click on. It’s literally the perfect tool for this task we have of removing all of one color.
Sometimes the Magic Wand tool gets a bit of flak from users because it doesn’t work as they expect. I love the Magic Wand tool and it works very well for me. The main thing is to understand there are limitations to what the program can do automatically.
To get started with this method, let’s open the Magic Wand tool from the toolbar on the left. It may be hiding behind the Quick Selection tool. Just right-click on the tool to open the flyout menu and choose the Magic Wand.

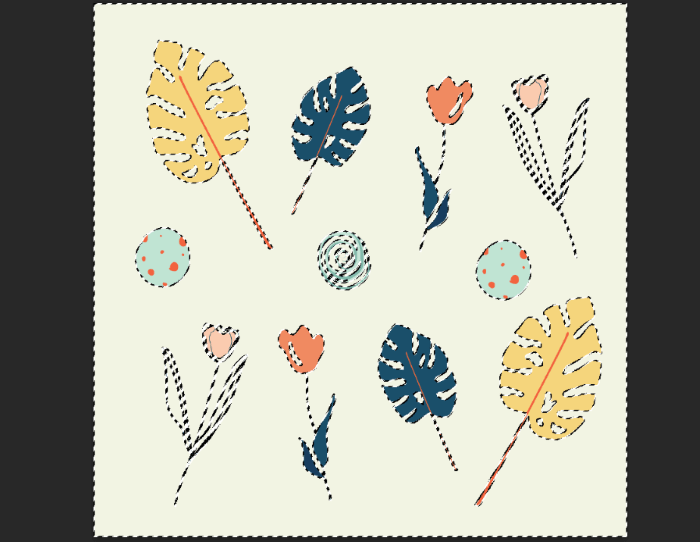
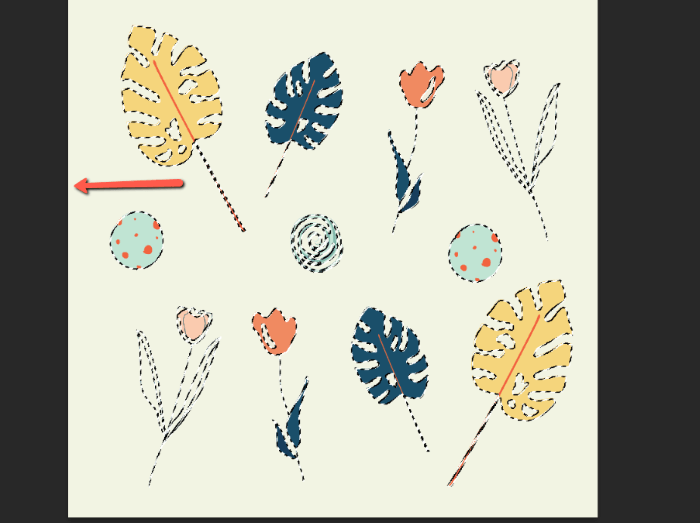
Click on the color you want to select and boom! The program selects it. Check out this example with this image from Pixabay.com.

One-click makes this complicated selection around this leaf.
Of course, color selections won’t always be this simple. However, the Magic Wand tool has several settings that allow you to refine what counts as a “similar color.”
In this case, let’s say I want to get rid of the background. This allows me to cut these leaves out and place them into other images without this cream color interfering.
Click on the cream color and notice how it instantly selects the whole background.
Delete the Color
The simplest way to remove the color is to hit the Backspace or Return key. This will delete all the selected pixels.
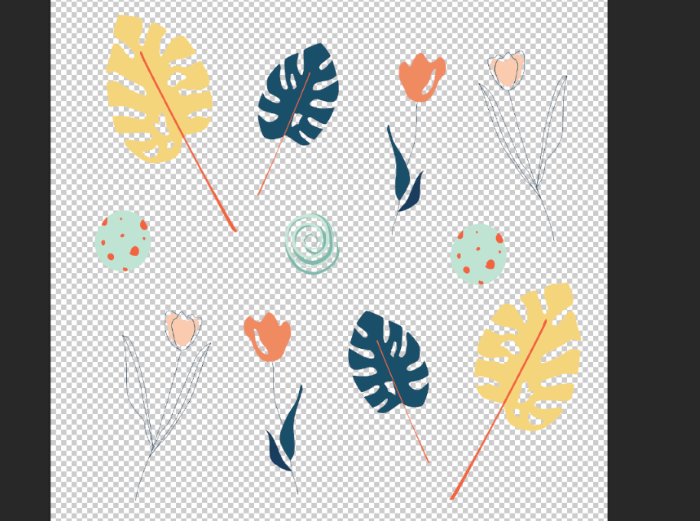
The only problem with this method is that you can’t make any adjustments to the selection later in case anything gets missed.
To keep the edit non-destructive, you can use a layer mask instead.
Add a Layer Mask
Let’s back up to where we clicked on the background to select it.
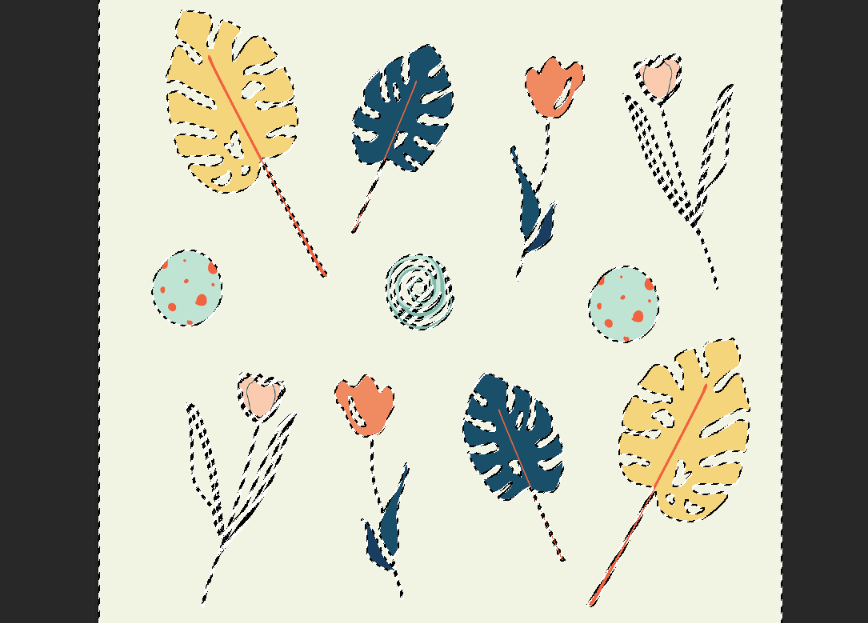
When we add a layer mask, everything that is not selected gets masked out. That is, it disappears. Since we have selected the background color, all the leaves will disappear.
We want the opposite of that so we need to invert the selection. This will select all the objects and when we apply the mask, the background will disappear.
To invert your selection, press Shift + Ctrl + I or Shift + Command + I. You’ll see the marching ants disappear from around the edges.
Click the mask button at the bottom of the layer’s panel. It looks like a solid rectangle with a hole in the center.
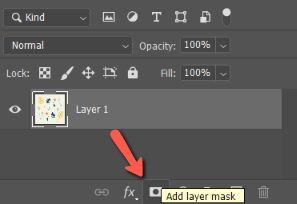
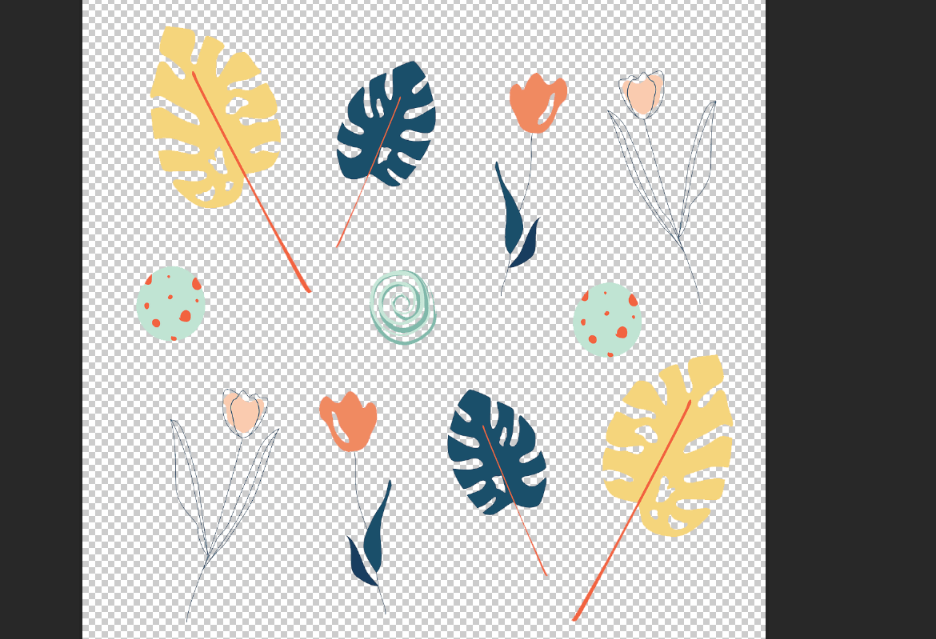
The mask is applied and all of that one background color disappears! The mask is editable so you can make adjustments as needed later.
Method 2: Color Range
If the Magic Wand tool isn’t working too well for you, the Color Range tool is another option for selecting all of one color.
Go to Select in the menu bar and choose Color Range.
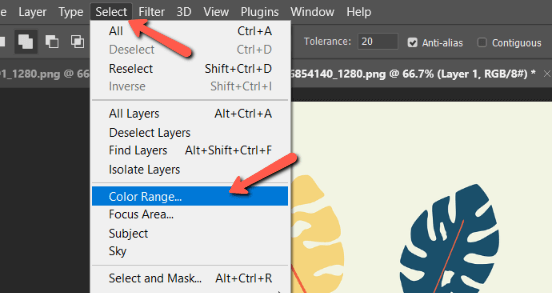
The color range panel opens and you’ll notice that your cursor turns into an eyedropper. Click on the color you want to select.
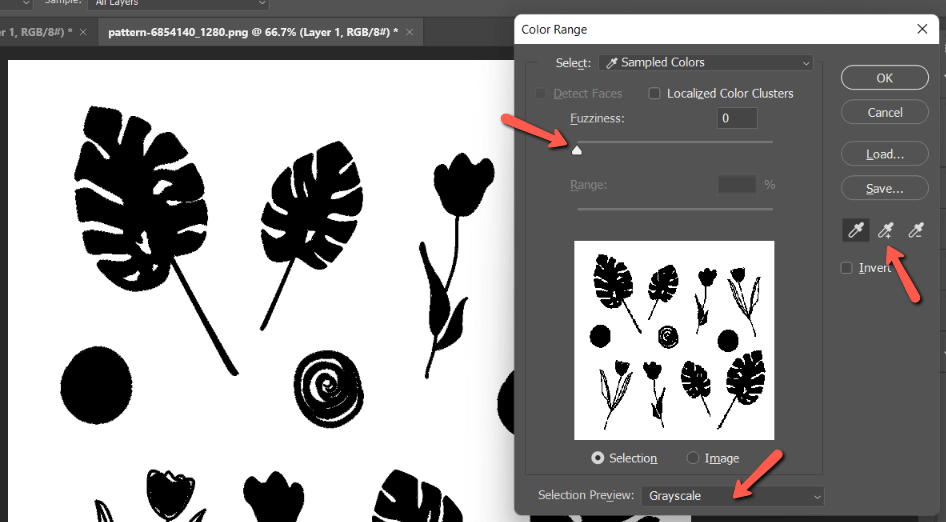
In the preview box, you’ll see a black-and-white image. White is your selection and black is everything else. (If you want to see this same black and white on the actual image, make sure the selection preview box is set to Grayscale).
In this case, I already have a crisp selection. If you need to refine it, you can turn up the Fuzziness to allow the program to accept a wider range of colors.
You can also add to the selection by working with the eyedropper with the plus sign. Inversely you can subtract from the selection by using the eyedropper with the minus sign.
Once you have a crisp black-and-white image as you see here, click OK.
Again, you can hit Backspace or Return at this point to delete the background color permanently. Or you can invert the selection with Shift + Ctrl + I or Shift + Command + I and hit the mask button.
Either way, you got rid of the cream color and are now free to use these objects however you please!
Curious about other cool things you can do with color in Photoshop? Check out how to make an image black and white except for one color here!
About Cara Koch