Hi there! My name is Aly, I am an avid user of Photoshop with over five years of experience editing images and creating artwork in Photoshop.
In this article, I am going to be explaining “Banding” which can occur in photos, and how to fix it in Photoshop.
Table of Contents
What is Banding in Photoshop
The unappealing, sharp lines of color that show in your photo are called color banding. The transitions between distinct colors become rapid, harsh, and obvious enough to be immediately noticed in photographs that have significant monochromatic areas, such as the sky.
This shift is usually undetectable, smooth, and gradual in photographs. However, this tone progression can occasionally be taken too far to the point that the colors are unable to be seen.
Therefore, the color jumps and creates a sharp line between the tones rather than transitioning smoothly from, for instance, a light green to a darker green.
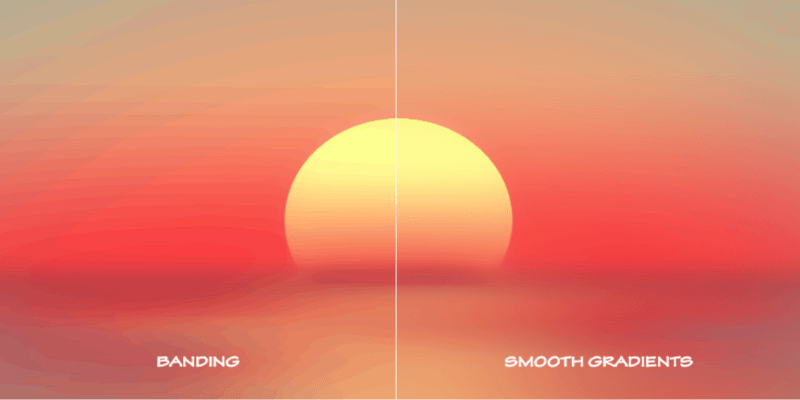
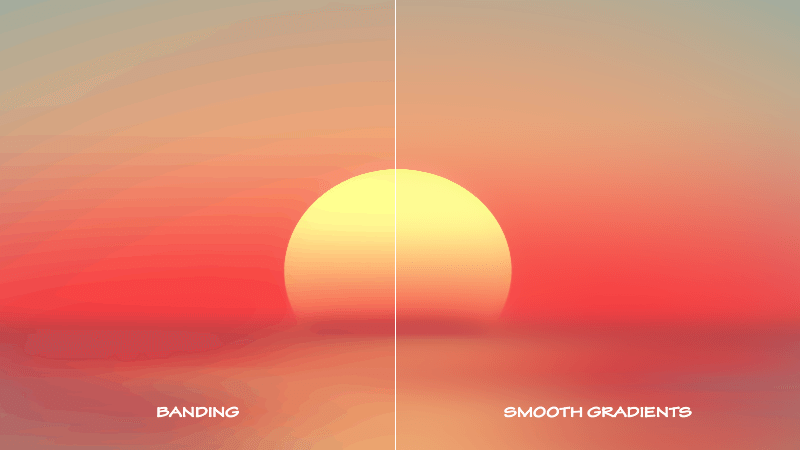
This image is an example of what color banding looks like. As you can see, the harsh lines are in between colors.
Why Does Color Banding Happen
Color banding is when there is an abrupt change in color where there should be a gradual transition. When your file is lacking in information, banding can occur. Or you go too far with the editing.
A clear, blue sky frequently exhibits banding. But it could be challenging to define. After taking the photograph, you might view it right away, or you might notice it later in editing. Banding could be present in one image but not in another.
Color banding has one fundamental reason. The image’s tone range is insufficient for a gentle transition.
The first and most crucial step in ensuring you won’t run into this banding issue is to avoid over-pushing values during post-processing. This entails doing as much as you can “correctly” while taking photos.
Of course, shooting uncompressed RAW and getting the exposure right is the best course of action.
And if the scene has too much dynamic contrast, bracket your images so that you can utilize additional exposures in post-processing to achieve your artistic goals rather than pushing the highlight or shade sliders to their maximum limits.
You won’t experience color banding too often if you only adhere to these suggestions.
How to Avoid Color Banding in Photoshop
Even if color banding is present, it may not always be easy to see on your computer screen because the skies are typically blue and brilliant, but once your image is printed, those unsightly lines really stand out.
You can take the following steps to ensure that this won’t occur with your image.
How to thoroughly inspect for color banding:
Observe each of your channels. Go to the channels tab in Photoshop and then examine the individual Red, Green, and Blue channel representations.
If banding is present, it will be considerably more obvious in this view than it would be in RGB full color. If you notice banding, you should take care of it.
Additionally, you should remember to shoot in RAW and make your corrections before switching to JPEG files. Because of the amount of information they provide, RAW files are far more forgiving. Therefore, always edit in RAW and save in other file formats last.
How to Fix Color Banding in Photoshop
Checking to check if you over-processed your image is the quickest and simplest technique to fix color banding. Check this by going to Levels in Photoshop and seeing that they all look normal and not out of the ordinary.
Verify your sliders, draw them back, and observe the difference. Make sure you haven’t overdone the saturation or dehaze if you’ve created a gradient.
Another way to fix color banding in Photoshop is to choose Filter > Noise > Add Noise. The Add Noise filter will be applied at this phase to your overlay. There should also be a box. Decide how much noise you want to add to your photo, in terms of percentage.
It is suggested that you choose a percentage between 3% and 5% to start with. At the bottom of the window, there ought to be a place where you may select a distribution. Choose Gaussian Blur.
You can also add blur to your image even though that sounds a little strange, it works! The sharp lines that develop in your area of color are the problem with banding. Therefore, if it’s possible, blurring that region is another option.
This would only be effective in certain circumstances because, for instance, it would seem odd if there were bold clouds in the sky if they were blurred. However, this method, for instance, really works great when the sky is clear and blue.
The only way to fix banding in your shot if all of these settings are correct is to cover it up with one of these methods.
Conclusion
Overprocessing frequently has the side effect of banding. But most of the time, it can be simply remedied or better still, avoided entirely. If you follow the advice above and discover it in your photographs, you should be able to correct it.
Any questions about Color Banding in Photoshop? Leave a comment and let me know.
About Aly Walters