
Light it up! If you really want to catch people’s attention, why not add a neon sign to your design? Though it seems like it would be a complex edit, creating neon type is super simple!
Hi, I’m Cara! As a photographer and designer, I use Photoshop regularly. Though I like working with the program, I also love edits that are fast but look really cool. Making a neon sign in Photoshop is one of those edits. Let me show you how easy it is!
Note: the screenshots below are taken from the Windows version of Photoshop. Mac and other versions can look different.
Table of Contents
Step 1: Create Some Text
For this demonstration, I am going to use this brick background image. Now open the text tool by pressing T on the keyboard or selecting the Horizontal Type tool from the toolbar on the left.
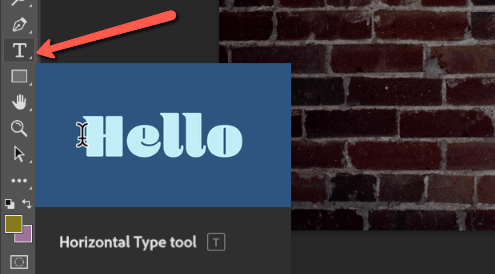
Click somewhere in the image and type your text. Make sure you’re working with a rather thick font so the effect can show up well. You can change fonts up in the Options bar.
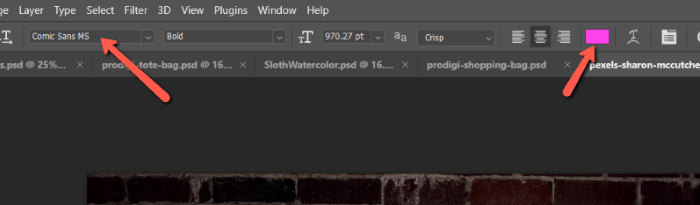
Also in the Options bar, double-click on the color swatch to choose a font color. Let’s go with bright pink. Click the checkmark close to the color swatch or hit Enter or Return on the keyboard to accept the changes.

Step 2: Add an Inner Glow
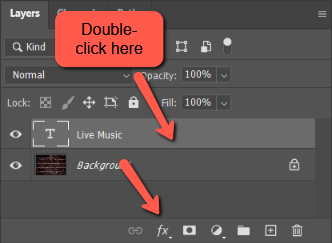
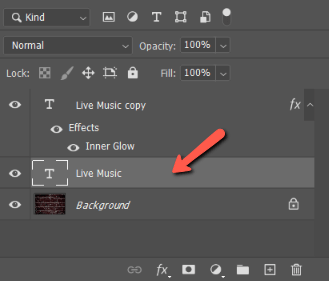
Now let’s dress it up. With the text layer highlighted, hit Ctrl + J or Command + J on the keyboard to copy the layer.
Double-click on the copied layer to open the Layer Styles panel. Alternatively, you can click the fx button at the bottom of the Layers panel.
In the Layer Style panel, click Inner Glow and you’ll see the settings appear in the middle of the box. Make sure the checkbox is marked to apply the effect.
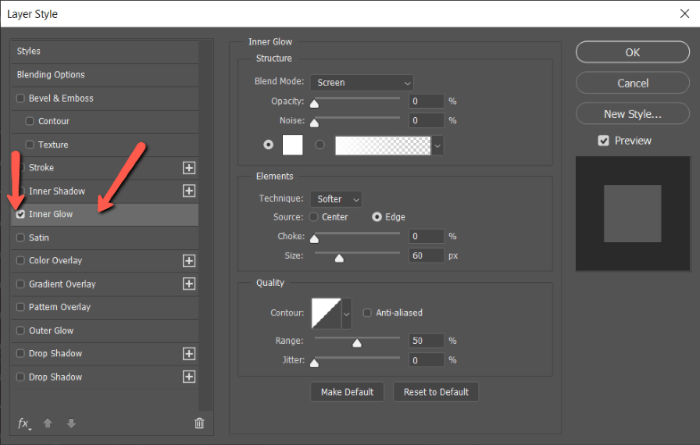
Adjust the settings to your liking. I’m going to stick with a Normal blend mode, then bring the opacity up so I can see the effect. Choose a color by double-clicking on the color swatch. White or a lighter version of the color you chose for your text is great for this.
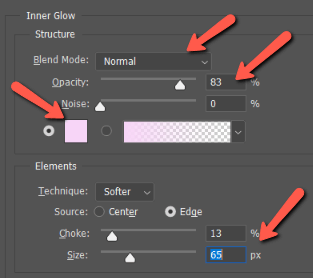
Adjust the size and Choke of the effect until you like how it looks for your text. You can try my settings but yours may be different depending on the size of your text.
Step 3: Add an Outer Glow
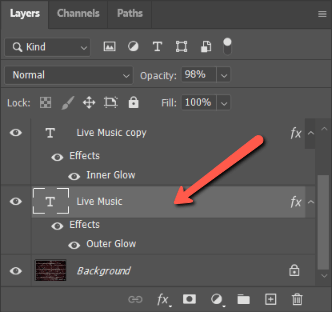
Now we want to add an outer glow to the original text layer. The inner glow has to go on top so we could see it and the outer glow will go on the text layer underneath, but we will still see it around the edges of the text.
Click on the original text layer to highlight it and open the Layer Style panel once again.
This time, we’ll select the Outer Glow. Again, make sure the box next to the style name is checked to apply the effect.
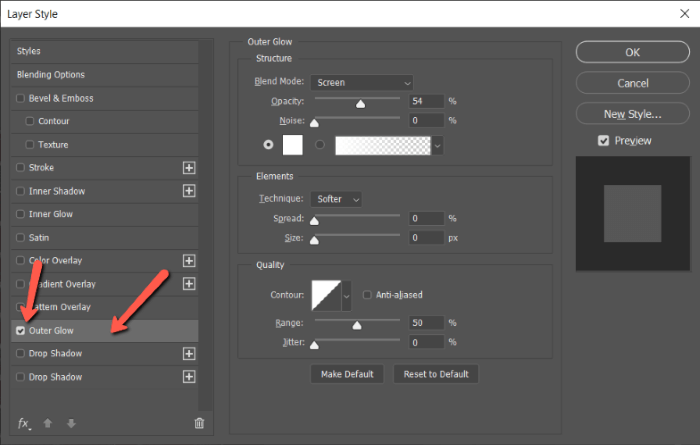
To blend the glow into the background and make a realistic glow effect, change the blend mode to Vivid Light. Double-click on the color swatch to pick the color you want. I’m going with a darker shade of a similar color.

Here’s what we’ve got so far.

It’s looking pretty good, but let’s tune it up a touch more.
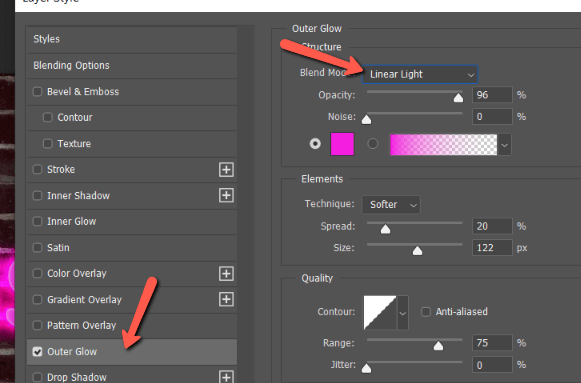
Step 4: Duplicate the Outer Glow
Depending on your settings, this step may be optional. I think I could clean up the look a touch more for this example.
Select the text layer with the outer glow in the Layers panel.
Hit Ctrl + J or Command + J to copy the layer. Double-click on the newly copied layer to open the Layer Style panel once more. Choose Outer Glow and change the blend mode to Linear Light. The rest of the settings can stay the same.
Here’s the result! Pretty nifty, isn’t it?

Interested to learn more fun things you can do in Photoshop? Check out our tutorial on how to make circular text here!
About Cara Koch