A great deal of attention is given to creating selections in Photoshop, but what about filling your selection once you’ve made one? As I say in every other Photoshop tutorial article, there are always quite a few different ways to complete your edit, and filling selections with color is no exception.
Creating fills is a basic Photoshop process that you’ll be using again and again, so it’s a good idea to get familiar with all the different methods before you start building bad habits! Here are four of the most popular and useful ways to fill a selection in Photoshop.
Note: the tutorials and screenshots below are from Photoshop CC for Mac, Windows or other versions can look different.
Table of Contents
1. The Fastest Way to Fill a Selection in Photoshop – Shortcut!
Many new Photoshop users resist learning keyboard shortcuts, but they can dramatically speed up your workflow, so it’s a good idea to learn as many as you can!
If you want to quickly fill your current selection with your current foreground color, you can use the Photoshop fill shortcut Option + Delete (use Alt + Delete on Windows).
If you want to quickly fill your current selection with your current background color, use the keyboard shortcut Command + Delete instead (use Ctrl + Delete on Windows).
For whatever reason, this shortcut isn’t listed in any of the menus, but it works! Depending on your keyboard layout, you can also substitute the Backspace key for the Delete key, and you’ll get the same results.
Confusingly, this shortcut will not work with the Delete key located in the number pad area of your keyboard – although some modern compact keyboards no longer include this section to save on space and materials.
This technique is best used for filling large sections with a new solid color, usually right after you’ve used Command + A (or Ctrl + A) to select the entire layer.
2. Fill A Selection Using The Paint Bucket Tool
Another quick way to fill a selection is by using the Paint Bucket tool. The Paint Bucket tool is nested in with the Gradient tool and the 3D Drop Material Tool (which is soon to be removed as Adobe clears out Photoshop’s 3D features).
Switch to the Paint Bucket using the toolbox or the keyboard shortcut G – continue pressing the G key to cycle between the three grouped tools.
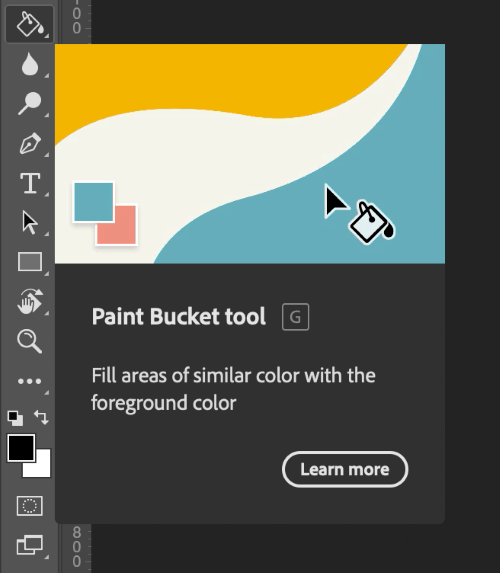
Once you’ve selected the Paint Bucket tool, simply click anywhere inside your selection to fill it with your currently selected foreground color.
The Paint Bucket tool can also be set to fill your selection with a pattern using the Options bar. Open the dropdown menu and select Pattern, then select your chosen pattern from the available options. Click anywhere inside your selection to apply the pattern.
3. Using The Fill Command
The Fill command offers a wide range of different ways to fill your selection and a few customization options for each type of fill. You can fill it with your current foreground color, and current background color, or select an entirely new color.
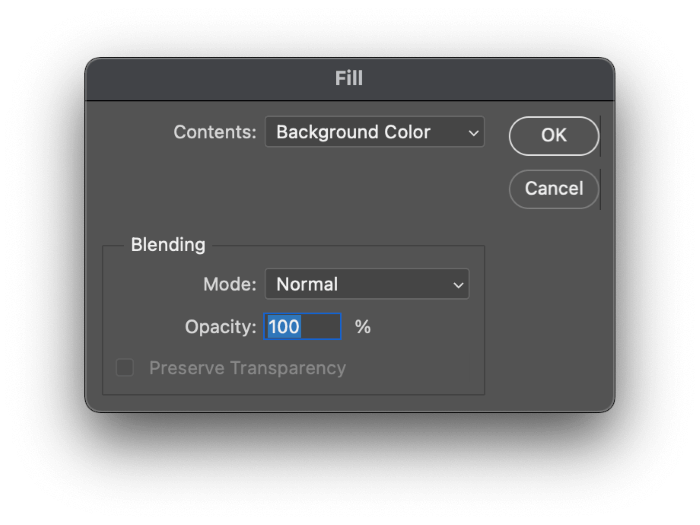
You can also fill your selection with a pattern, or a previous history state, or even allow Photoshop to create new content automatically by selecting the Content-Aware option.
But if you want to try the content-aware option, it’s probably better to use the alternate method below for additional customization options.
Last but not least, there are presets for pure black, 50% neutral gray, and pure white.
It’s possible to launch the Fill command in a surprising number of ways. You can press Ctrl + Delete on a Mac, but you’ll have to use Shift + Delete on a PC.
You can also use the universal shortcut Shift + F5, which works on both platforms or simply open the Edit menu and select Fill.
Last but not least, you can right-click on your selection marquee in the main document window and select Fill from the popup menu.
However you get there, they all provide the same functionality, so choose the method that works best for you.
4. Using The Content-Aware Fill Tool
One of the coolest features found in Photoshop is the Content-Aware Fill tool. As you might guess from the name, Photoshop can synthesize entirely new image content using the rest of the pixels in your image as a base.
This doesn’t work perfectly in every situation, but it’s always worth a try. Even if Photoshop doesn’t create a perfectly undetectable fill, it can provide a solid base to work from, even if it needs a bit of polishing using the Clone Stamp tool around the edges.
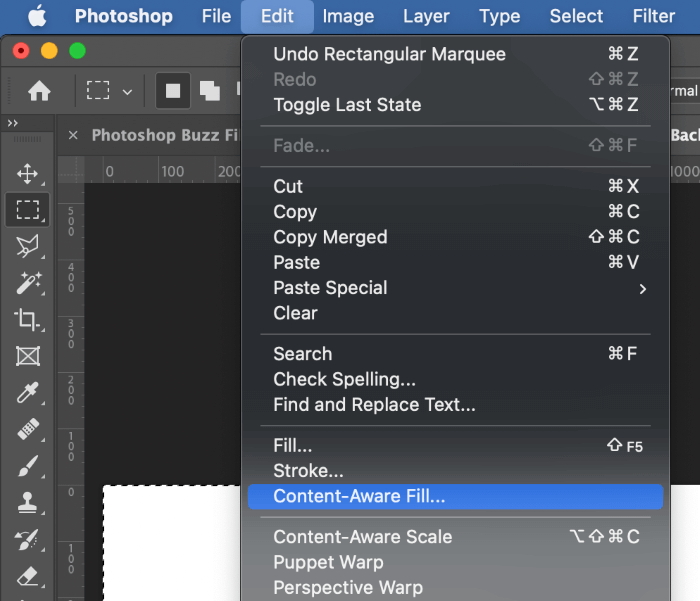
It’s possible to create a content-aware fill using the basic Fill command that I mentioned in the previous section, but the latest versions of Photoshop now come with a dedicated Content-Aware Fill workspace that gives you a lot more control over the results.
To load it, open the Edit menu and select Content-Aware Fill…
Modeled along the same lines as the Select and Mask workspace, the Content-Aware Fill workspace allows you to define which areas of your image will be used as sources for generating new synthetic content using brush tools.
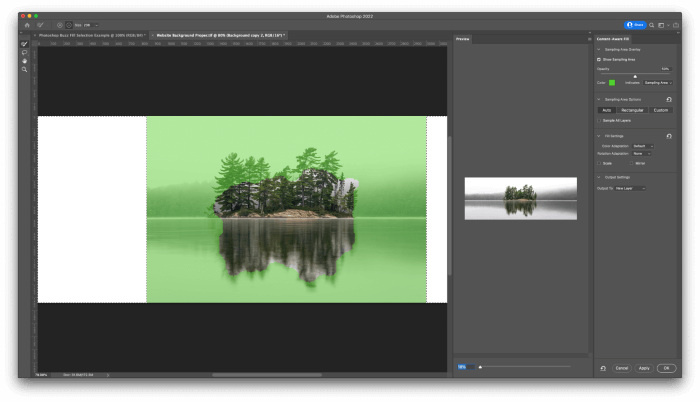
You can also customize some basic options about how color is used and where the pixel output should be placed, including the option to automatically output it in a new layer, which is very handy for non-destructive editing.
A Final Word
That was a bit of a long list, but we’ve now covered everything from the fastest to the most useful ways to fill a selection in Photoshop. Practice those keyboard shortcuts, because you’re probably going to find yourself using them quite a lot.
Happy editing!
About Thomas Boldt
John
Thanks for some ideas. But I could not find anything about how to write text in a new box created with the rectangle tool I want a soft white background in the box with a few sentences in colour. I’ve wrestled with this all afternoon and got precisely nowhere!
Regards,
June
Hi John, you can select the Type tool on the toolbar, click on the canvas to type in your sentences.