Why would you want a blurry picture? Aren’t you spending all your time trying to get crisp, tack-sharp focus in your images?
Yes. But Blur is an effective tool photographers use to manipulate the viewer’s eye.
Hey there! My name is Cara and as a photographer, I use blur in my images all the time. I usually create this in-camera by using a shallow depth of field to blur the background and draw the eye to my in-focus subject.
However, you can add blur in Photoshop to “fix” images where you missed the mark or add creative effects like motion blur to make a stationary object look like it was moving. You also might use blur to obscure parts of an image, such as a license plate or a child’s face.
All right, let’s dive into how to blur a layer or image in Photoshop!
Table of Contents
Step 1: Open the Image in Photoshop
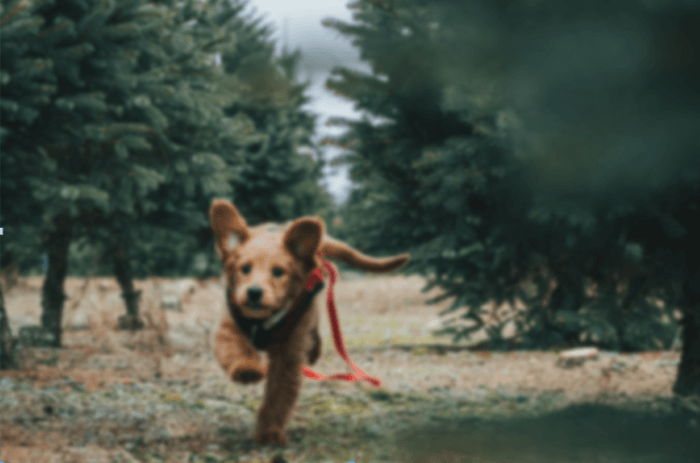
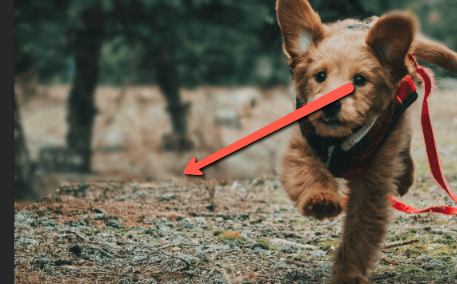
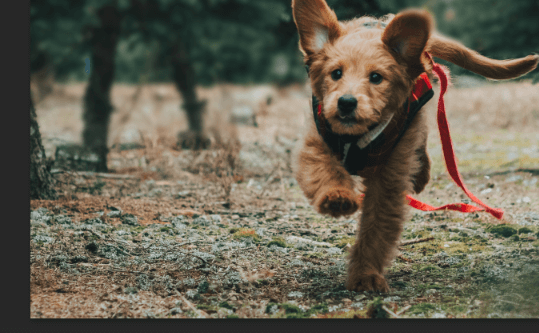
Today, we’ll work with this image. Notice that the photographer missed the focus a bit. The dog’s eyes aren’t in perfect focus, but the trees just behind him are in sharp focus. This confuses the eye because you don’t know where to look.
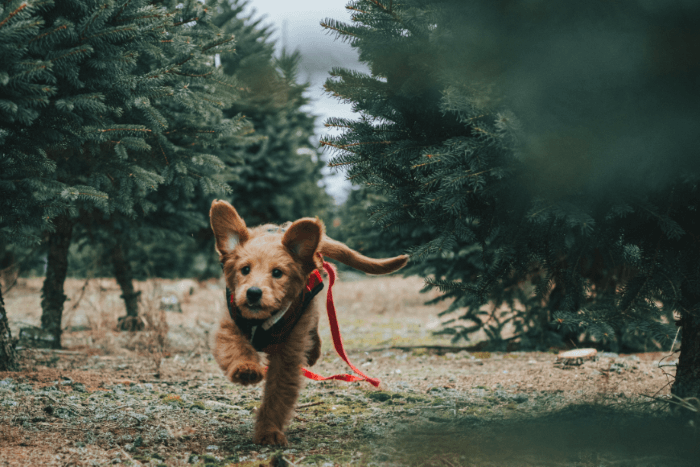
Let’s see what we can do to fix it.
We’ll start by hitting Ctrl + J (Command + J) to duplicate the background layer.
Step 2: Blur the Duplicated Layer
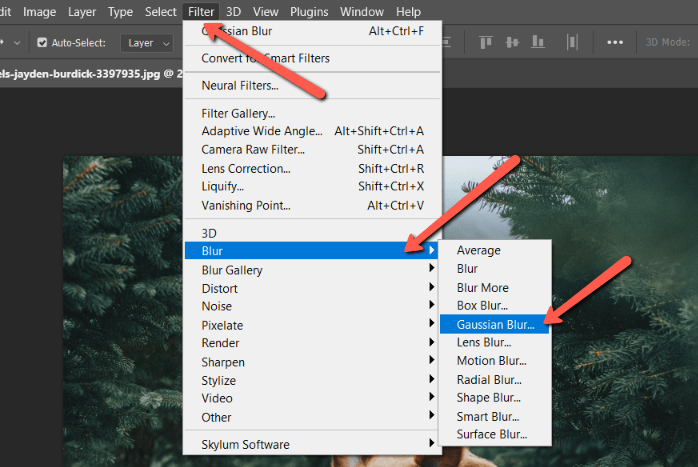
Blur this entire layer by going to Filter in the menu bar, hovering over Blur, and choosing Gaussian Blur.
This box will pop up which allows you to change the strength of the effect. Slide the bar to the left to lessen the effect and to the right to strengthen it. You can also choose a pixel count and type it in the box.
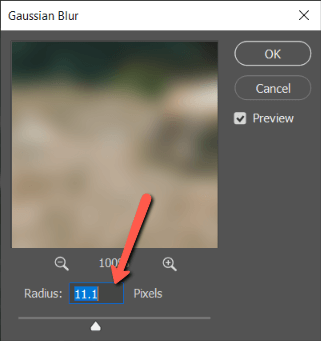
Click OK when you’re happy with the adjustments.
Step 3: Mask and Invert
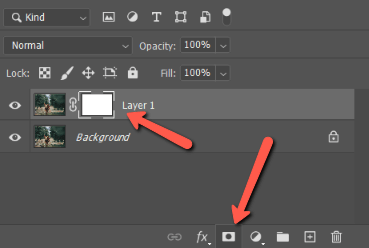
Your entire image is blurred at this point, which we don’t want. Create a layer mask by clicking the layer mask button at the bottom of the Layers panel.
Invert the mask, or “hide” the effects of your blur layer, by hitting Ctrl + I (Command + I) on the keyboard. Make sure you have the layer mask selected when you do this. If the picture thumbnail is selected, you’ll get this weird psychedelic thing you don’t want.
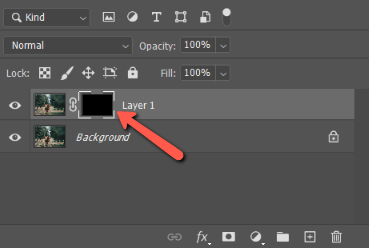
The layer mask will turn black to indicate it has been inverted. The image in your workspace will become clear once more as the blur effect is moved behind the mask.
Step 4: Paint in the Blur
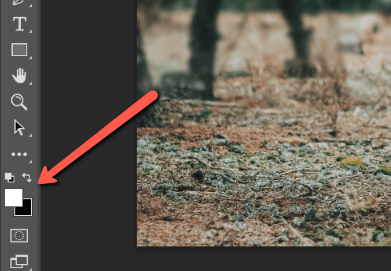
Switch to the Brush tool by hitting B on the keyboard. Make sure the foreground color is set to white and start painting the image where you want it to be blurry.
To better blend the blur and make it look more realistic, lower the flow of your brush as you work in transition spots. You’ll find this option in the toolbar.

Not sure what I mean? Check out this example. If I paint the blur at full strength, there’s a hard line screaming to the viewer that you’ve altered the photo.
But when I turn the flow down and work at it gently, I don’t get that hard, obvious line.
And there it is!
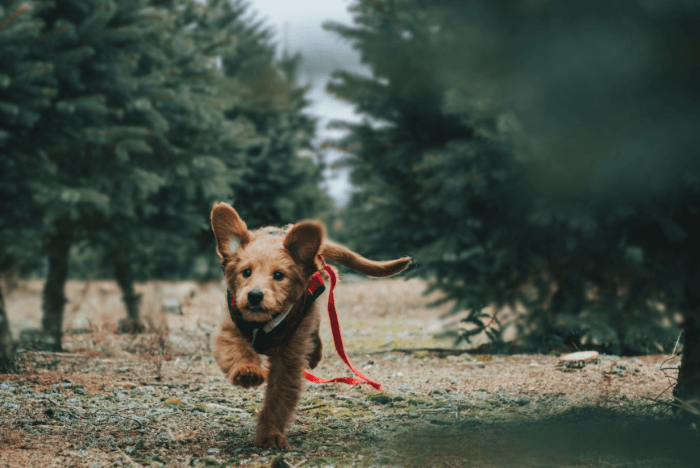
The dog’s eyes are still slightly out of focus, we haven’t changed that. But now, because the trees are more blurry, comparatively, the dog looks more in focus. Plus, your eye understands better where you’re supposed to look.
What do you think? Did adding blur to the background “fix” the image? Obviously, it’s not perfect, but it’s a great trick to enhance an image that didn’t turn out the way you expected.
Give it a try! And check out more of our informative tutorials like how to copy and paste layers.
About Cara Koch