
Being able to move photos from Photoshop to Lightroom is an important part of your workflow. Though recent updates to Lightroom have made the program even more powerful, there are still certain things you can do best or only do in Photoshop.
But once you’ve made your edits, you need an easy way to export the image back to Lightroom.
Hey there, I’m Cara! I process hundreds of images each week as a professional photographer, so I’m a big fan of anything that’s quick and easy. And switching between Photoshop and Lightroom is just that – as long as you have it set up correctly.
So let’s look at what you need to know!
Note: I use the Windows version of Photoshop. If you are using a Mac, the workspace will look slightly different from the screenshots displayed here.
Table of Contents
2 Ways to Export Images from Photoshop to Lightroom
There are two methods for exporting images from Photoshop to Lightroom. Which one you use depends on where the photo came from.
If you originally exported it to Photoshop from Lightroom, simply save the image. It will automatically go back to Lightroom and create a new photo as part of a stack with your original image in Lightroom. Your Lightroom preferences must be set correctly for this to work properly.
If you opened the photo originally in Photoshop, exporting to Lightroom requires a little more work. However, once you understand the process, it only takes a couple of clicks and you’re done.
So let’s dive in and examine what you need to know!
Exporting an Image from Photoshop Back to Lightroom
Lightroom has a handy feature that allows you to easily export images to Photoshop. You can make edits and then quickly pop it back over into Lightroom and continue editing without missing a beat.
Export from Lightroom to Photoshop
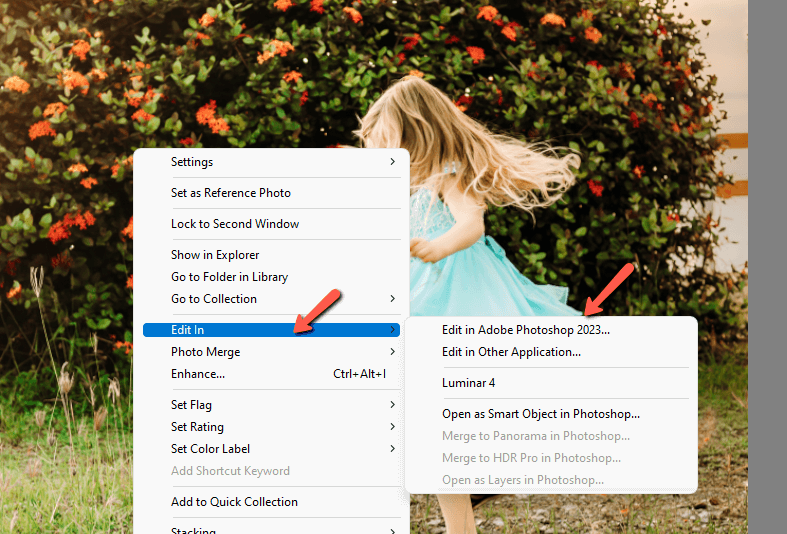
To access the feature, simply right-click on your image. Hover over the Edit In option and choose your version of Photoshop from the menu that appears. You can also press Ctrl + E or Command + E on the keyboard as a shortcut to the feature.
If you have already applied edits in Lightroom, you can choose to move them to Photoshop or not. After clicking on Photoshop, this box will appear.
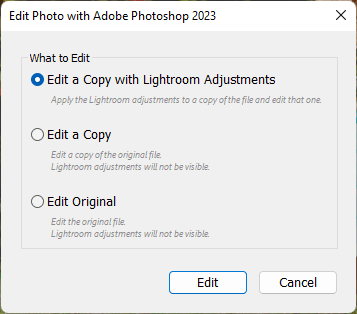
Choose the option you want and click Edit. Your image will then automatically open in Photoshop.
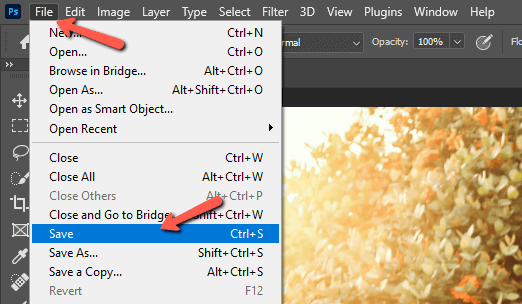
Once you’ve made your edits, you can simply save the image by pressing Ctrl + S or Command + S or going to File and choosing Save.
Photoshop will move the image back to its original location (Lightroom) following whatever parameters have been set. So you need to make sure those are set correctly.
To do this, let’s go back to Lightroom.
Set Lightroom External Editing Preferences
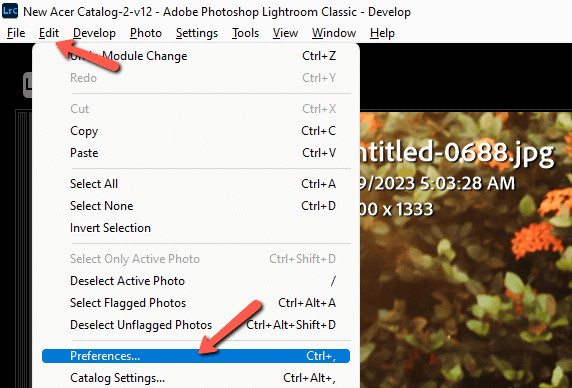
Go to Edit and choose Preferences.
Click the External Editing tab at the top of the window that appears. Notice the top section is titled Edit in Adobe Photoshop 2023. You can set the dropdown menus to govern the photo quality of the image when you export.
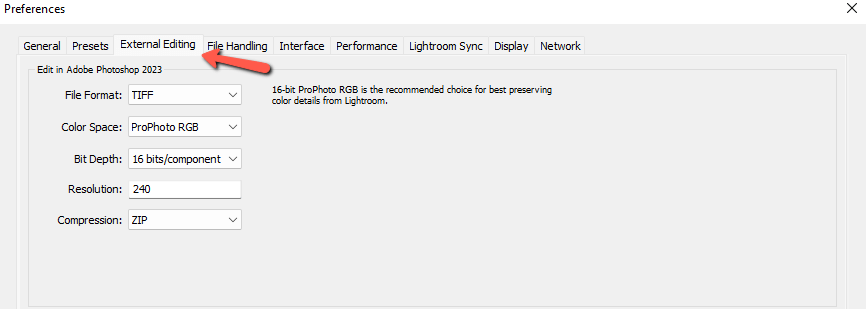
If you don’t know how to set them, leave them on the default or set them to what I have here in the example.
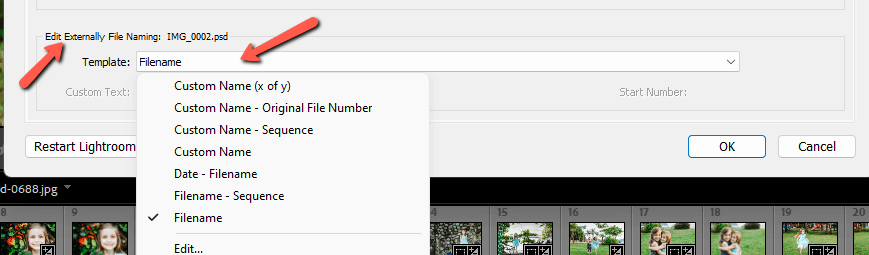
Before you go, check out the very bottom of this window. There’s a section called Edit Externally File Naming.
When Photoshop exports the image back to Lightroom, it creates a new version of the image as a TIFF (or PSD file depending on the File Format you chose in the previous section). It also has to give that file a name, which is what you’re determining here.
As I’m working on a photo shoot, I want the image to stay in the correct order with my other images. Keep in mind that Photoshop will always bring it back and place it in a stack with the original image.
But if the name is different, when you export several images in your shoot at once from Lightroom, the Photoshop-edited image will appear out of order. Thus choose Filename so the TIFF file gets the same name as the original image.
Of course, choose the naming strategy that works for your workflow. Once this is set correctly, all you have to do is save your image in Photoshop and you’re done.
Exporting an Image from Photoshop to Lightroom
What if you wanted to export an image from Photoshop to Lightroom that didn’t come from Lightroom? It isn’t as easy as saving the image, but it’s still pretty simple. Let’s take a look at the process.
Step 1: Save as a Copy
Remember that files in Lightroom aren’t actually saved in Lightroom. They are saved on your computer and Lightroom just accesses the file and attaches a sidecar file to make edits.
So if you want to export the image from Photoshop to Lightroom, the first step is to save the image to your computer in a handy location. Ideally, you should save it to a folder that is already synced with Lightroom.
In Photoshop, go to File and choose Save a Copy.
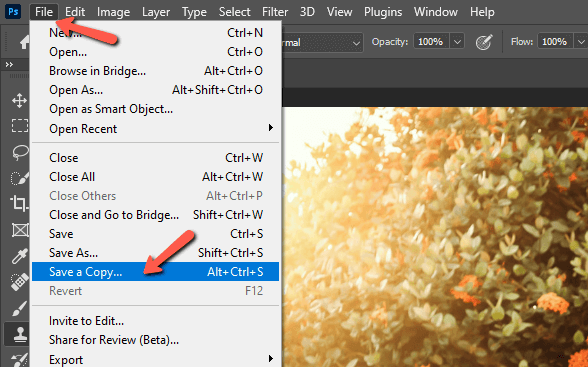
Pick the file format you want to use. TIFF is usually the best choice for retaining all the photo information as you move between the two different programs.
Then navigate to the folder where you want to save the image and click Save.
Step 2: Import the Image into Lightroom
You have two options for importing the image into Lightroom.
The easiest method is to sync the folder where you saved the image with Lightroom. This only works if you saved the Photoshop image in a folder already synced with Lightroom.
In the Library module of Lightroom, simply Right-click on the folder where you saved the Photoshop image. Choose Synchronize Folder from the menu that appears.
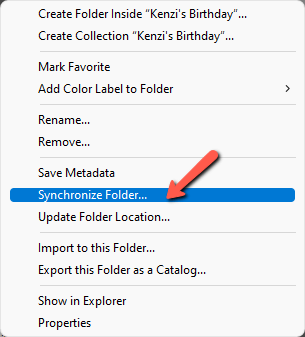
Lightroom will automatically pull in any new images in that folder, including the one you just placed there from Photoshop.
If the folder was not already synced with Lightroom, you’ll have to import it as normal. Click the Import button at the bottom left of your workspace.
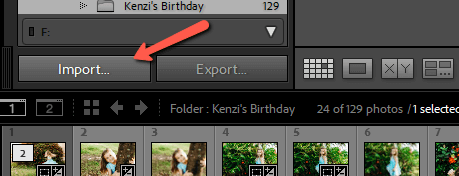
Go to wherever you saved the Photoshop image on the left and import it to your chosen folder in Lightroom as normal.
And there you have it! Exporting images from Photoshop to Lightroom is a piece of cake – as long as you keep track of where you’re saving your images. Curious about working with files from other programs in Photoshop? Check out how to correctly export and use Illustrator files in Photoshop here!
About Cara Koch