Ready to make your own awesome composite images? An important step is learning how to key out a color in Photoshop.
This technique is useful when you’re taking pictures that you know you’ll be cutting out later. You photograph your subject against a solid background and then key out the color in Photoshop.
Hey there! I’m Cara and though I think Photoshop is fun and everything, I’m not a fan of wasting time on the program. Clients don’t pay me for fiddling around.
So when I need to photograph something I’m planning to cut out, I’ll photograph it against a solid color background and use this technique. If you’re looking to use the green screen in Photoshop, you’re in the right place.
Let me show you how it works!
Table of Contents
A Word About Your Background Color
Many (newer) photographers think that it’s all about the green screen. The reality is that the background simply needs to be a different color than anything in your image or there is plenty of contrast.
Green is often the color of choice because people aren’t green and they don’t often wear green colors. However, any solid color will work as long as the same color doesn’t appear in what you are photographing.
In fact, other solid colors like white or gray tend to work better than green. Photographing against a green background can leave a green color cast on the subject, which is highly undesirable.
Kindly note that the screenshots below are based on Photoshop CC for Windows. If you are using the Mac version, they’ll look slightly different.
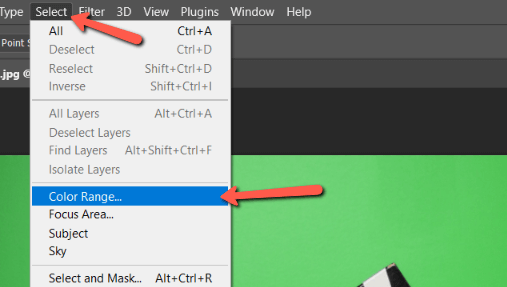
Step 1: Open the Color Range Tool
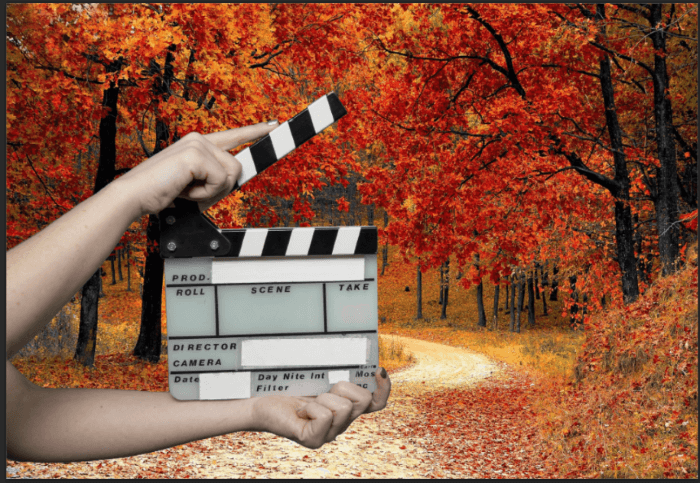
For this example, I’ll go ahead and use this image. That way you can see that color screen that I’m talking about.

Let’s start by going to Select and choosing Color Range.
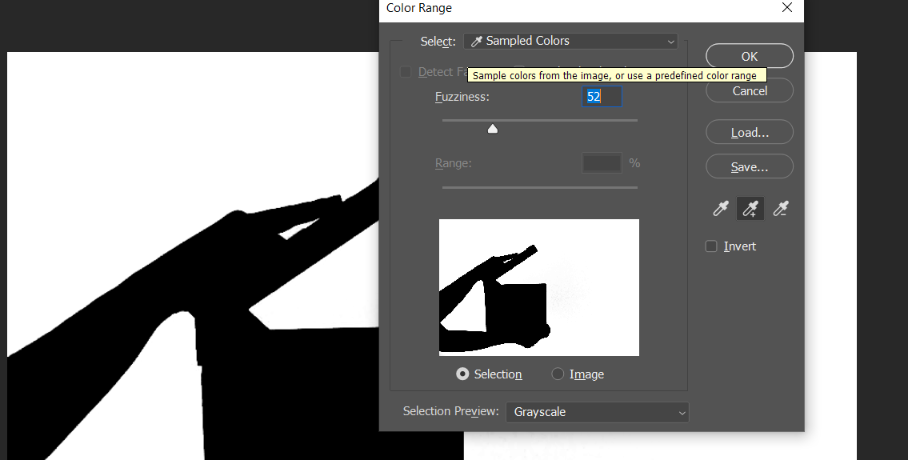
Step 2: Make Your Selection
In the box that opens, you’ll see your image in grayscale. The first time you open it, the image will probably be mostly black. White is the selected area and black is unselected.
With this tool we want the subject to be completely black and the background completely white. In other words, we want to eliminate gray as much as possible.
Notice that your cursor is a color picker. Click somewhere in your image that you know is the color you want to remove.
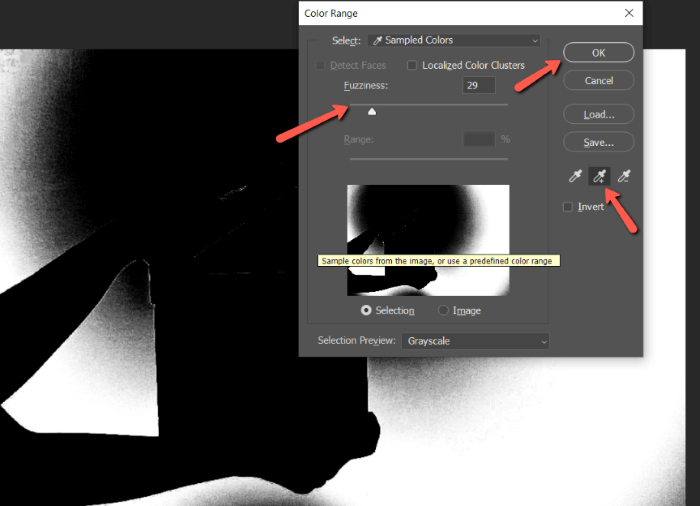
Your subject will start to appear as you can see in my screenshot. Make sure to check the color picker with the plus sign so you can add it to your selection. Otherwise, every time you click, you’ll just get a whole new selection based on one click.
If you need more colors included in the selection, move the fuzziness slider to the right. If you want a stricter selection range, move it to the left.
When you’re happy with your selection, click OK.
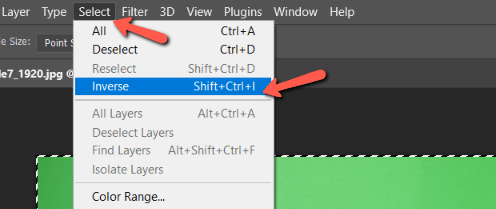
Step 3: Invert the Selection
Notice that the background is selected rather than the subject. You can tell because of the marching ants around the edge of your canvas.
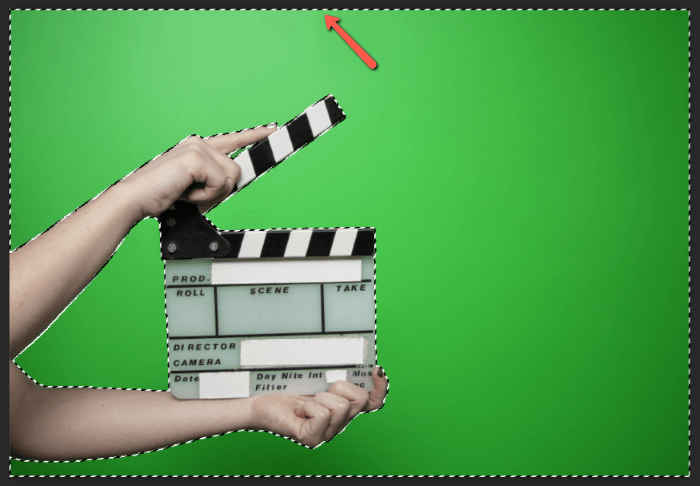
To fix this, invert/reverse the selection by pressing Ctrl + Shift + I or Command + Shift + I. You can also invert through the Select menu by choosing Inverse.
The inverted selection should show up around just your subject like this. Notice there are now marching ants around the edge?

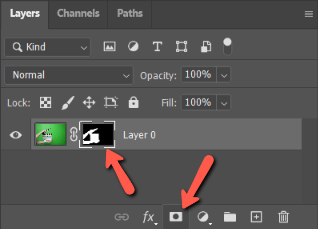
Step 4: Mask Out the Background
All that’s left is to remove the background. Press the Mask icon at the bottom of the Layers panel. It looks like a rectangle with a circle inside it.
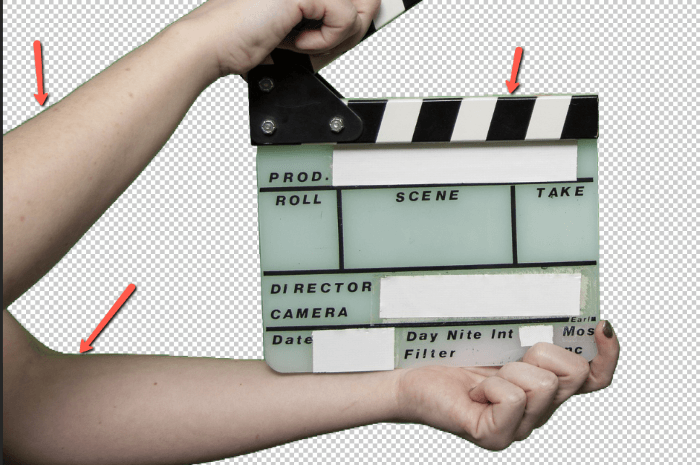
The mask will be applied and your background will be replaced by Photoshop’s checkerboard pattern indicating the transparency.
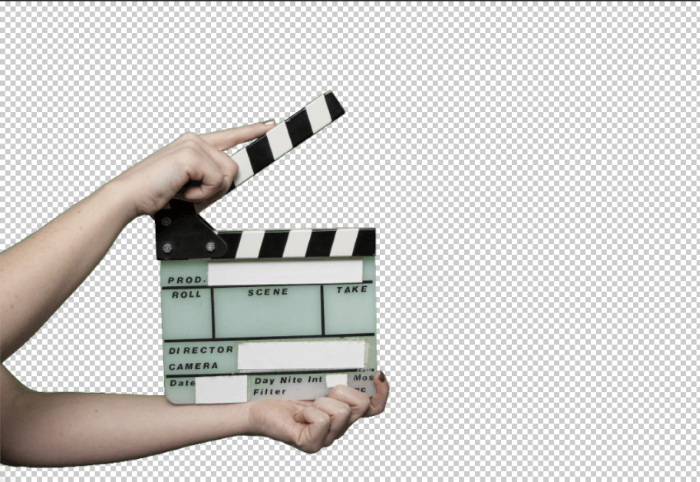
That was easy!
Or perhaps too easy. This image isn’t too bad, but if you look closer, you’ll notice a slight color cast on the arms and a little bit on the clapperboard.
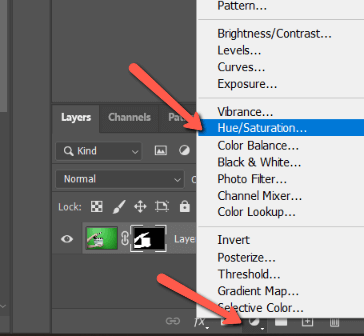
Step 5: Remove the Color Cast
The Hue/Saturation tool provides us with a simple way to remove the color cast. Click the half-filled circle Adjustment Layer icon at the bottom of the Layers panel. Choose Hue/Saturation from the list.
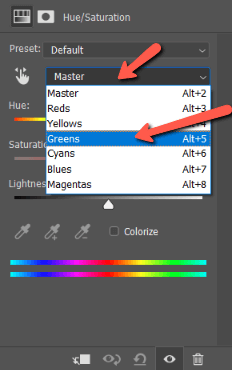
In the box that opens, click Master to open the dropdown box and choose the color range for the color you want to remove. In this case, greens.
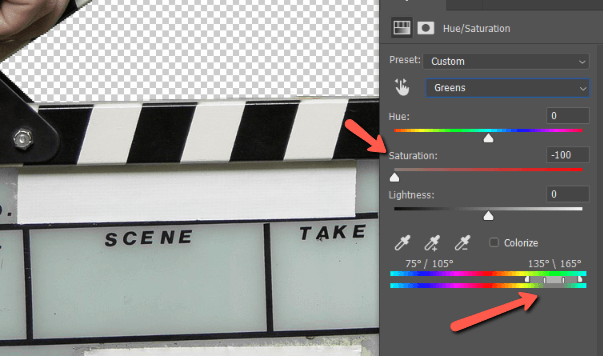
The program will select the greens in the bars at the bottom of the panel. Grab the saturation bar and slide it to the left to desaturate the color. Notice the color cast has disappeared from the clapperboard.
Now you are free to drop in another image to replace the background or do whatever you want with your subject.
Boom! You’re welcome!
Have fun with this new technique and let us know what you come up with in the comments! Most importantly, get out there and create!
Interested in more Photoshop techniques? Check out our other tutorials, such as how to put a border around an image here!
About Cara Koch