
Wouldn’t it be nice if you could just magically erase the background from behind your subjects? As with many things in Photoshop, the seemingly impossible becomes possible and relatively easy to do all at the same time!
Hey there, I’m Cara and I’m here once again to show you an amazing trick in Photoshop. The Background Eraser tool makes it possible to make seemingly impossible cutouts with a few swipes of your brush.
The tool does require a little patience, but with the right settings, you can make very precise selections around your subjects. Even around tough elements like hair! So let’s look at how to use the Background Eraser tool in Photoshop.
Note: I use the Windows version of Photoshop. If you are using a Mac, the workspace will look slightly different from the screenshots displayed here.
Table of Contents
Background Eraser vs the Magic Eraser Tool
To find the Background Eraser tool, go to the usual place – the toolbar on the left. Your Eraser tool will probably be on top so hold and click or right-click to open the flyout menu.
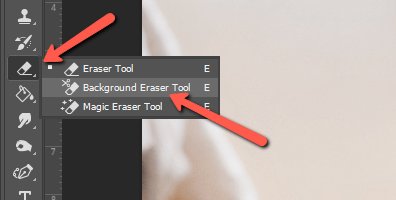
Now, you’ll notice there are two other eraser tools, the Background Eraser and the Magic Eraser. And that might pique your interest a bit. Magic Eraser. That sounds easy!
And it is. With just one click of the Magic Eraser, any similar pixels anywhere in the image are instantly erased. This is perfect for removing mostly solid color backgrounds that are a different color from your subject.
However, it can get tricky and because the tool has limited settings, you can’t get very precise with it.
…and that’s when you switch to the Background Eraser tool. It might take a few extra minutes, but when used correctly, you can cut out even a complicated subject from your background.
Keep in mind that you can use them together for some images. You can use the Magic Eraser tool to remove large portions of the background and switch to the Background Eraser to fine-tune.
However, both tools work destructively. If you accidentally erase something with the Magic Eraser that you didn’t intend, you can’t go back and fix it later. For this reason, it can be better to stick with the Background Eraser from start to finish, though it takes a few minutes longer.
So, with that in mind let’s learn how to use the Background Eraser!
Background Eraser Tool Settings
If you don’t know how to configure the settings, using this tool becomes significantly more frustrating. So let’s look at the settings and understand what each one controls.

Brush Settings
You can access the brush settings by clicking the little down arrow to the right of the brush tip preview in the Options bar.
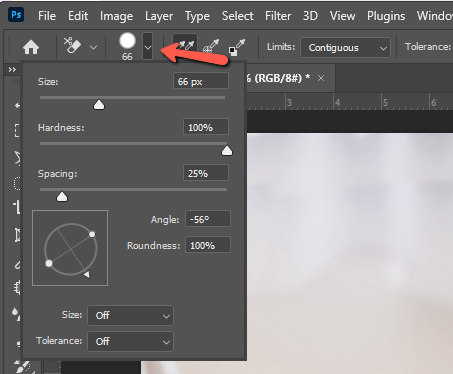
Choose the size according to your image, and you’ll probably need to change it as you work. To change the brush size without coming up here and choosing a new value, use the Bracket keys [ ] on the keyboard. The left bracket key shrinks the brush while the right bracket enlarges it.
You can change the Hardness of your brush, but for erasing you’ll pretty much always keep it at 100%.
The Spacing affects how quickly new brush strokes are applied as you drag across the image. Keep this value low or there will be unwanted gaps between brush strokes.
You can also change the Angle which doesn’t matter much unless you change the Roundness. Reducing the roundness changes your brush to an ever-skinnier oval until you end up with a straight line at 0%. Most of the time 100% is just fine.
Sampling
The next three icons control the tool’s sampling.
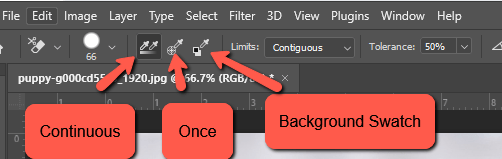
The first option is continuous. As you move your cursor around, the program will constantly sample the color under your mouse. This is helpful for complex backgrounds with different colors. However, if you move into the subject, it will erase the subject too.
Once is the option that limits the sampling to the first point you click on. Photoshop will then erase the surrounding pixels that match the color you click. It will do nothing to the pixels that don’t fit the parameters. This is super helpful for hair as we’ll see in a moment.
The Background Swatch option lets you set a background color in the toolbar and the tool will only erase that color.
Limits
The Limits box gives you three options – Discontiguous, Contiguous, and Find Edges.
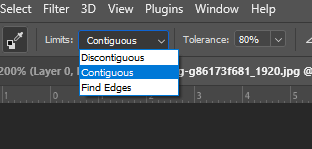
Discontiguous will allow the tool to erase any color pixels within the target area that match the color parameters you’ve set. But if you set the option to Contiguous, only pixels that are touching each other will be erased.
Find Edges is useful for finding the edges of an object and helping to keep them smooth.
Tolerance
The Tolerance percentage allows you to control how close pixels have to match the selected pixel. A low percentage means the colors must be nearly the same. A higher percentage will include more shades of the same color in the definition.
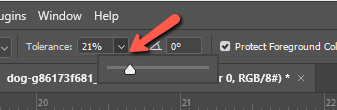
Thus, for working carefully, you need to lower the percentage so Photoshop will only erase pixels that are very close to the selected pixel. However, this is maddening when you want to work over a larger area and precision isn’t strictly necessary. So you can increase this value.
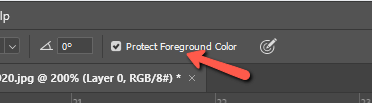
Protect Foreground Color
To further protect your subject, you can set the foreground color to your subject’s color and check this box.
Pen Pressure
This last little icon controls the Pen Pressure if you’re using a tablet and pen rather than a mouse. Click this option to control the Opacity of the tool based on the pressure of your pen.
Using the Background Eraser Tool
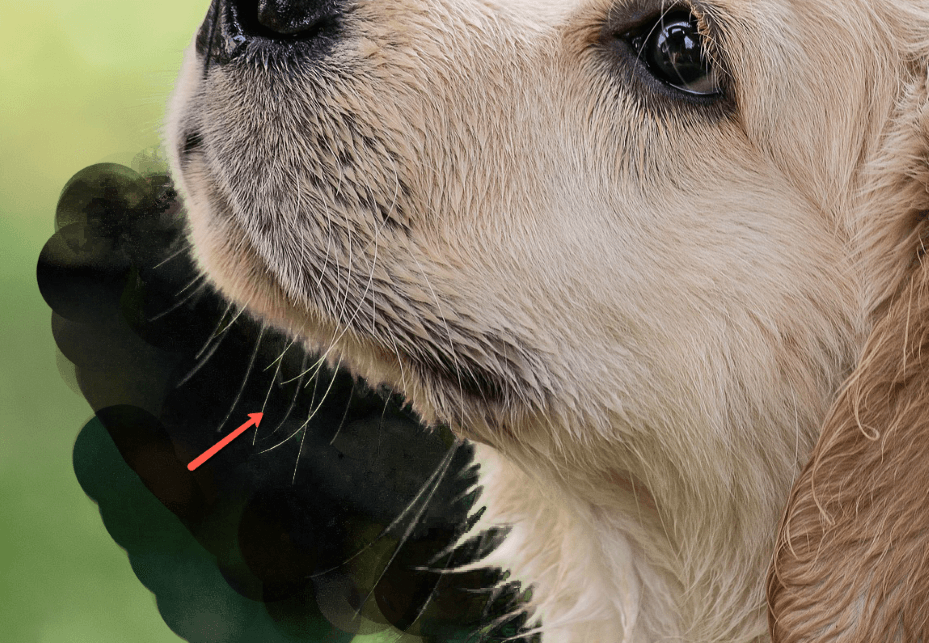
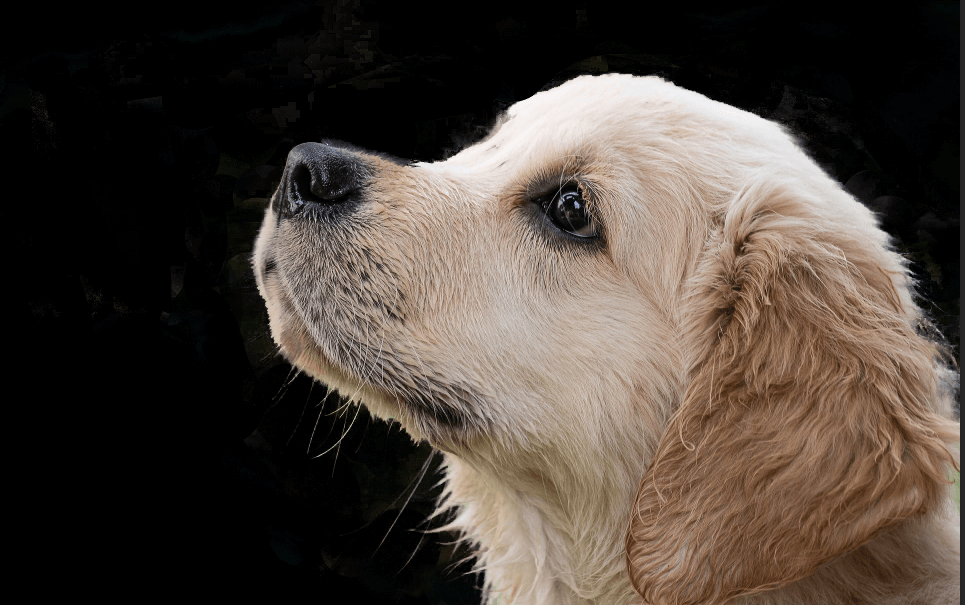
Now that we know how the settings work, let’s look at this tool in action. We’ll look at this adorable picture of a puppy I downloaded from Pixabay.com.
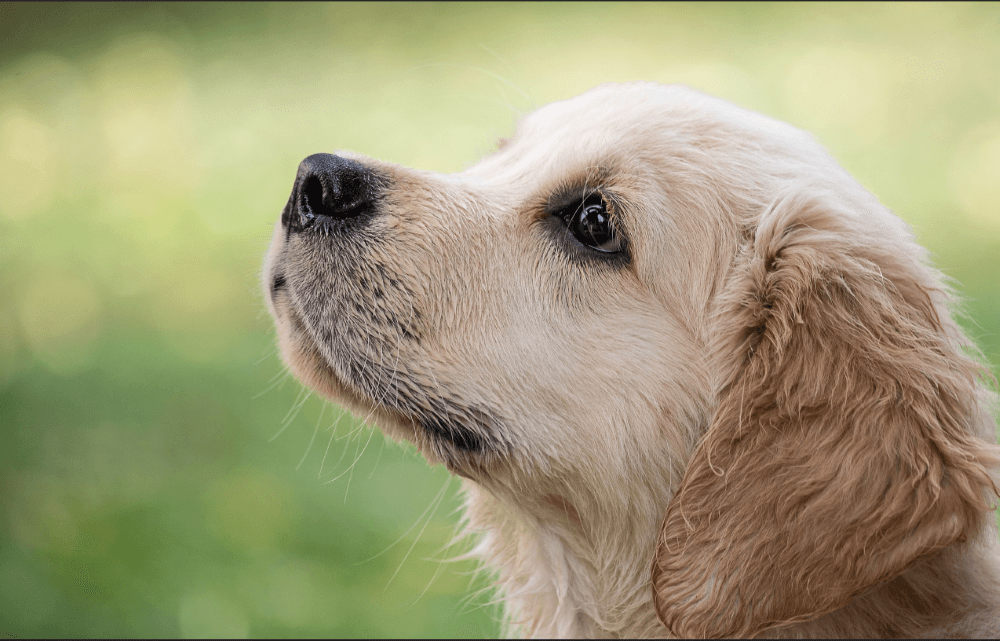
Notice he’s got some thin whiskers on his chin and the wispy hairs around his throat. We’re going to see if we can remove the background while conserving those.
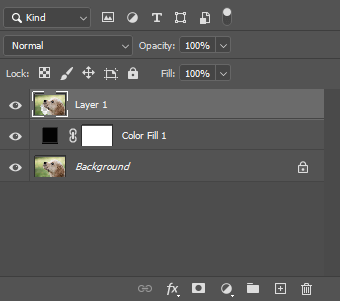
Just to show you the setup real quick, I duplicated the background layer by pressing Ctrl + J or Command + J. Then I added a black sold color adjustment layer between them so I can see better.
The wispy hair will be hard to see against the checker pattern that Photoshop uses for transparency.
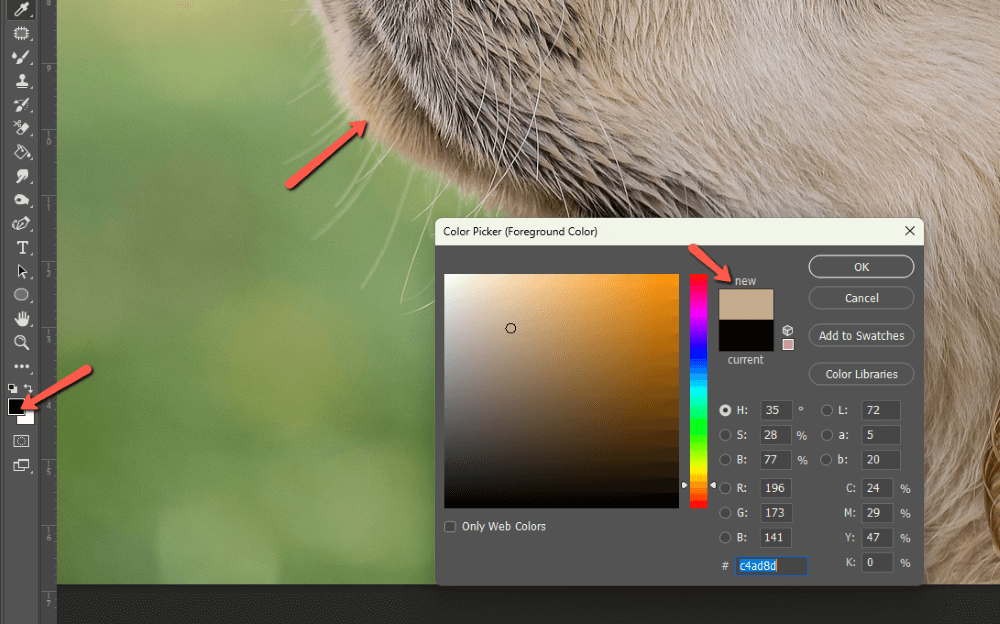
Now, let’s click the foreground color to open the color picker. Click on the dog’s chin to set the foreground color to his fur. Press OK.
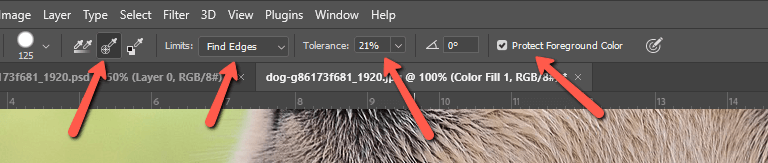
Now let’s choose our settings. Make sure to check the Protect Foreground Color. We’ll use Once for sampling and set the limits to Find Edges. Let’s start with the Tolerance of around 20%. You may have to adjust this as you work.
Make sure that the top layer is selected in the Layers panel and start erasing.
Check it out! We’ve still got his hair! Working up here on the top of his head, we can also work around the hair to erase the background without losing the texture of his fur.
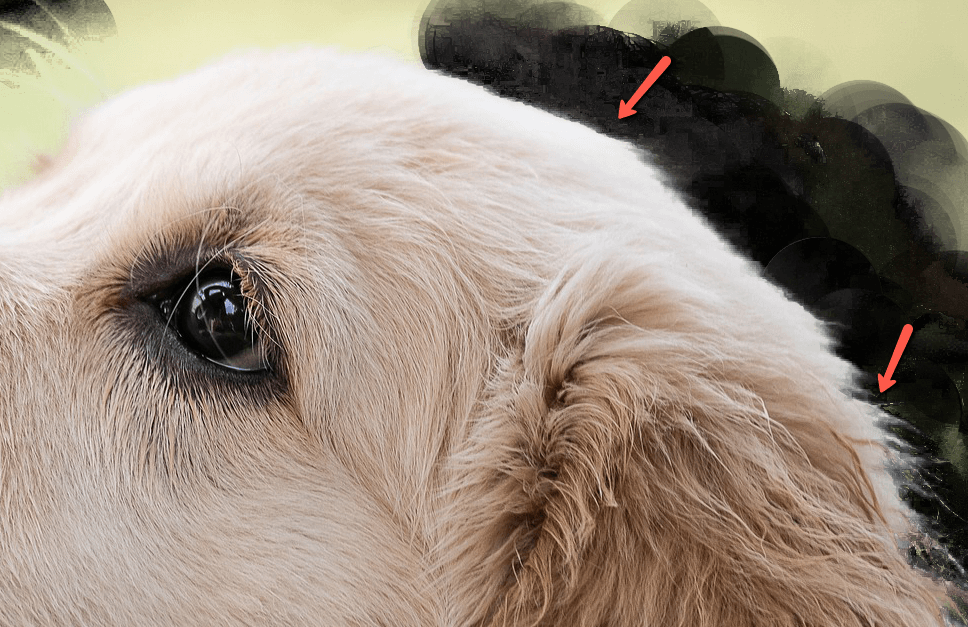
It will take a little time, but patience is all you need to erase this background. As you get farther away from the subject, you can turn up the tolerance so you can erase larger portions of the background at once.
Pretty nifty!
The Background Eraser tool is handy in situations like this where you need to work around edges that are hard to select. However, there are faster ways to select subjects that have more defined edges. Check out some of the selection tools and how they work here!
About Cara Koch