
Sometimes, no matter how narrow you set your aperture, you can’t get an entire image in tack-sharp focus. It’s a limitation of the camera that our eyes don’t have. Our eyes are constantly shifting focal points as they move through a scene, but the camera only gets one.
…unless you focus stack in Photoshop. Photo stacking in Photoshop basically gives your image as many focal points as it needs to get the whole scene in focus.
Curious about this trick? I’m Cara, photographer extraordinaire! Come along with me as I show you how easy it is to focus stack in Photoshop.
Note: the screenshots below are taken from the Windows version of Photoshop CC. If you are using the Mac version, they will look slightly different.
Table of Contents
Why Focus Stack an Image?
You may wonder why focus stacking is necessary in the first place? After all, if you want more of the scene in focus, all you need to do is close down the aperture.
However, in some scenes, it is impossible for the lens to get every part of the image in focus even when you close the aperture as much as possible. This happens a lot in macro photography when you’re dealing with tiny depths of field that are only a few millimeters thick.
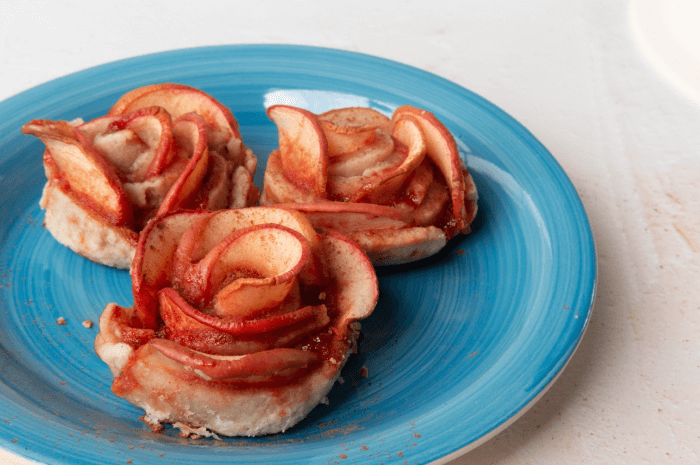
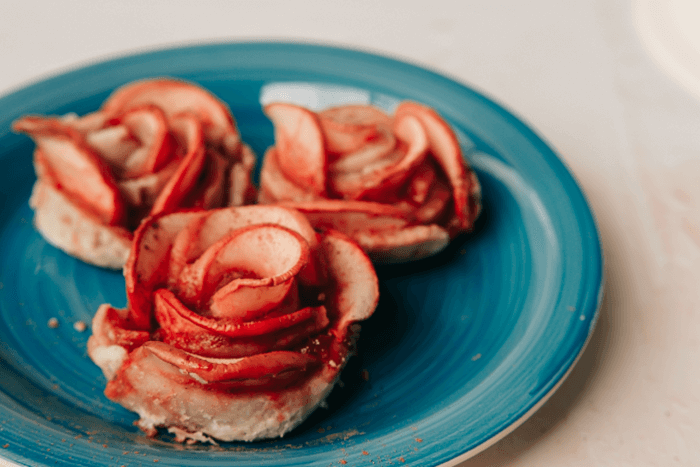
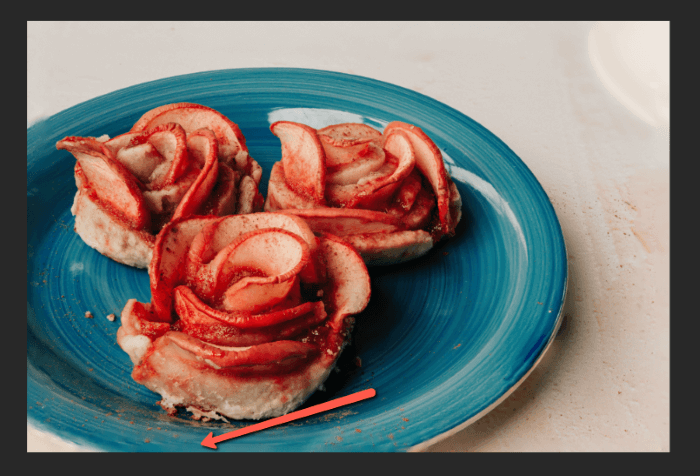
For example, in this image of apple roses that I made yesterday (they were delicious btw), I couldn’t get the entire scene in focus. Even when I stopped down my 50 mm lens to its max (f22), the back part of the roses was still out of focus.
Another reason might be because there isn’t enough light in a scene to stop down the aperture that far. Plus, the focus tends to get soft anyway when using the extreme ends of your aperture setting.
How to Focus Stack an Image in Photoshop
Focus stacking in Photoshop is really easy. The program pretty much does all the work for you. The real trick is in taking the photos correctly.
However, this isn’t a photography blog so I’ll just offer a few brief tips.
- Take a slightly larger image than you want so you can crop it later (I’ll explain why in a minute)
- Use a tripod: to align the images as much as possible
- Use a trigger or timer: to avoid camera shake and blur as much as possible
- Use manual focus: you need to choose the exact focus points you want rather than let the camera pick
- Take lots of images: more is better than less because you need to get every point in the image in focus in at least one image
For this image, I used 10 images to create the final image.
Step 1: Open the Images in Photoshop as Layers
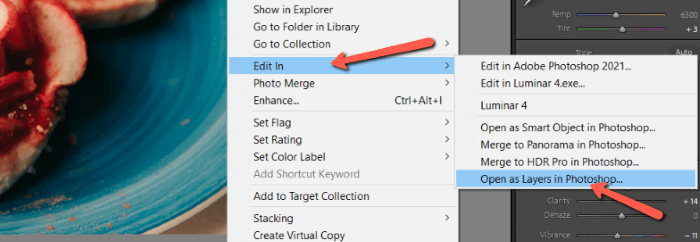
There are a couple of ways you can do this. I was working on them in Lightroom, so I opened them from there. Just highlight all the images you want to include. Then right-click on the image, hover over Edit In, and choose the Open as Layers in Photoshop option.
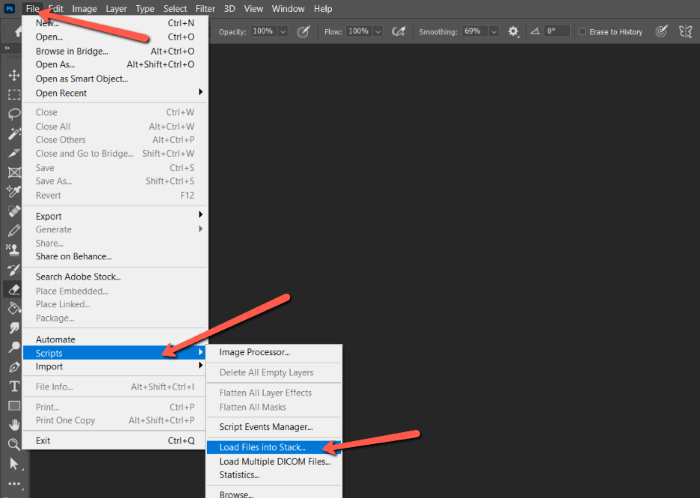
You can also do this in Photoshop. Go to File, go down to Scripts, then choose Load Files as Stack.
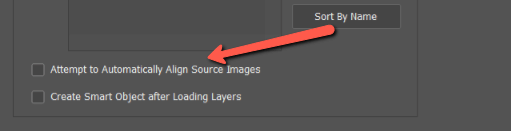
If you go this route, make sure to check the Attempt to Automatically Align Source Images box at the bottom of the window. Doing so will eliminate the next step.
Step 2: Align the Images
Say you took my advice and used a tripod to take your images. Assuming you didn’t move anything while you were shooting, all the images should be perfectly lined up. Right?
Wrong.
Unfortunately, there is a phenomenon known as focus breathing. As you adjust the focal point of the lens, the scale of the image changes slightly.
Here are my first and last images. The difference is slight, but the two images aren’t exactly on the same scale. This means my images won’t line up perfectly when placed on top of each other.
To align my images, I need to either check that automatically align box I just mentioned or follow this step.
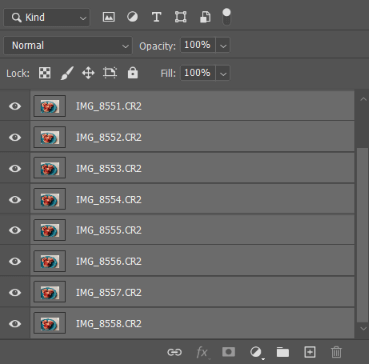
Select all the layers by clicking on your top layer, then hold the Shift key as you click on the bottom layer. The layers should all be highlighted, like this.
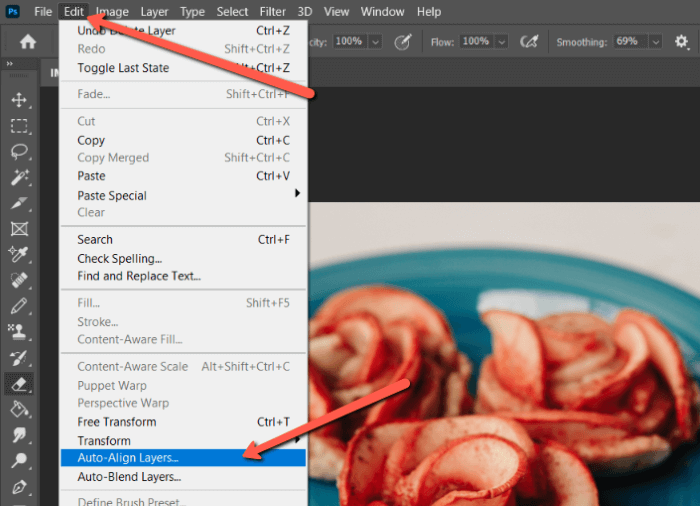
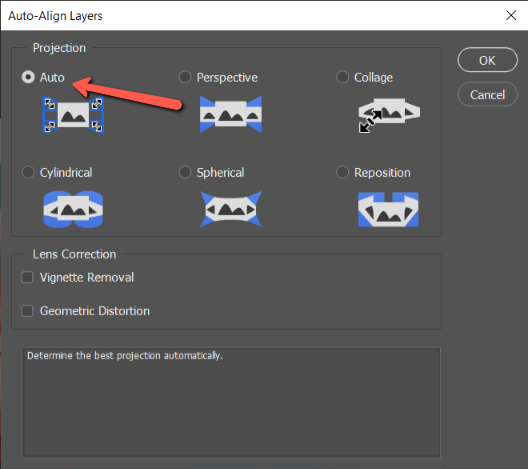
Now go to Edit in the menu bar and choose Auto-Align Layers.
This box will appear. Just leave it set to Auto and click OK.
Here’s what I got after Photoshop finished processing.
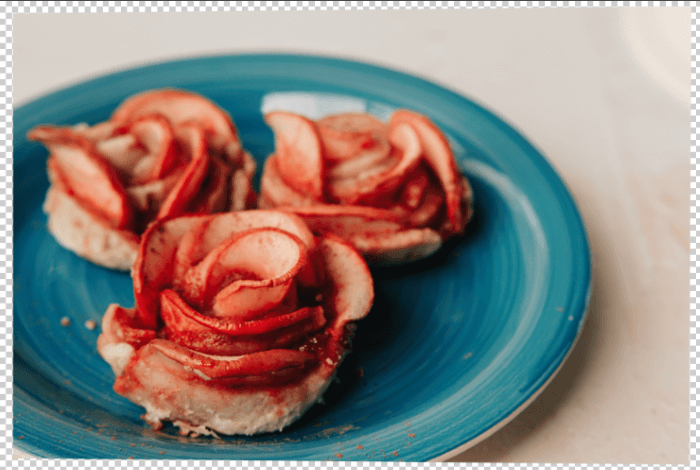
A little underwhelming, isn’t it? The back part still looks out of focus and now there’s the checkered pattern representing transparency around the edge. This is because Photoshop had to resize some of the photos to align them.
Step 3: Blend the Images
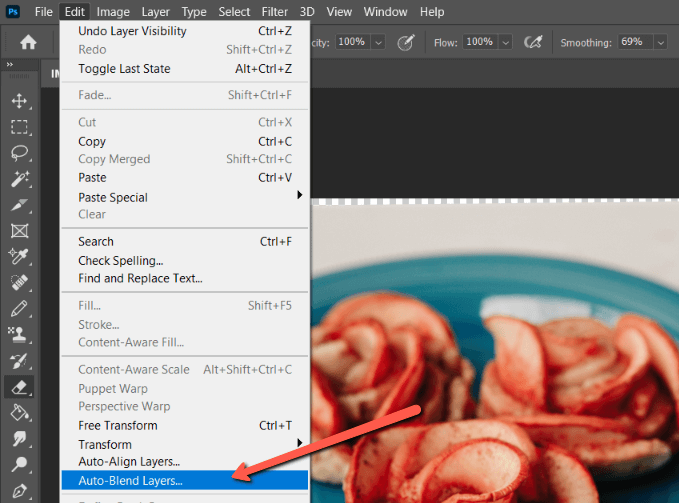
Let’s clean it up. With all of the layers still selected, go up to Edit, and choose Auto-Blend Layers.
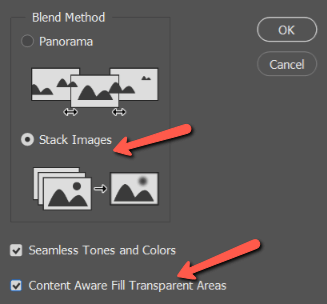
Make sure the Blend Method is set to Stack Images. The Seamless Tones and Colors box should be checked.
You can check the Content Aware Fill Transparent Areas box and Photoshop will automatically fill in the transparent areas where it resized the images. Leave it unchecked if you plan to crop the image anyway. Click OK.
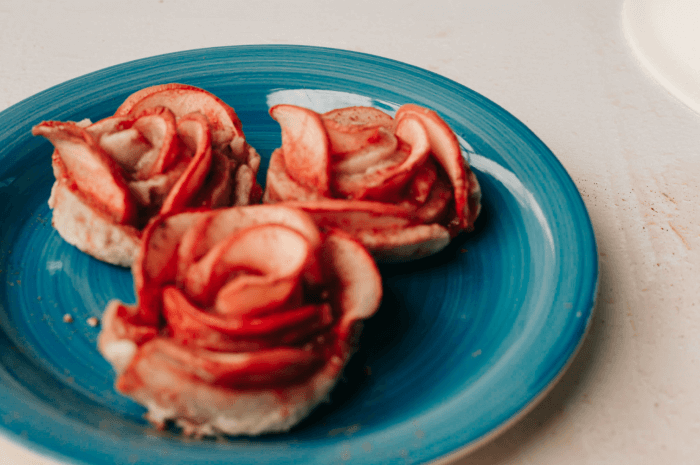
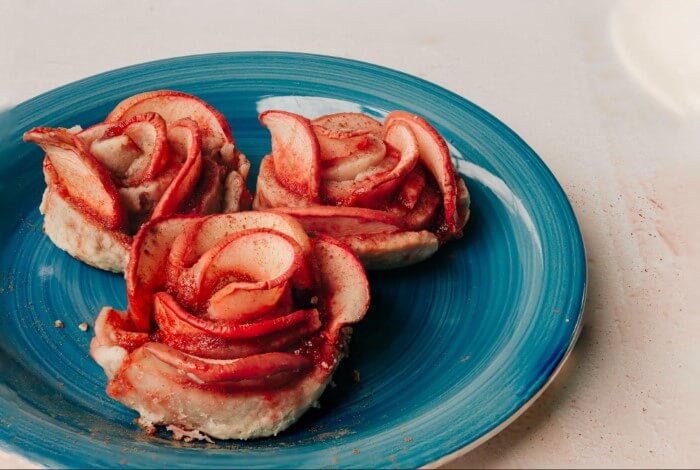
Here’s what I ended up with.
It looks quite good, except for that tiny bit at the bottom of the plate. Photoshop had trouble filling that in, but all I have to do is crop it out. That’s why I suggest you take a slightly larger image than what you want to end up with.
Pretty easy, right? Be sure to check out more of our fun tutorials to learn more about the magical world of Photoshop!
About Cara Koch
Joseph Sebring
Easy to follow and understand save both time and money on extra software that is not necessary.
Thank You
June
You’re welcome, Joseph!