
Ever thought about how much time you waste scrolling through layers in Photoshop?
As you may already be aware, it doesn’t take much for your layers panel to get cluttered. Layers are a great way to work with images and they give us complete control over every part of an image. But they tend to pile up.
Hi! I’m Cara and as a photographer, I work with layers a lot in Photoshop. However, before I know it, I’ll have dozens of layers open. Even if I name them all (a good habit to get into), I’ll still have to scroll up and down, looking for the layer I want. It gets confusing really quickly.
To avoid this problem as much as possible, you can group related layers together. Let me show you how it works.
Note: the screenshots below are taken from the Windows version of Adobe Photoshop, if you’re using the Mac version, the navigations may look slightly different.
Table of Contents
Step 1: Select the Layers
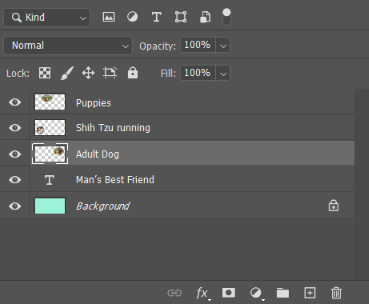
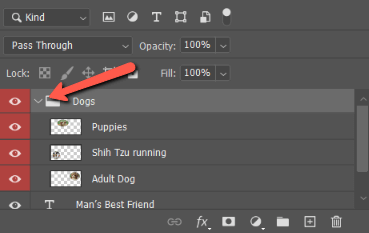
As an example, let’s look at this image I whipped together for you. Each dog and the text box are all on separate layers.
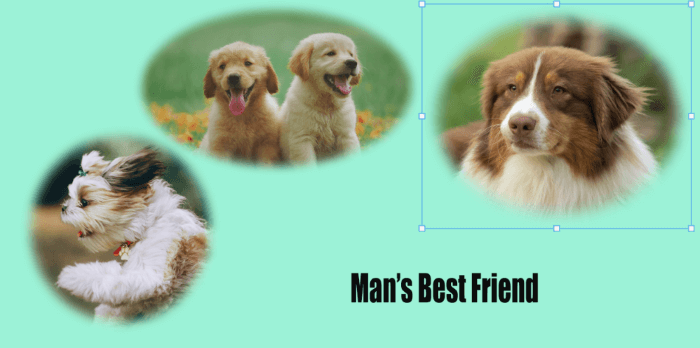
Just in this simple example, there are already have 5 layers going (including the background layer).
If you want to group all the dog layers together, you’ll need to select all the layers you need. To select contiguous layers, click the first one, hold Shift, and click the last one. To select discontiguous layers, hold Ctrl or Command while clicking each layer.
Feeling confused? Check out the in-depth explanation of selecting multiple layers.
Step 2: Group the Layers
With your layers selected, there are a couple of options for grouping them together.
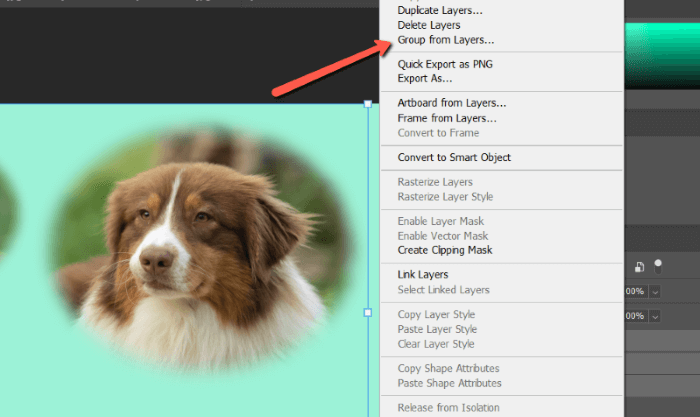
Right-click on one of the layers in the layers panel to open the menu panel. Choose Group from Layers.
In the box that opens, you can name your group (recommended). You can also choose a group color for further organization.

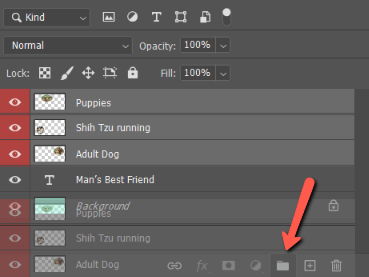
Your selected layers will disappear and be replaced by a little arrow, folder, and the name you chose for your group.
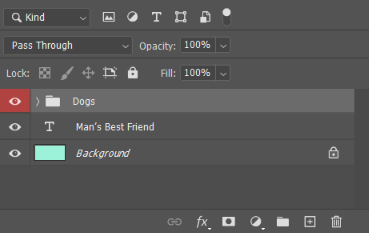
Click on the little arrow to uncover all the layers in the group. Click it again to hide them.
Alternatively, you can group the layers by hitting Ctrl + G or Command + G on the keyboard. Double-click on the folder’s name to rename the group.
You can also click on the layers and drag them down to the folder icon at the bottom of the Layers panel.
How to Ungroup Layers
What if you need to ungroup the layers later? Right-click on the group in the Layers panel.
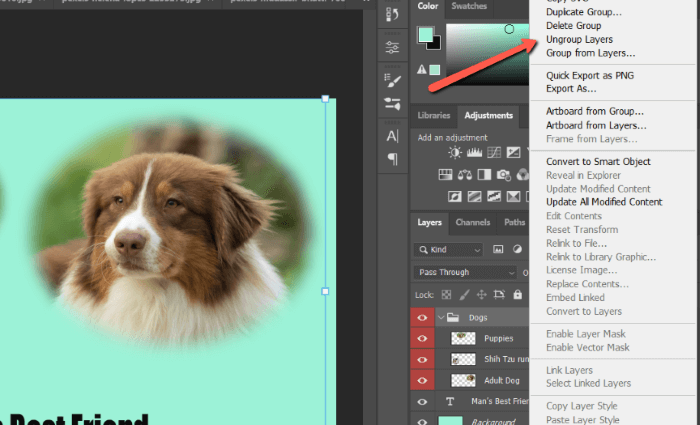
Click Ungroup Layers to separate them once more.
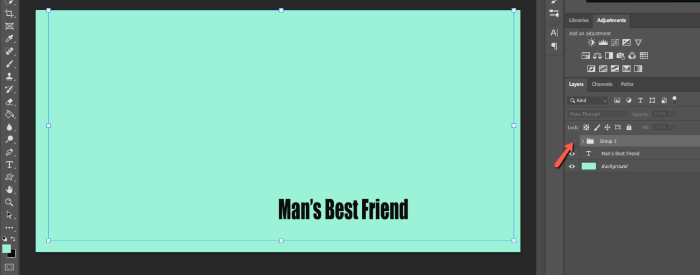
Alternatively, you can select the group and hit Ctrl + Shift + G (Command + Shift + G) to ungroup it.
Advantages of Grouping Layers
Grouping layers is not only helpful for organizational purposes, but it can also help speed up your workflow because certain changes that you make to the group will affect all the layers.
For example, try hitting the eye icon next to the group. All of the layers in the group will be hidden at once.
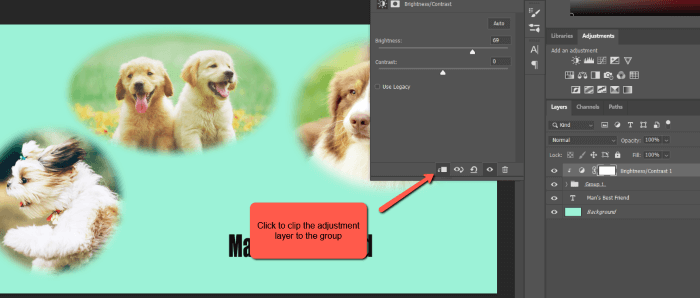
You can also apply adjustment filters to the group that will affect only the layers in the group. See how I can turn up the brightness on all three layers at the same time without affecting the background?
If you’ve ever been frustrated by losing a layer amidst all the others in a project, this trick is for you! Play around with it to see how grouping layers can help keep your workspace more organized and speed up your workflow.
And don’t forget to check out more of our tutorials like this one explaining the layers palette.
About Cara Koch