If you’ve ever printed an image straight from your computer and wondered why the colors look so wrong, then this is the perfect article for you!
High-quality professional printers use the CMYK colorspace for all their work, so you’ll need to convert your RGB images to CMYK in order to ensure you get accurate color reproduction.
Hi, my name is Thomas Boldt, and as you may know from my various blurbs around the site, I’ve been working with digital imagery for over 20 years.
While my personal focus is mostly on-screen at the moment, I’ve also spent a fair amount of time working on print-based design and photography projects that used the CMYK colorspace.
Normally, I’d recommend that you use Adobe Photoshop for all your colorspace conversions, but I know that many people don’t have access to it, so I thought I’d put together a quick guide that showcased an alternative method of converting RGB to CMYK without using Photoshop at all.
Table of Contents
RGB vs CMYK
Many image editors can spend a long and busy career without ever needing to use the CMYK colorspace, so don’t feel bad if you’re unfamiliar with the details of how different color modes work.
Here’s a quick explanation, hopefully without getting too technical. (If you don’t need to know how colorspaces work, you can skip right ahead to the next section.)
Most of the digital images you see every day use the standard RGB colorspace. RGB images are made up of 3 color channels – Red, Green, and Blue – that are combined to create every color in your image.
This method, known as an additive color model, works great when viewed on-screen because the light is actually being emitted from your device.
When you look at a printed page, it’s only visible using reflected light – instead of being an actual light source itself – so you can’t use an additive color model.
CMYK stands for Cyan, Magenta, Yellow, and Key (the Key color is usually black), a subtractive color model that uses inks to control the reflection of light, creating all the colors your eye perceives on the printed page.
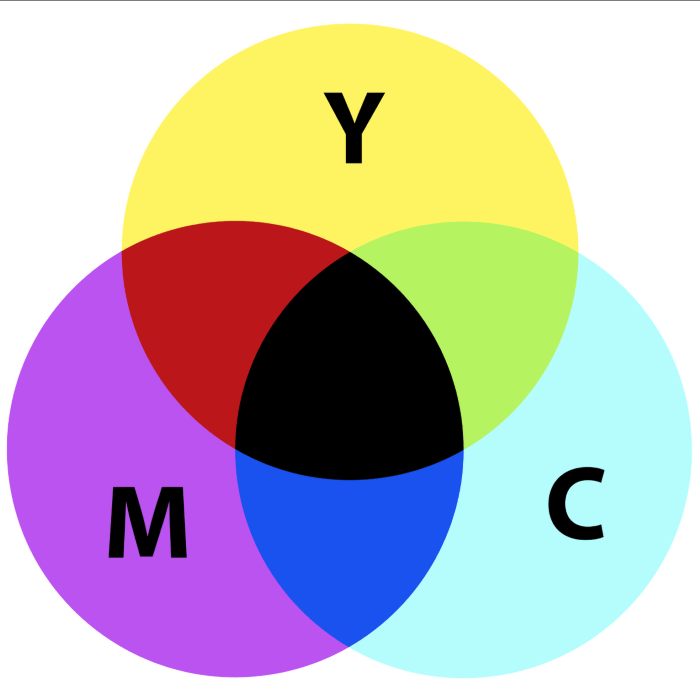
As you can see in this helpful image from the Wikipedia page on CMYK, when two subtractive primary colors are combined, you’ll get the corresponding additive primary color (Red, Green, or Blue).
I won’t go into any more detail here, but if you want to learn more about the technical side of things, see the articles on CMYK and RGB here.
In a nutshell, you can’t print RGB images using CMYK inks and expect your printed image to perfectly match what you see on-screen.
Modern printers and their software are pretty decent, so for casual home prints you may not notice any color shifts – but if you need to be absolutely sure that your prints will match your screen, your best option is to convert your RGB image into a CMYK image.
Converting RGB To CMYK Using Cyan
Instead of using Photoshop to do your color conversion, you can use the free program Cyan which is a dedicated color converter.
I’ll walk you through the process of installing Cyan and configuring the related color profiles, and then give a quick overview of how to use them together to complete your colorspace conversion.
Install Cyan
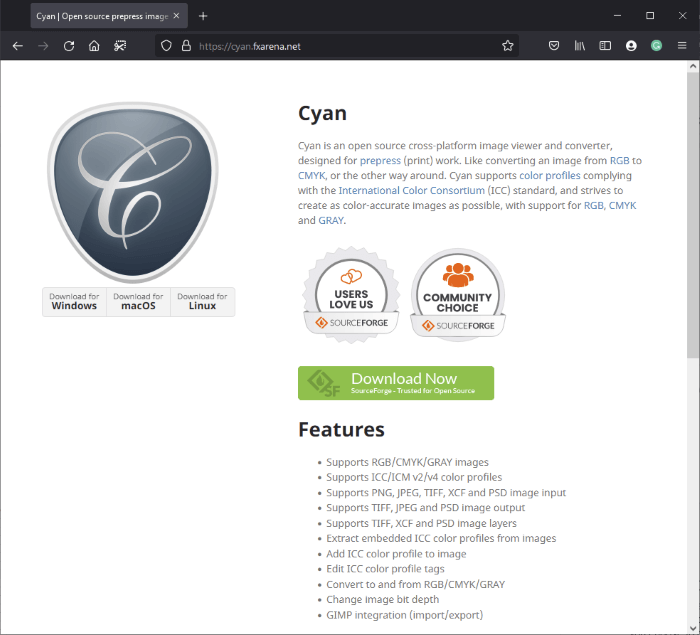
To get started, you’ll need a copy of the free Cyan software. You can read a bit about the project and download the latest version from the official website. Make sure that you choose to download the correct version for your operating system!
The Cyan plugin arrives as a compressed ZIP or DMG file, depending on your operating system. Once the download is completed, open the compressed file and run the file inside it named Cyan. Because the app is so small and convenient, it doesn’t require any installation to run.
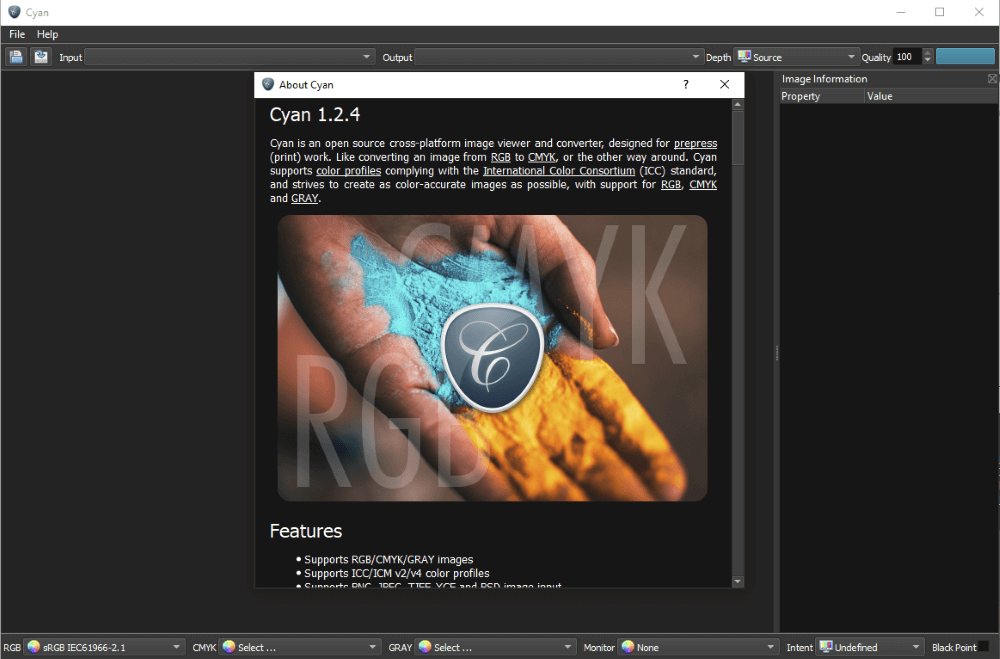
The interface is fairly simple, although there is a bit of configuration that you’ll need to do before you can actually do any color conversion.
Configure Color Profiles
Before you can convert an image from RGB to CMYK, you’ll have to configure the default color profiles you want to use for each color space. These only apply when Cyan cannot detect a color profile embedded in an image.
Along the bottom of the Cyan window, you’ll see dropdown menus for RGB, CMYK, GRAY, and Monitor. The default RGB setting should be fine, but you’ll have to choose a CMYK and GRAY color profile to use.
For the GRAY setting, there are only two default options and this won’t affect an RGB to CMYK conversion at all, so don’t worry about what option you set here.
To get the best results from your color conversions, you should be using a monitor that has been calibrated with a colorimeter to ensure that what you see on your screen is an accurate representation of the colors in the image.
If you’ve already done this, select the appropriate color profile from the Monitor dropdown menu.
Time to Convert RGB To CMYK
Once you’ve got your default color profiles set up, it’s time to actually do your color conversion! Open the File menu and click Open Image, or use the shortcut in the menu bar. Browse to select your file, and click the Open button.
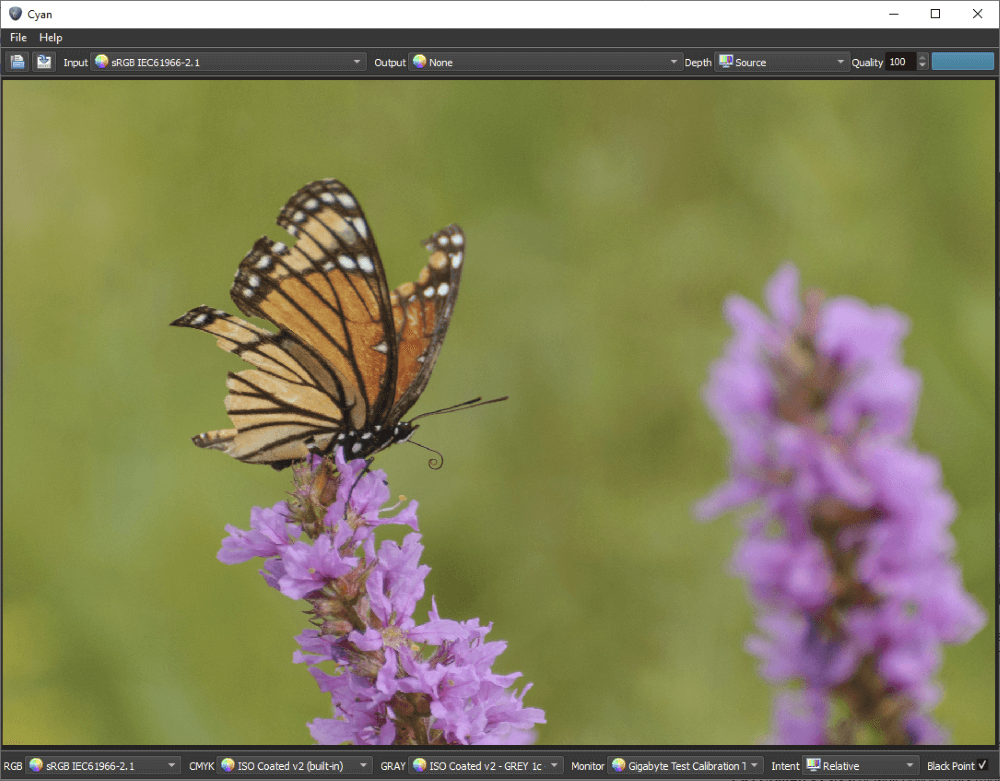
In this example, Cyan correctly detected the sRGB color profile that was associated with the image and configured the Input setting automatically. If your image doesn’t have an embedded color profile, you’ll need to select one.
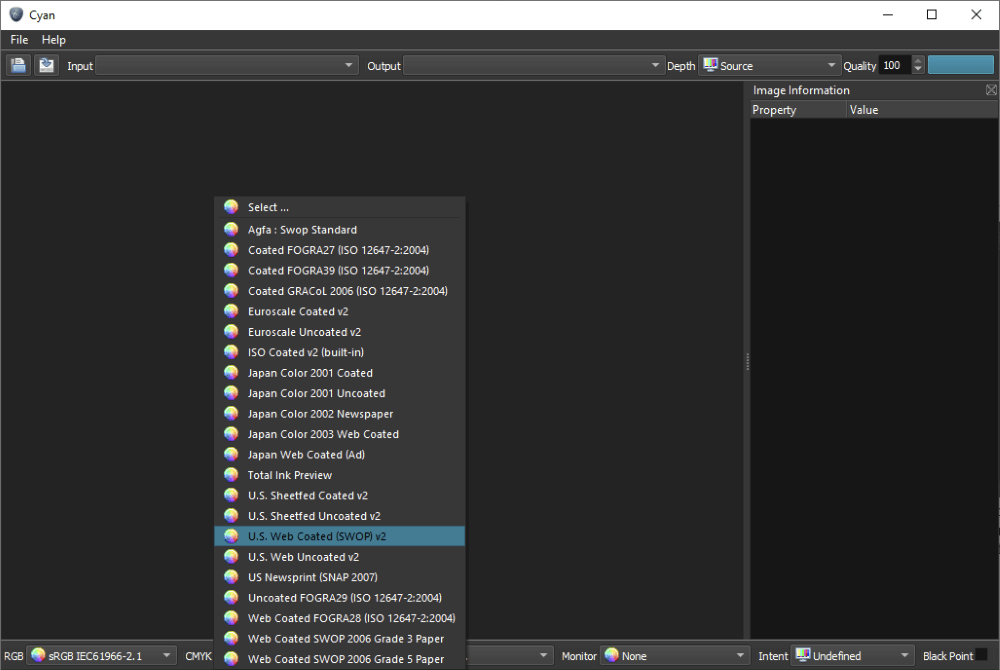
You’ll also need to choose the Output profile. This can be tricky because every printer and press uses a slightly different CMYK profile, so it’s often a good idea to check with your printer about which CMYK profile to use.
If you can’t get any straight answers, select ISO Coated v2 as a default option. This might not get you 100% perfect color matches, but it’s a good baseline if you can’t get any more specific.
You may need to experiment using the Intent and Black Point Compensation settings in the bottom right corner to get your image displaying properly.
This is some pretty technical stuff, but the most common Intent settings are Relative and Perceptual. Black Point Compensation is used when there is a discrepancy between the visible black point on your device and the printed page, and you’ll have to decide whether or not to use it based on your image.
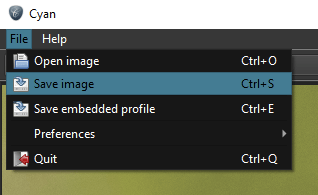
Once you’re satisfied with how your image looks, it’s time to save it! Open the File menu and select Save image. Cyan can save your image as JPG, TIFF, or PSD file formats, but you’ll have to set the file type by manually adding the appropriate file extension.
Phew – you’re finally done!
A Final Word
This process is filled with a lot of potential issues, so always make sure that you get a printed proof of your image to confirm that your color conversion was accurate before you print 5000 copies of something!
This method is fine for doing the occasional RGB to CMYK conversion without using Photoshop, but if you’re really serious about working with print media and the CMYK colorspace in general, you’re going to have a much easier time if you just bite the bullet and use Photoshop.
It has greater flexibility, and better technical support, and you can go straight from editing to color conversion without having to switch programs.
Happy color-converting!
About Thomas Boldt