Changing GIF speed is probably one of the easiest steps in making animation in Photoshop. All you have to do is select the frame and choose a speed.
Whether you want to speed up or slow down the gif, the method is the same, the difference is the number you choose, which represents the speed.
Before getting to the detailed steps, please note that if you want to edit an animated gif in Photoshop, you will need the original .psd file. If you try opening an existing .gif you will find that you can only view one frame of the animation.
Once you have the gif in .psd format, let’s get started.
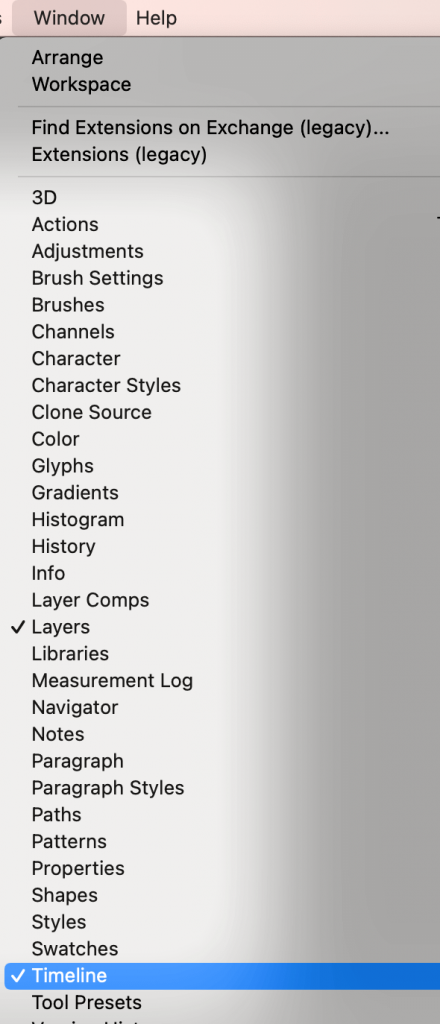
Step 1: Open the PSD file and open the Animation (Timeline) panel from the top menu Window > TImeline.
Note: All screenshots are taken from Adobe Photoshop CC Mac version. Windows or other versions might look different.
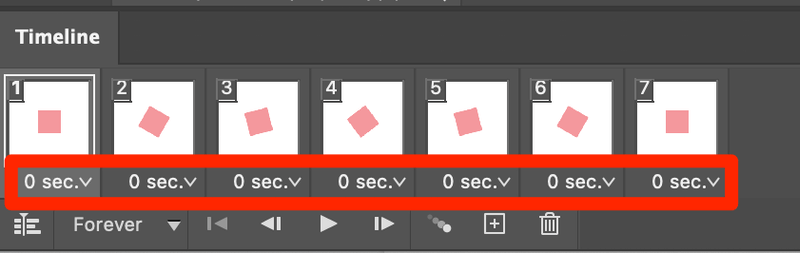
The Timeline panel looks like this. As you can see I have seven frames and their speed is at 0 sec.
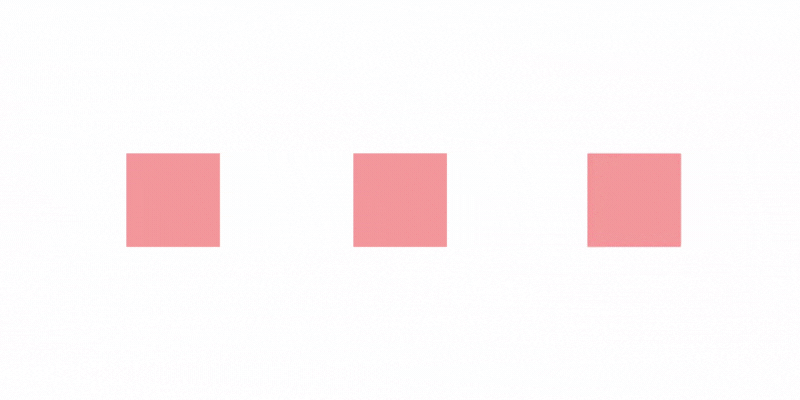
This is what the gif looks like right now. In the next steps, I’ll show you how to speed up and slow down this gif.

Step 2: If you click on the 0 sec box under each frame, you will see other number values, choose the number to speed up or slow down your frame. The bigger the number, the slower the speed will be.
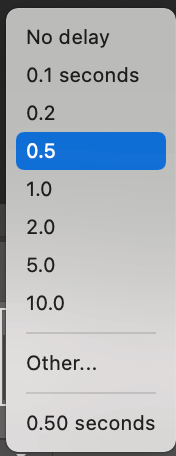
No delay (0 sec) is the fastest speed. If you want to slow down the gif, you can choose any value other than No delay. For example, I chose 0.2 and this is how it looks, a little bit slower than before.

Note: you’ll have to manually click and select each frame to change the value (speed).

You can click the Play button to see how the gif looks and adjust the speed accordingly.

Of course, you can select different speeds for different frames as well.
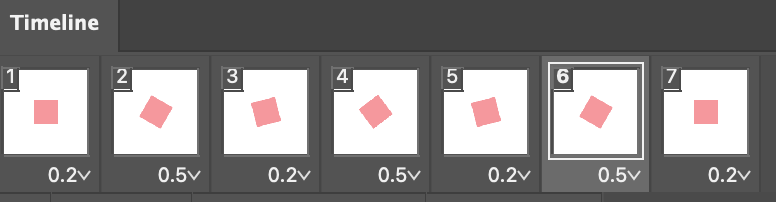
Here I’ve mixed 0.2 and 0.5 in between the frames.

Wrapping Up
Making a gif is about adding a movement to layers and speed makes a movement. You can make a fun gif by manipulating the speed in two quick steps! If you are interested in learning more about creating animation in Photoshop, check out another fun gif-making tutorial that I made.
About June
Emily
thanks! helped a lot
Mehboob
Helped, Thanks
Bart
Thanks a lot, I really needed it 😉
Alex
But then, is there a way to change the timing on all frames equally? I have one that’s at 0.03 but i want to change them all but there’s 150 frames in total!
Jessica
You can select all the frames so that they’re highlighted, click on one of the arrows and change the timing – that will change the timing on all the frames.
Questioner
What about the frame rate? I’ve set the delay to 0 but it’s still to slow. I know you go to the animation panel and then document something, but I can’t find any of this. I have timeline open
June
What version of Photoshop are you using? In CS5 you can click on the triangle on the top right of the animation panel, this will then show a menu where you can change the Document Settings. Which allows you to change the frame rate. This option doesn’t seem to be available in CS6. If anyone knows how to change the frame rate in CS6 please post a reply.
Peter
Hello,
Is it possible to get 2 elements moving at different speeds on the same layer?
Thanks.
June
Hi Peter,
I’m afraid it’s not possible because the gif is made of individual layers. If the two objects are on the same layer, when you animate, the same effects apply to everything on the same layer.