
Adding a steam effect to a food or hot drink image can give people more appetite because it shows freshness and makes the image look more lively.
I did freelance graphic design for the food & beverages industry for the past five years, retouching food images was the essential step to do because a good image sells better.
In this tutorial, I’m going to show you how to create customized smoke/steam effects in Photoshop along with some useful tips. The most commonly used method is using the brush tool along with Photoshop filters and transforms.
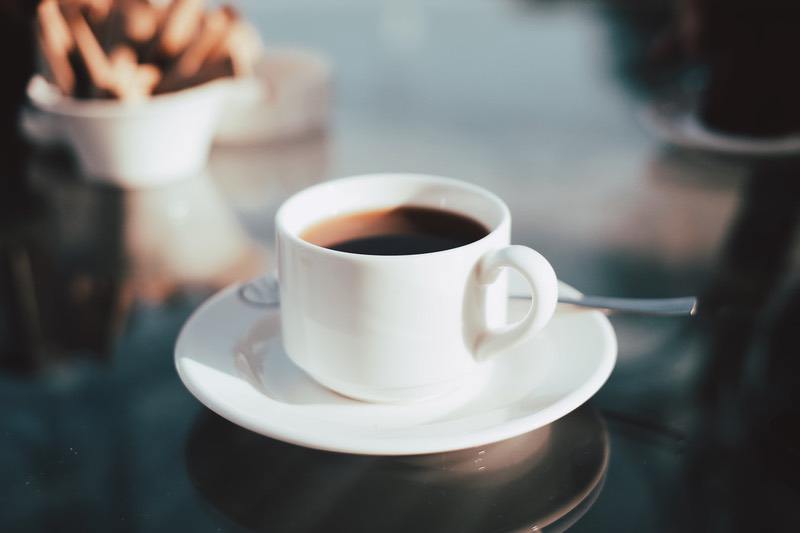
Let’s take a look at a classic example of adding steam to a coffee image.
Note: All screenshots are taken from Adobe Photoshop CC Mac Version. Windows or other versions might not look the same.
This method allows you to customize and manipulate the steam or smoke freely.
Step 1: Open the image you’d like to add steam to in Photoshop. I am going to use the coffee image.
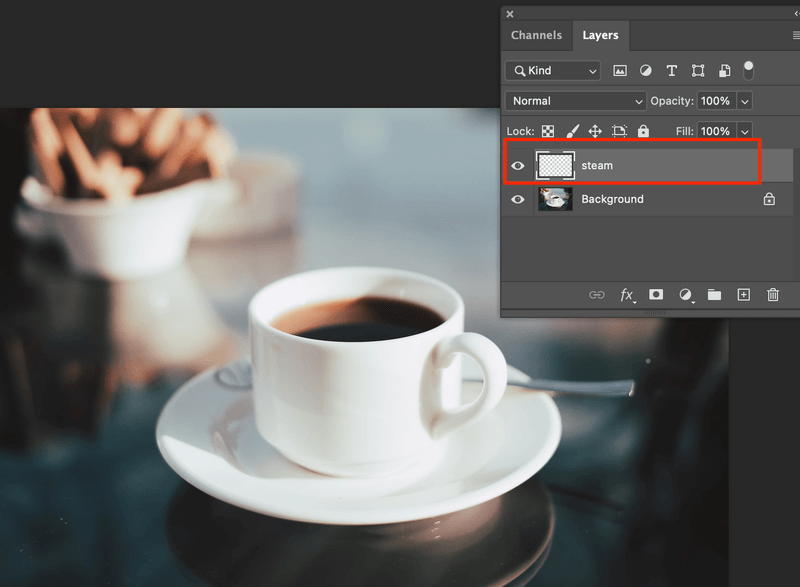
Step 2: Create a new layer on top of the coffee image. I’ll name my new layer steam.
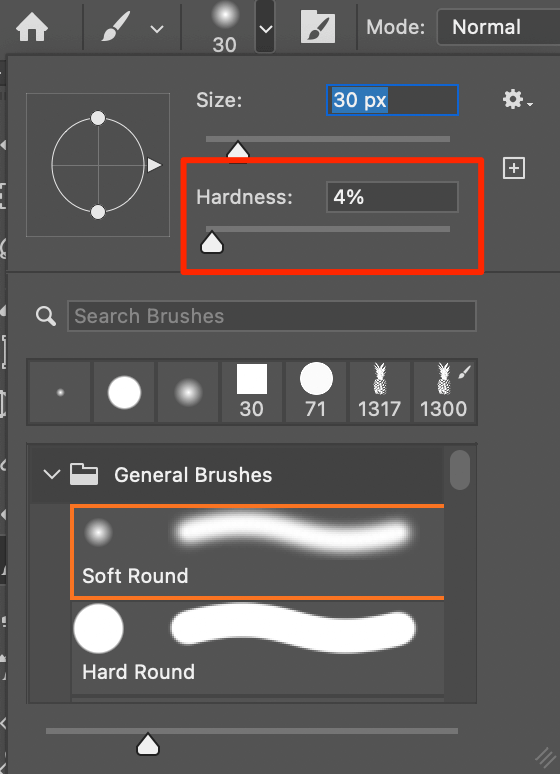
Step 3: Select the Brush Tool (keyboard shortcut B) and select a white color for the paintbrush. Set the brush Hardness low, around 3% to 5%. I chose a soft brush because it’ll create a more natural look.
You can start drawing the steam direction. I suggest using different sizes of brushes and try not to overlap the brush strokes when you draw.
Tips: You can add a solid black color layer on top of the coffee image if you want to see the brushes clearer.
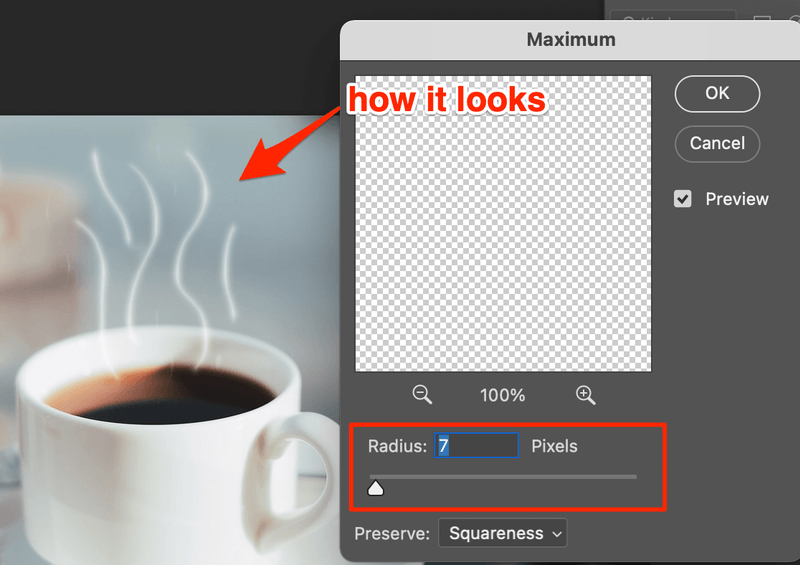
Step 4: Go to the top menu and select Filter > Other > Maximum.
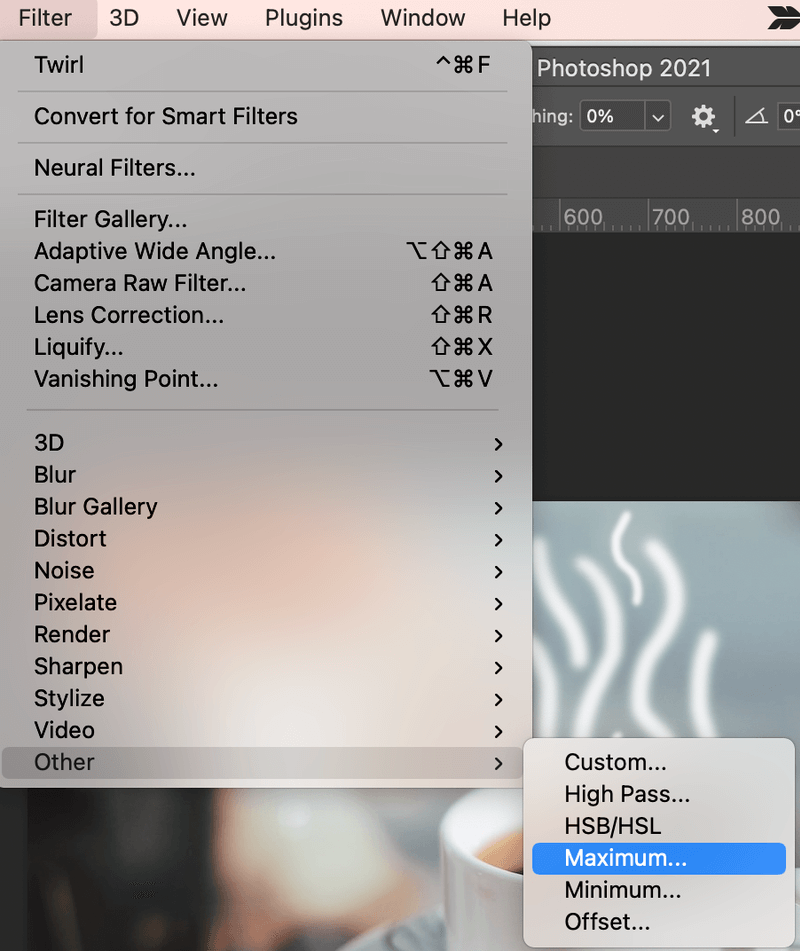
You can set the radius higher (I set mine around 7 pixels) until the brush strokes start to look like smoke. You can repeat this step a couple of times until you get the desired result.
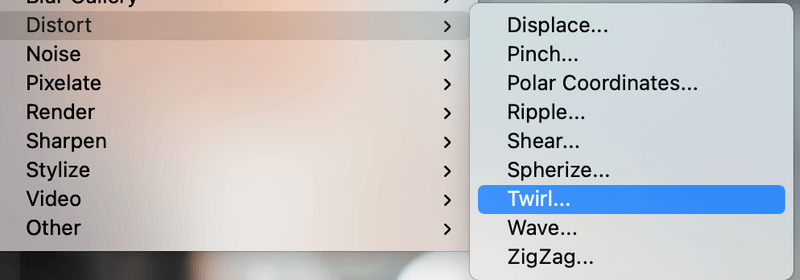
If you want to add more distortion to it, go to FIlter > Distort > Twirl. If not, go ahead to step 5.
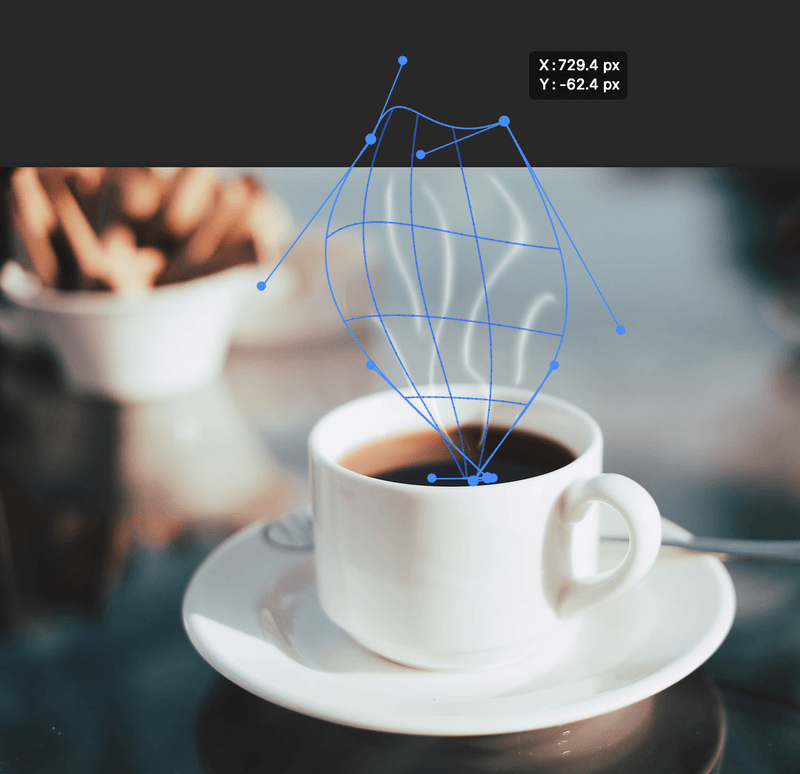
Step 5: Go to the top menu again and select Edit > Transform > Warp.

In this step, you can click and drag on the steam later and freely transform the steam.
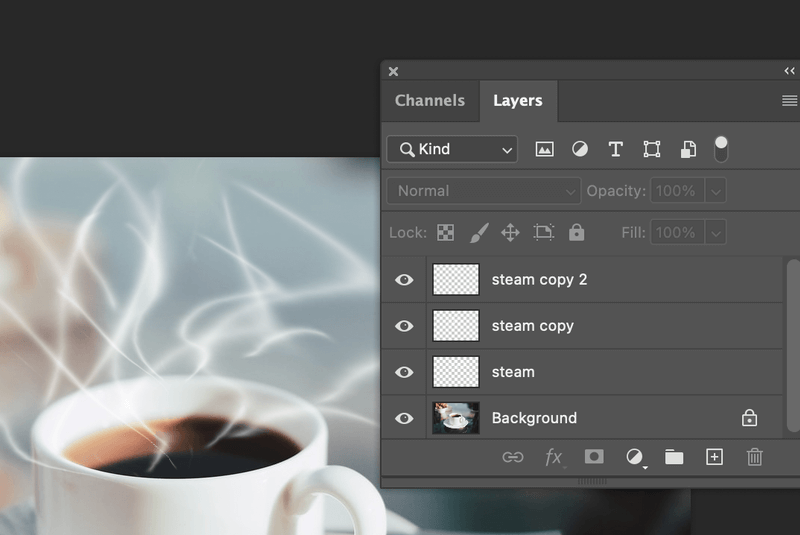
Tips: If you want to have more smoke, you can make a copy of the steam layer, and repeat step 5. For example, I’ve made a couple of copies and distorted them on each layer.
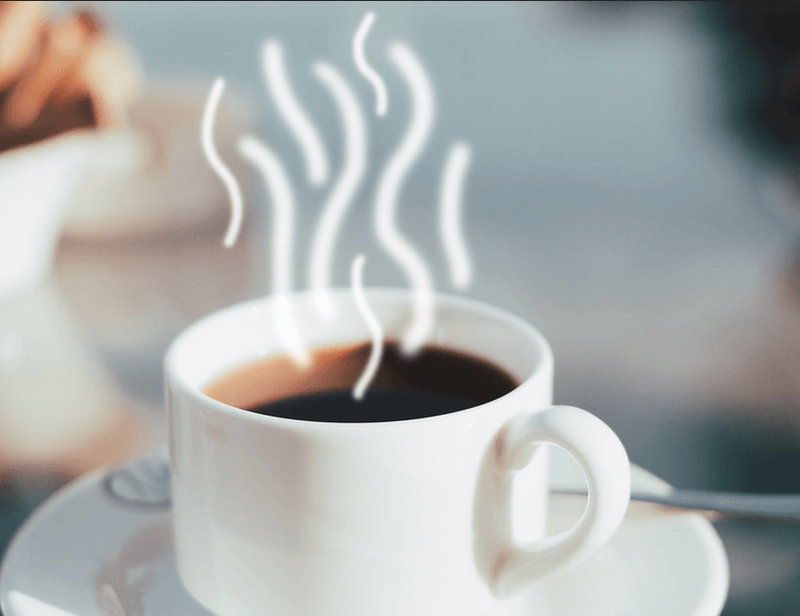
Step 6: Lower the opacity of all the steam layers so the final smoke looks natural on the image background and this is the final step!

Your warm coffee is ready!
Conclusion
You can use this method to add smoke/steam to food and hot beverages or make smoke effects for any other design purposes. The basic idea is to play with the distortion, transformation, and opacity of the brushes you use.
About June
Russell English
Thanks very much for this excellent tutorial. Exactly what I needed!
suresh
i have tried most of smoke making effect on photoshop but i could not get as per your simple tecqnic wich i follow well . thanking you.
Arun thambi
Thanks for d simple steps its really works n awesome .