Gradient adds a soft touch to images, and you can use it to create a fading effect. I love using a gradient to blend in some color to my image to give it a special effect. This simple trick can give a design an upgrade and today you’ll learn how!
In this tutorial, I’ll show you the two easiest ways to make and add a transparent gradient to your photos in Photoshop and some quick tips on how to edit a gradient.
You can use the Gradient Tool to directly add a gradient to your image or play with the layer mask to create a transparent gradient effect in Photoshop.
Let’s take a look at a quick example of how to add a transparent gradient to this sunset image.

Table of Contents
2 Quick Methods to Make a Transparent Gradient in Photoshop
There are several ways to add a transparent gradient to your image in Photoshop, and the two methods below are the quickest and easiest.
Note: Screenshots are taken from the Adobe Photoshop CC Mac version. Windows or other versions might look slightly different.
Method 1: Gradient Tool
As I briefly mentioned earlier, you can directly add a gradient on top of your image layer to create a transparent gradient effect using the Gradient Tool.
Step 1: Open your image in Photoshop.
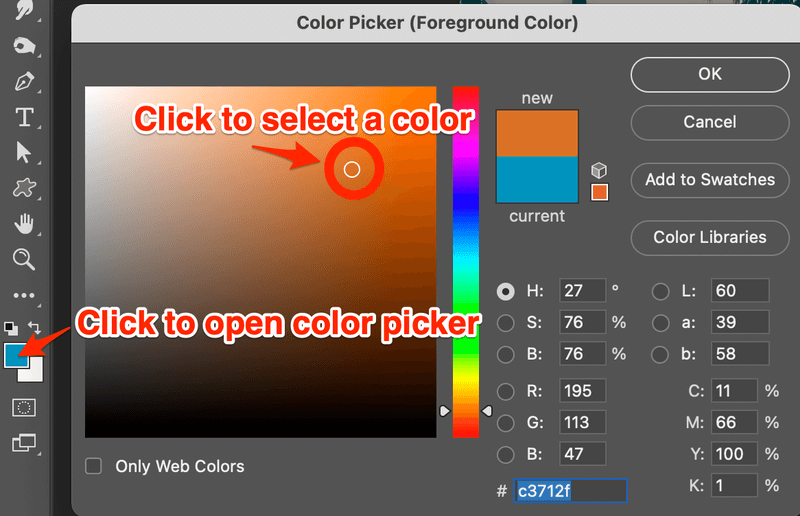
Step 2: Select a color using the color picker.
Step 3: Select the Gradient Tool on the toolbar (keyboard shortcut M), go to the top menu, and click on the Gradient Editor.

From the gradient editor, you can choose the presets, gradient type, smoothness, and move the slider to change how you want the gradient to look.
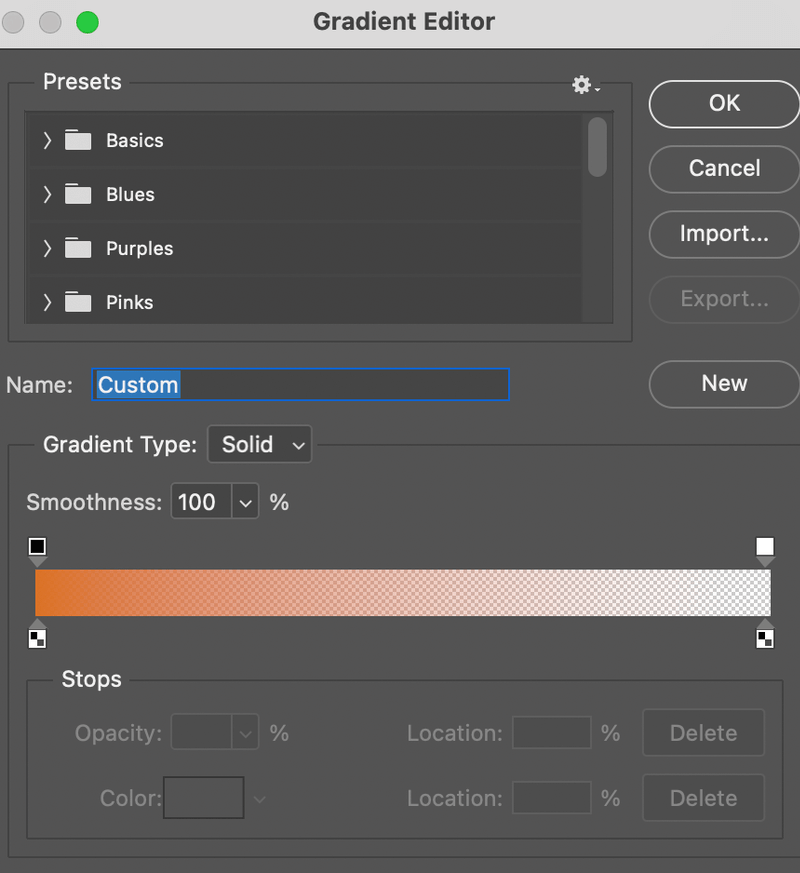
Tips: Lower the Opacity at the top menu if you want to create a softer and more natural gradient.
Step 4: Click on the image and drag it to the direction you want the gradient to appear. For example, I’m going to click on the edge of the photo and drag it toward the center.
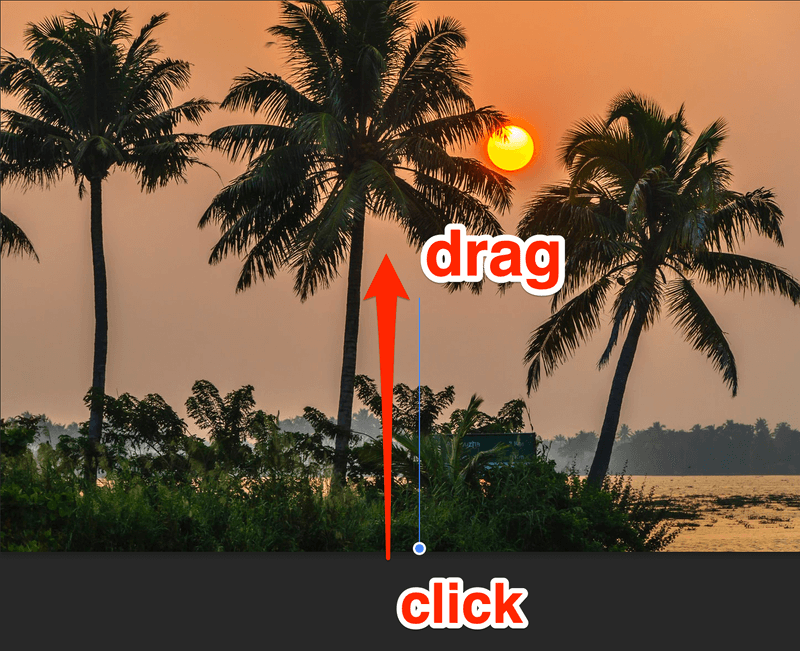
See, I only applied a transparent gradient to the bottom area.

Tips: you can also create a gradient layer but it doesn’t give you the flexibility to select the gradient area.
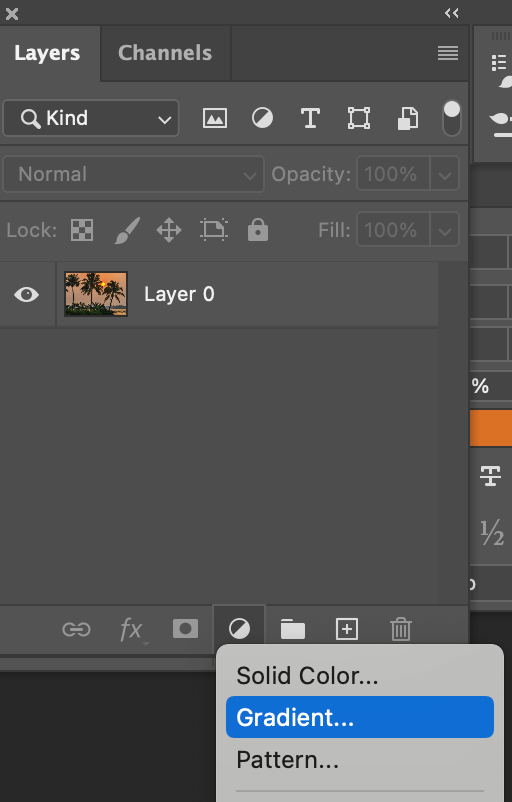
Note: when you add a gradient layer, it applies the gradient to the whole image.
Method 2: Layer Mask
This method allows you to blend your image into a solid color background.
Step 1: Open your image in Photoshop.
Step 2: Create a new Solid Color layer and choose a color. For example, I chose a dark gray.
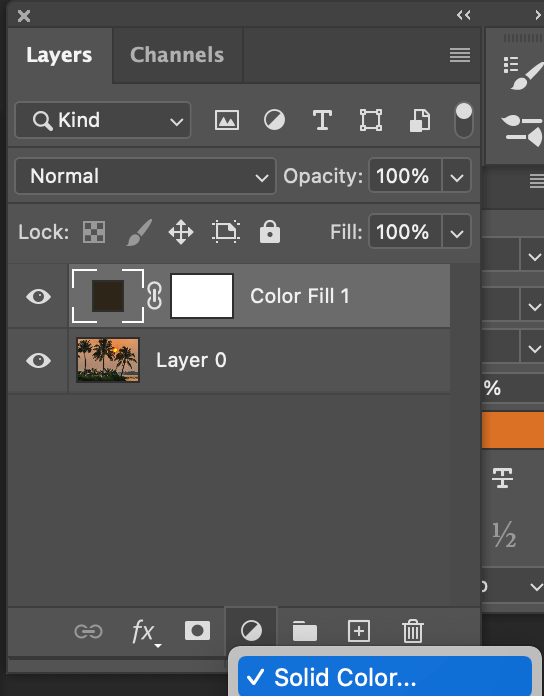
Note: The solid color is the transparent gradient that’ll show on your image.
Step 3: Select the new layer and drag it under the image. So the sunset image layer is above the color background layer. (As shown in the screenshot below in Step 4).
Step 4: Select the image layer and add a layer mask.
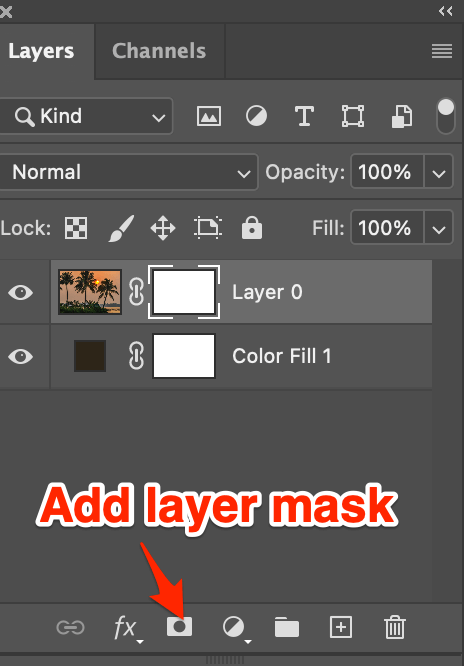
Step 5: Select the Gradient Tool and edit in the Gradient Editor if needed.

Step 6: Click and drag the area you want the transparent gradient effect on the layer mask. Again, I click on the bottom of the image and drag it toward the center.
Note: you must add the gradient on the layer mask.
Conclusion
The key to making a nice natural transparent gradient is by adjusting the opacity and gradient direction (style). When the gradient tone is set, you can use either of the methods above (or combine both methods) to quickly add a transparent gradient to your beautiful image.
About June


Ben
Your tutorial answered a question I was scouring the Internet to find for almost an hour – how to remove color from a shape in Photoshop, and add a color-to-transparent gradient overlay.
THANK YOU!
June
Glad you found it useful 🙂 I’m always looking for new ideas for photoshop tutorials so let me know if there’s anything else in particular that you’re trying to find.
Cherrie
THANK YOU SO MUCH!!!!!
mario
cool tutorial and it worked just fine.
Now, though, any new shape layer has the gradient mask.
How do I get the shape back to the normal behavior.
This is making me crazy!
0-:
June
When you draw the next shape, if you right click the layer in the layers palette and choose ‘clear layer styles’ this should change the shape back to normal. 🙂
zedg
Photoshop is so unintuitive, its almost comedic.
Anyone out there who does not require Photoshop skills in a professional capacity, should use other software. Believe me, with other software packages you can work out how to do things much more quickly and easily – without having to scour the internet for the answer. You will save yourself loads of time and stress.
(eg, Corel PhotoPaint has a transparency tool which you simply drag across your shape/image. )
June
Thanks for your comment Zedg – There are plenty of other editing programs out there. Having used Photoshop for the last 15 years, I find it incredibly easy to use and intuitive! To anyone currently learning Photoshop, I would suggest they stick with it as you can create absolutely anything with it once you know how 🙂
john
I’m just wondering…I’m new to the whole photoshop software…Can you please teach me how to create a foreground to transparent rectangle specifically wherein the rectangle’s sides are the only ones that are transparent and the foreground color remains the same… In short, its a regular rectangle but it fades out
to a transparent background when it reaches both left and right sides