If you decide to use Photoshop for your creative work, you’d better get used to working with layers. One of my favorite things about Photoshop is how layers keep my work organized and the ease to manipulate layers to make my work efficient. And the greatest advantage is that I can edit objects separately without affecting one another.
In this article, you’ll learn the layer basics, and how to use layers in Photoshop. If you don’t know what a layer is in Photoshop, here’s a quick explanation.
Table of Contents
What is a Layer in Photoshop
You can see a layer as a transparent sheet you can add content or adjustment and you can stack a layer on top of each other. You can also move a layer to show which one goes above or under, as well as edit and add effects to the layer.
There are two categories of layers that you can create from the Layers panel. You can create a content layer, an empty transparent sheet (layer) where you can add objects like shapes, images, and text. Or add an adjustment layer where you can choose effects like a solid color, gradient, brightness, or other adjustments.
The layers panel has quite a few icons and options that you might get lost if you’re new to Photoshop. That’s why I’ve created the Layers panel overview below to help you get a better idea of what I’m talking about.
The Layers Panel Overview
If you haven’t seen it yet, this is what the Layers panel looks like. I’ve pointed out some icons to help you better understand them.
Note: All screenshots are taken from Adobe Photoshop CC Mac version. Windows or other versions might look different.
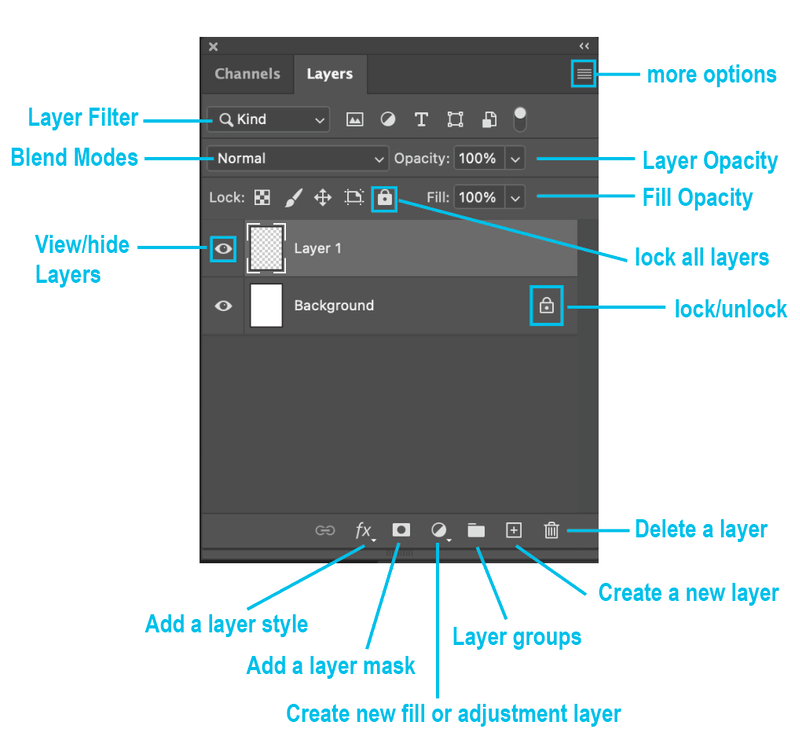
If you don’t see the Layers panel on the right-hand side of your Photoshop document, you can quickly open your Layers panel from the top menu Window > Layers.

How to Use Layers in Photoshop
As you can see above, the Layers panel offers plenty of options for image manipulation. But the first step you need to take is to create a new document in Photoshop.
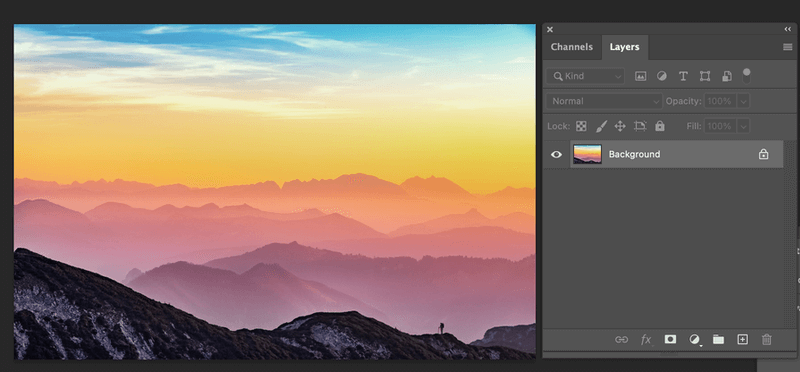
When you create a new document or open an image in Photoshop, it becomes the background layer automatically. The Background layer is always locked as the bottom layer unless you unlock and move it.
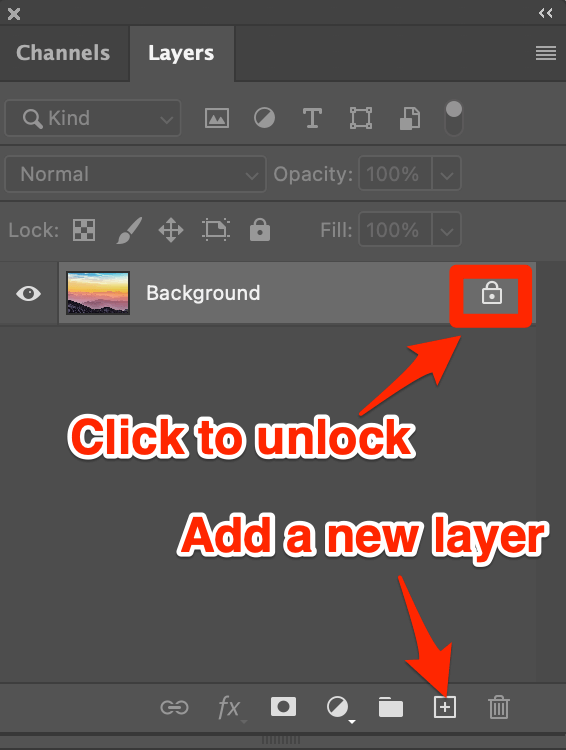
Once you’ve created a new document, you can create new layers to work on. There are different ways to create a new layer, but the easiest and quickest way is simply to click on the plus icon on the Layers panel.
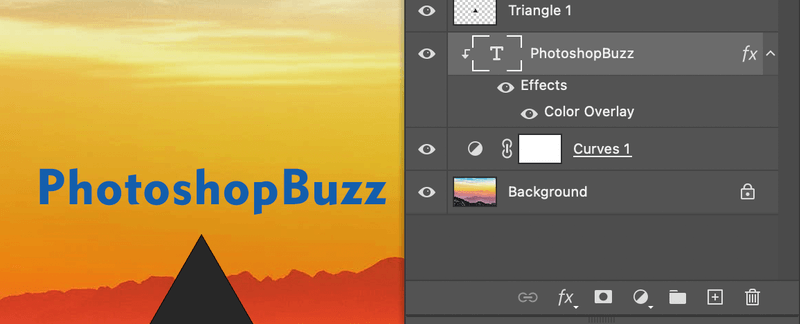
Now you can add objects to the new layer. For example, I selected the Type Tool, clicked on the canvas, and typed PhotoshopBuzz. Notice that the layer name changed to PhotoshopBuzz and the layer became a text layer.

Then I selected the Triangle Tool from the toolbar to make a triangle. You’ll see a shape layer called Triangle 1 in the Layers Palette.
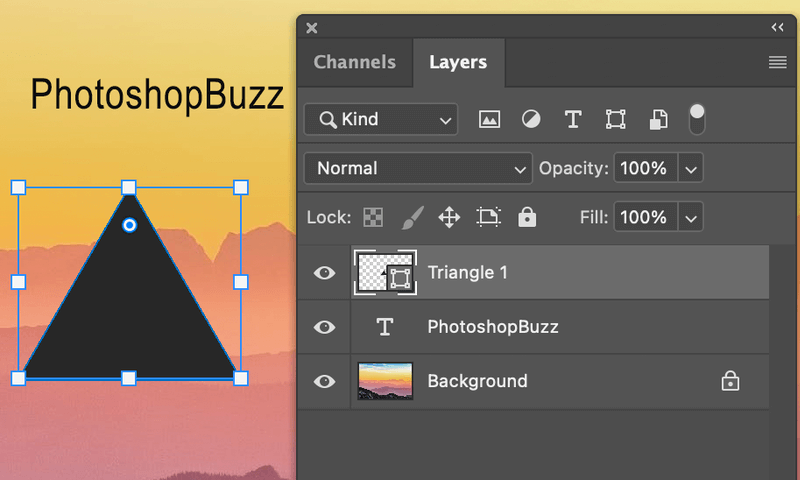
Note: I didn’t add a new layer, because when you add content to the canvas, it automatically becomes a layer.
If you want to adjust the lighting of the background image, you can add an adjustment layer on top.
The adjustment layer only applies to the layer underneath it, so if you want to adjust the background image, select the background layer, click on the Create new fill or adjustment layer icon and choose an option.

I’ll use the Curves to make the image color look more dramatic. See my adjustment layer is right on top of the background layer so that it doesn’t apply to other layers (Triangle 1 and PhotoshopBuzz).
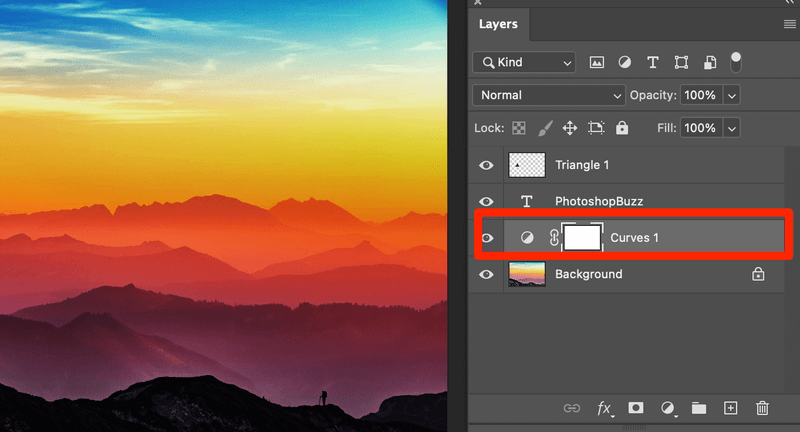
Tips: Adding adjustment layers can transform your original image into something awesome. You don’t have to worry about bad lighting because Photoshop can help! Explore your options 🙂
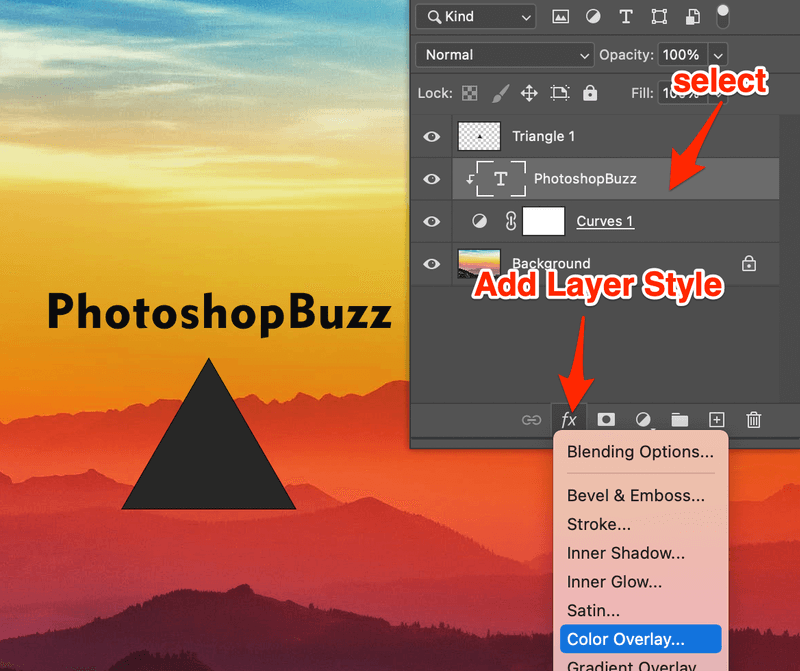
Adding Styles to Layers
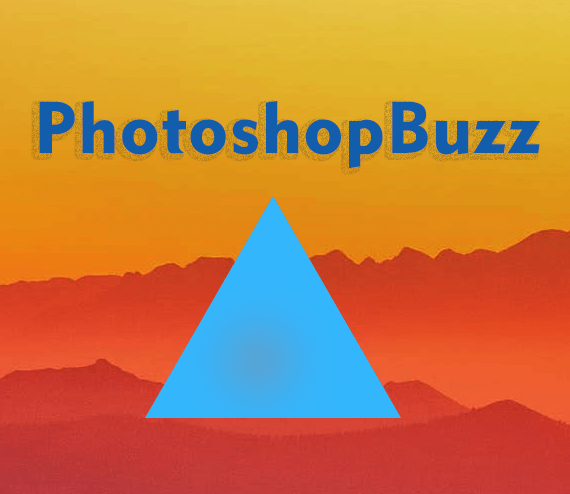
Now I want to change the color of the text layer (PhotoshopBuzz) and the shape layer (Triangle 1), so I’m going to add a layer style to both by following the steps below:
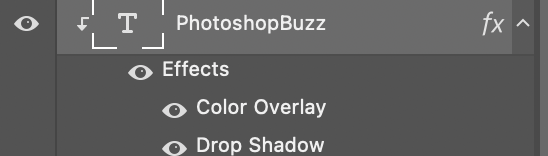
Step 1: Select the layer, click on the Add a layer style (fx) icon, and select Color Overlay.
Step 2: Click on the color box and choose the color you want the text to be from the Color Picker. Click OK.
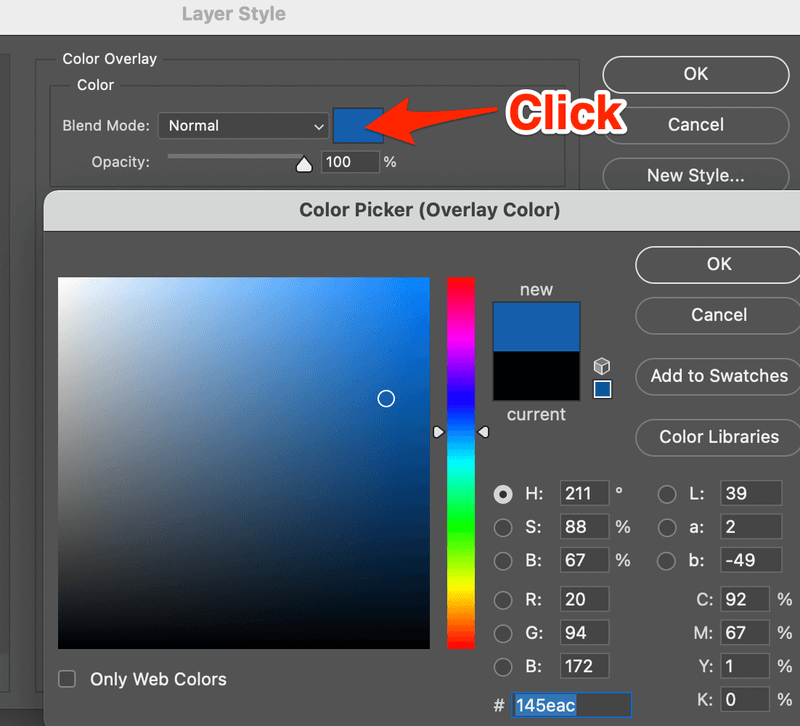
Tips: You can move the mouse out of the box and the pointer will become the Eyedropper Tool, so you can select a sample color from the image.
You can add multiple styles to your layer. I just added a drop shadow.
Repeat the same process for the Triangle 1 layer.
The triangle doesn’t seem to blend well with the background. You can create a layer mask to blend adjust the transparency and blend it following the steps below:
Step 1: Add a layer mask.
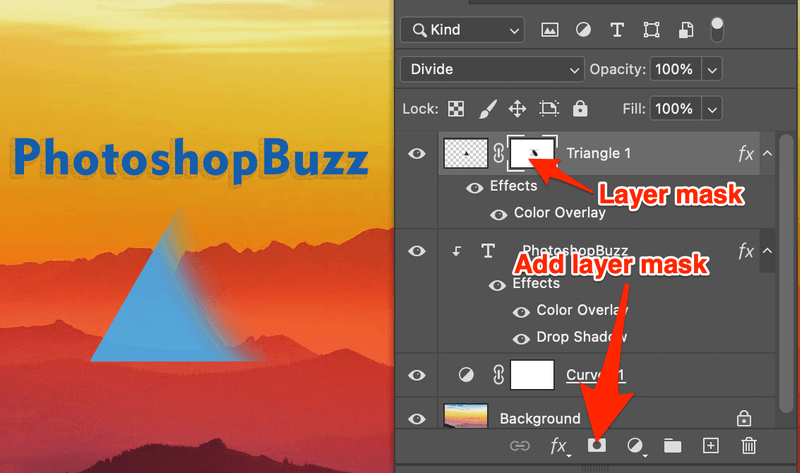
Step 2: Select the mask and select the Eraser Tool from the toolbar and adjust the brush opacity.

Step 3: Draw on the part of the triangle where you’d want to adjust the opacity.
Note: you must draw on the Layer Mask.
Not sure if blue is the right color or maybe the original black triangle looks better? No, you don’t have to delete or re-do anything. How about take a look first and decide?

Click on the eye icon next to Color Overlay to hide the effect and the original color (black) will show. Mmm, maybe the black does look better. Well, you can make it visible by clicking the eye icon spot again. Check a couple of times and decide. Easy.
Besides adding layer effects, you can also group layers, merge layers, etc. There’s so much you can do on the Layers panel.
For example, grouping layers also help to organize your workflow. You can select multiple layers and drag them to the Layer Group icon. Don’t worry if you make a mistake, layers can be dragged in and out of the groups.
Tips: Hold the Command/Ctrl and click on layers to select multiple layers.
Wrapping Up
From the example above you can see the tricks that you can do to your image. If you want to explore more blend options and transparency. You can change the Blend Modes and adjust the Opacity to get the best result you’re looking for.
The options I mentioned above should sum up the essential parts and usage of the Layers panel. Hope you find this tutorial helpful.
About June