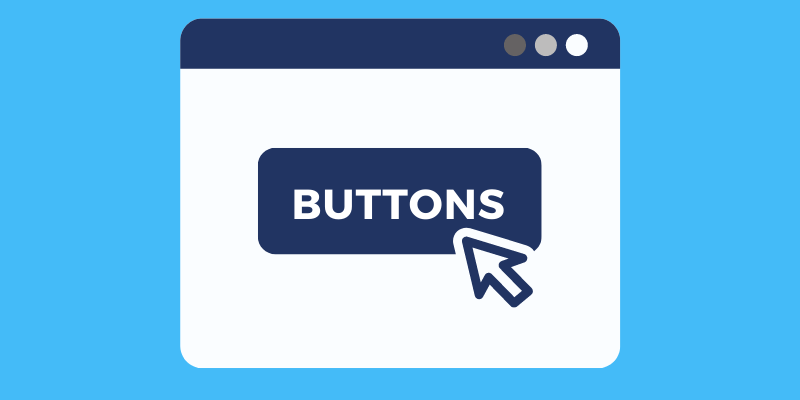
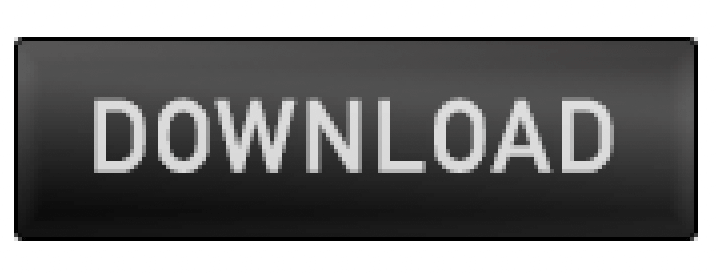
Thinking about buttons, what comes to your mind? Probably a classic rectangle download button that we almost see every day, or the Like button on Facebook and Instagram. Ok, that’s a bit fancier, so let’s start with the basic and classic.
I’ve worked as a graphic designer for more than ten years. From my experience with branding and visual communication design, every detail matters on a website. Customizing every detail on your website presents your professionalism and authenticity. From a complicated logo to a simple download button.
In this tutorial, I’ll show you how to make a button with a simple solid color and a button with a gradient background. The steps are similar, but there are more steps to add effect for a gradient button.
4 Easy Steps to Create a Button in Photoshop
Depending on how fancy you want your button to be, you can do it as quickly as three steps if you’re looking for a minimalist button.
Note: The screenshots below are taken from Adobe Photoshop CC Mac version. Windows or other versions might look different.
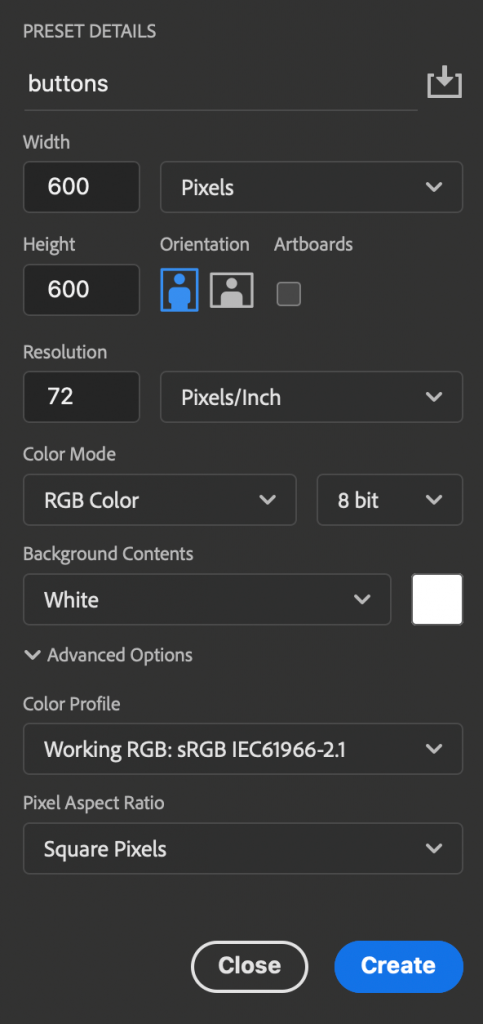
Step 1: Create a new document. The document size isn’t the button size, it should be big enough to create your button with a drop shadow. So ideally you should decide the size of your button first, but we can go ahead and create a square canvas 600 x 600 pixels, a safe option for all.
Set the file resolution at 72 pixels/inch and choose RGB color mode because you’ll use the button for the web.
Step 2: Select the rectangle tool from the toolbar and draw a rectangle. If you’re not sure about the button sizes, you can start with 170x50 px, a commonly used size for a button.
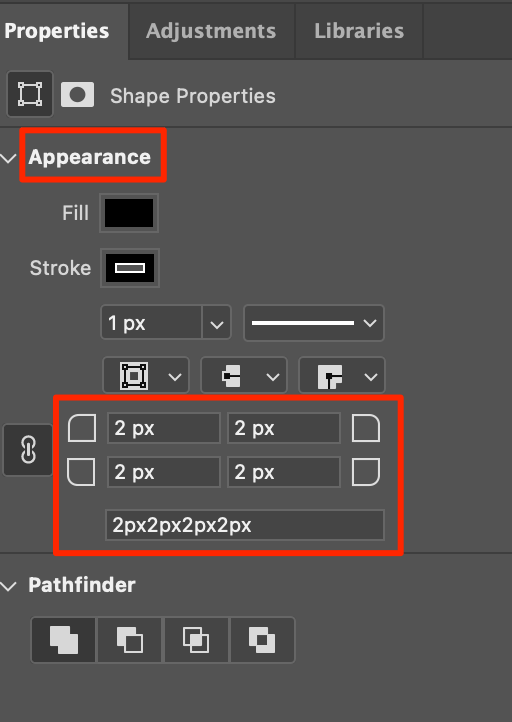
If you want to make rounded corners, click on one of the circles near the corner and drag toward the rectangle center.

Or you can go to the Properties > Appearance panel and type in the radius value.
Now you can choose to go ahead and add the text and be done or do some extra steps to make your button fancier. If you want a simple button with solid color, you can skip Step 3 and go directly to Step 4.
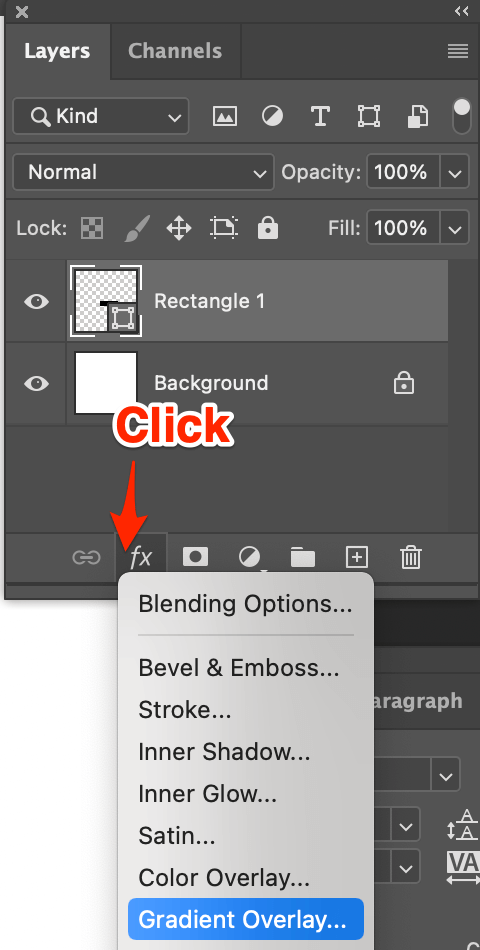
Step 3: Select the shape layer (Rectangle), click the fx icon on the Layers panel, and select Gradient Overlay.
Play with the settings in the Layer Style window. Check the Preview box to see the changes you’re making. Once you’re happy with the result, hit OK.
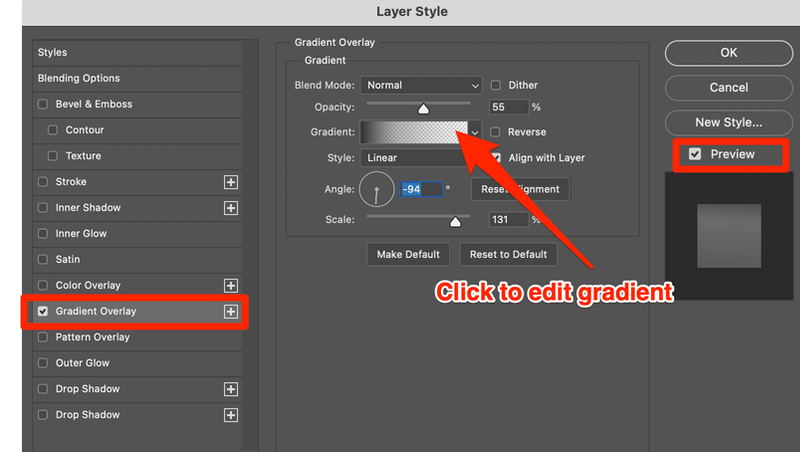
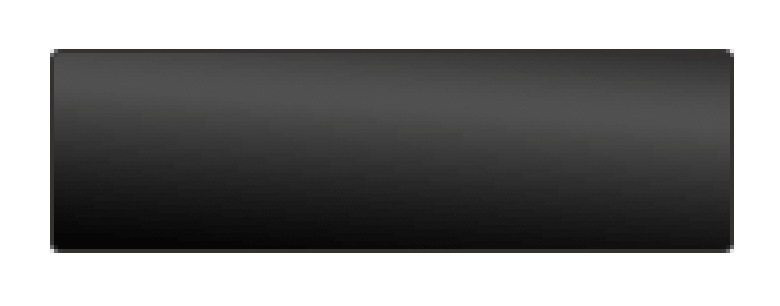
I chose a very gentle gradient and I’m pretty happy with this look.
But of course, there are other layer styles that you can add. How about an inner glow effect?
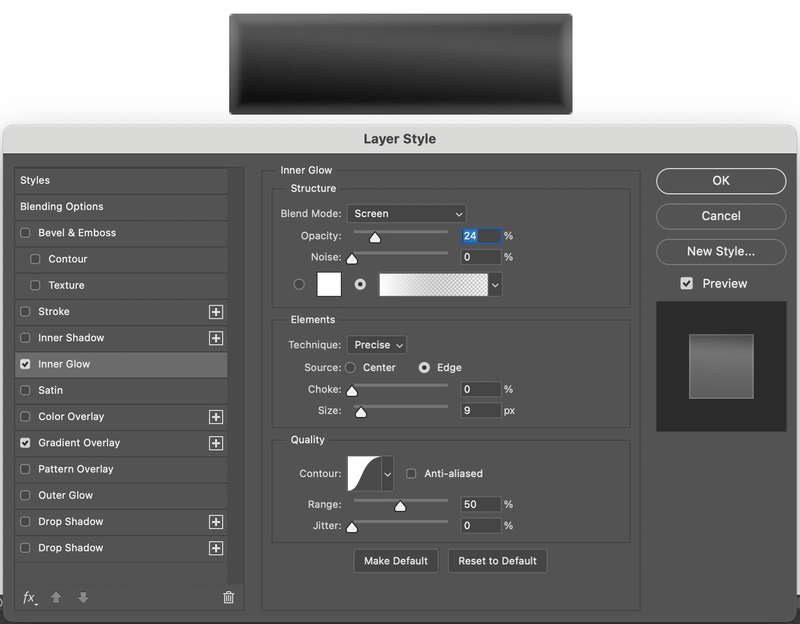
Looks good too! Ready to move on?
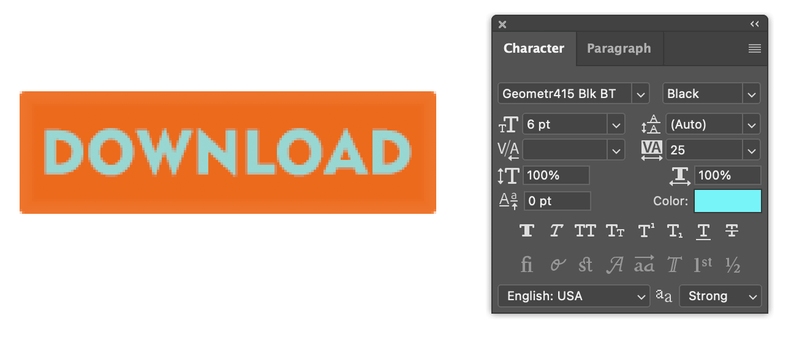
Step 4: Select the Type Tool, click on the rectangle, and type in the text you want to show on your button.
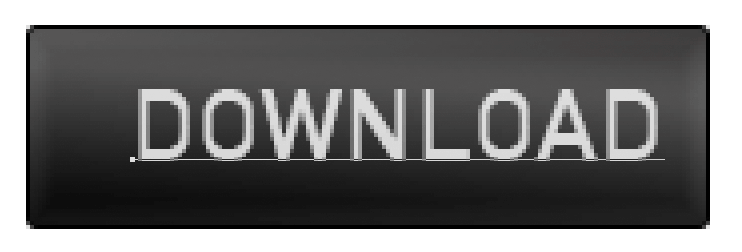
The text might not end up in the very center, but you can easily center the text. If you want to place the text in the center, the alignment options on the top menu should be a great help.
If you want to change the color of the button, you can add a Color Overlay. You can also explore the fonts, size, etc in the Characters panel.
Conclusion
We are pretty much done here. You can create more versions of the button by changing its colors, gradients or adding more effect to it using layer styles and shapes.
The same method applies to other shapes’ buttons as well. Who says a button has to be a rectangle? How do you like this one?

Mujeeb Yousef
Thank You Very much, Intresting