
It’s pretty simple to create a multiplicity effect in Photoshop, but first of all, you will need some fancy camera work. I highly recommend you use a tripod and a nice camera because it’ll make the process easier and you’ll get a good finished multiplicity photo.
Also, it’s important to take the photos in relatively quick succession, especially if shooting a photo sequence outdoors. This will ensure that the lighting and shadow in the photos will be coming from the same direction across all shots. Try to take photos in the same background.
Once you have the images ready, open Photoshop and follow the steps below.
5 Steps to Creative a Multiplicity Image in Photoshop
Note: the screenshots are taken from Adobe Photoshop CC Mac version. Windows or other versions can look different.
Step 1: Create a new document in Photoshop and drag in the photos you want to use for the multiplicity image. For example, I’ve selected three images.
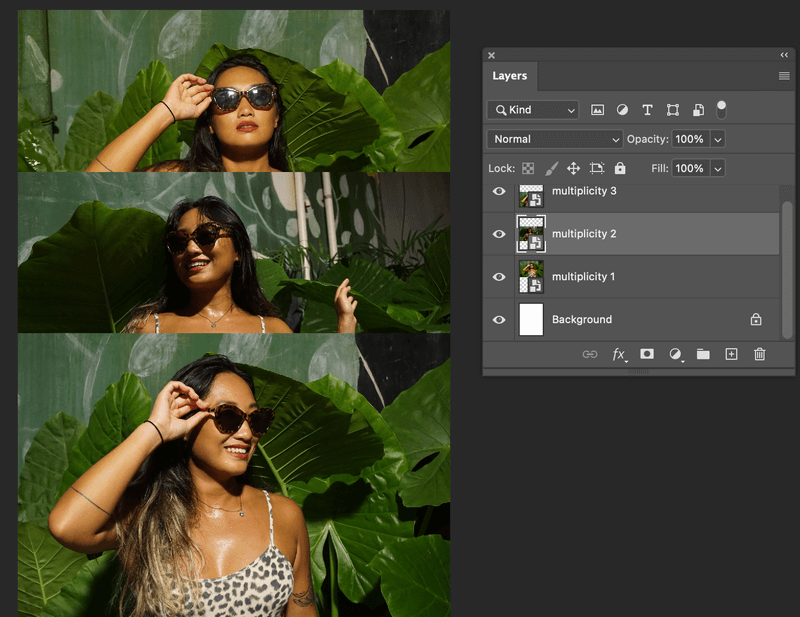
Step 2: Position the images, you can lower the opacity to see how it would look. I would like to align my three images horizontally.
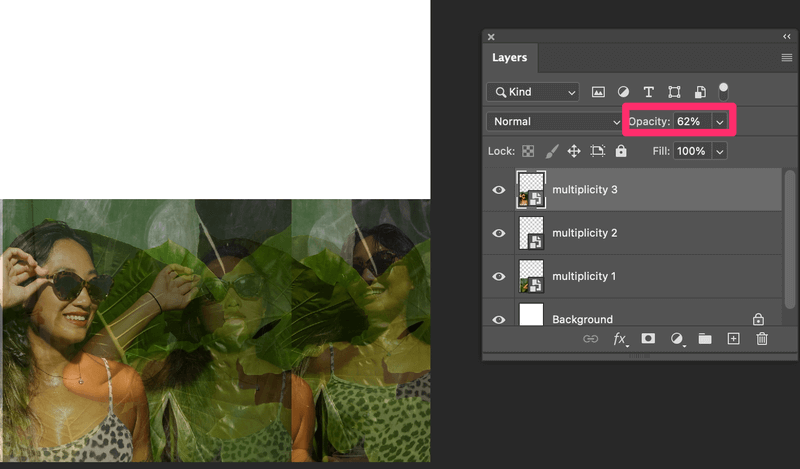
If the size of your images is not consistent and you want to make them all the same, use the keyboard shortcut Command (Ctrl for Windows users) + T to resize the image if needed.
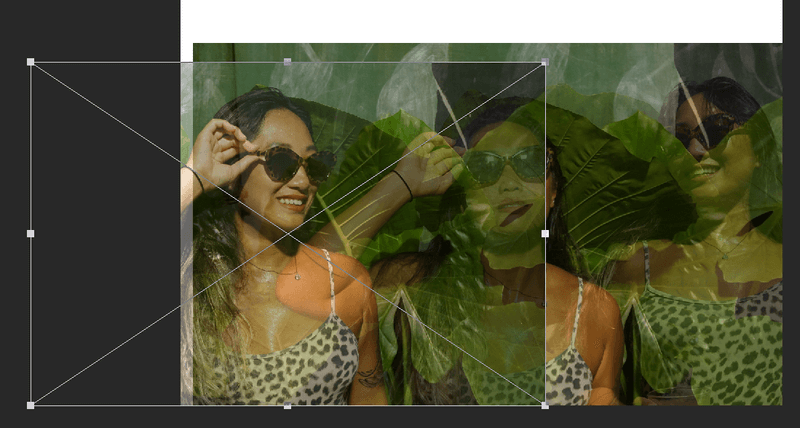
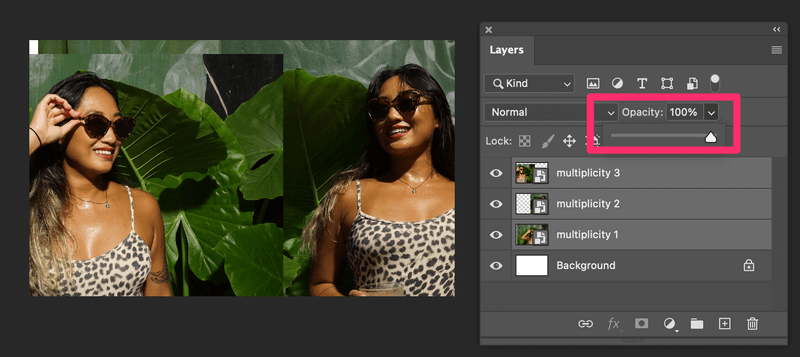
Notice that the top part is empty. Select the Crop tool from the toolbar and crop out the white part. Bring the opacity back to 100%.
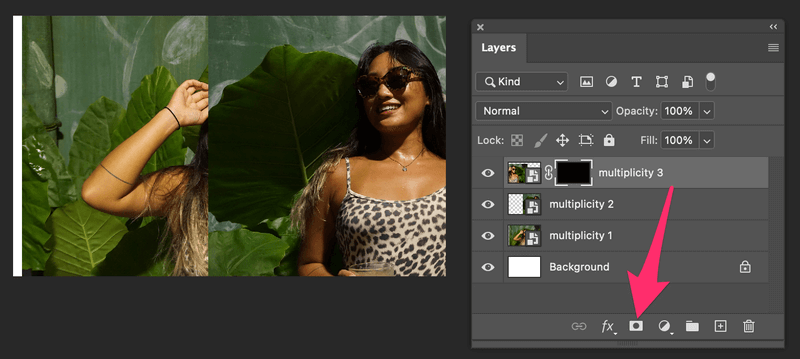
Step 3: Add an Invert layer mask to the image from the left-hand side (multiplicity 3) by holding the Option key (Alt key for Windows) and clicking on a layer mask icon. The image from the left will disappear.
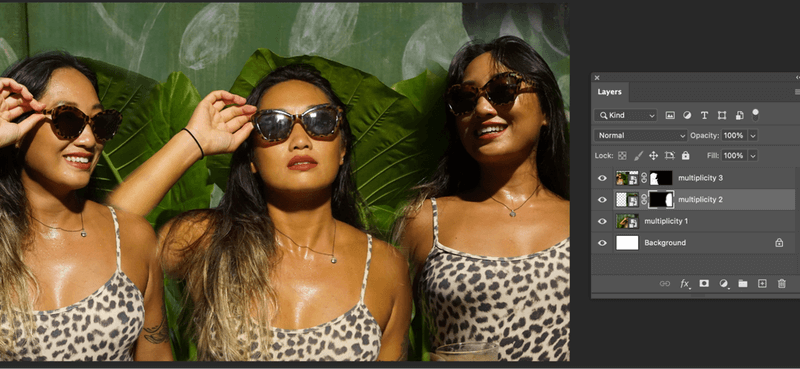
Step 4: Select the Brush Tool from the toolbar, change the foreground color to white, and start brushing on the area you want to show. See? Now the area I brushed on is showing.

Repeat the same steps for the image on the right-hand side. Add an Invert layer mask, and use the brush tool to reveal the image.
We are almost there, but there are some details we need to work on. Notice some areas are blurry and the blend doesn’t look natural?
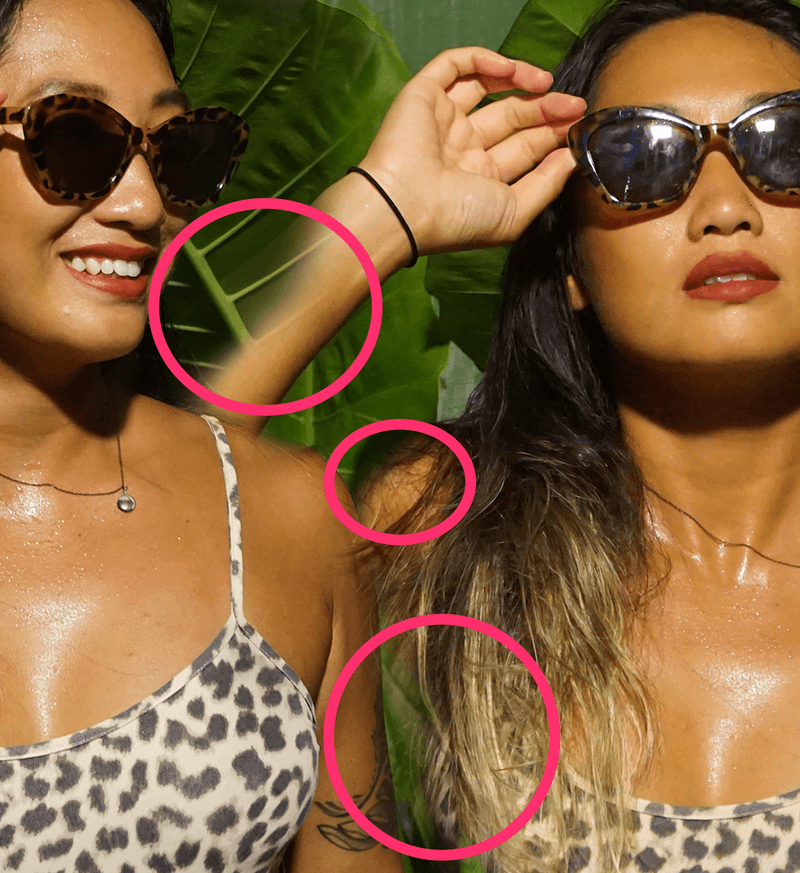
Step 5: Go back to each layer mask, zoom in, and use the brush tool or eraser tool to clean up the details. These photos are taken from the same background, so it’s pretty easy to clean up.

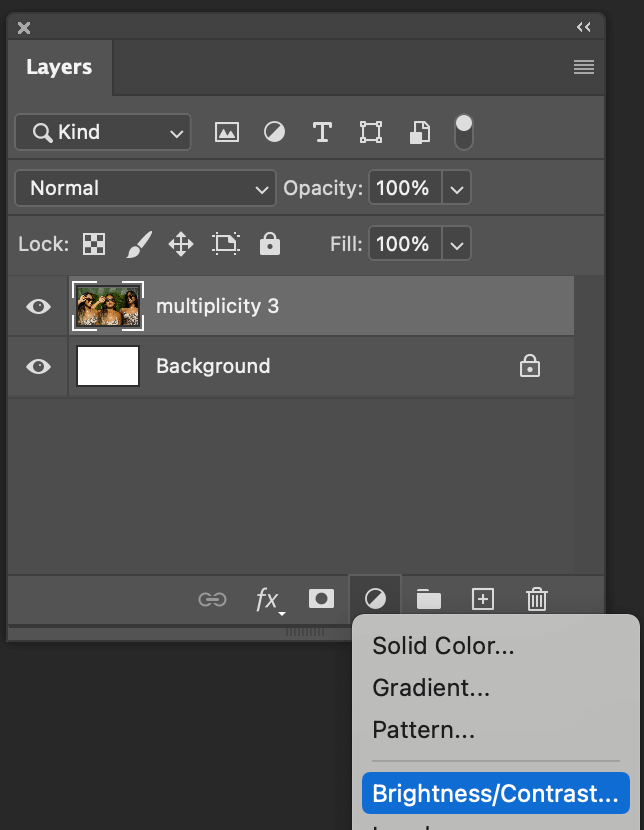
Once you are happy with the result you can merge all images into one (image) layer and add any adjustment layers to layer styles to manipulate the image.
Conclusion
I didn’t lie, right? It’s not difficult to make a multiplicity image in Photoshop if your photos are taken using the same background.
Actually, if you could take a photo of the background by itself, that would be even better. In short, the key step in making a multiplicity effect in Photoshop is the photo itself.
About June
pavan
it is very use to do multiplying images.in one image good work
Patrick
Cool. I used your tutorial to produce this: http://www.flickr.com/photos/larsonfamily/6364966043/in/photostream . Thanks!
June
Hi Patrick, that’s great. Thanks for sharing your final image 🙂
Ezza
what else in photoshop can make multiplicity? or only can do in photoshop cs5?
June
Hi Ezza, yes I use CS5. There is nothing CS5 specific in this tutorial though, you should be able to follow the tutorial and create the same effect with any version of Photoshop.
Rebecca
I was wondering if you could tell me how to do the sort of multiplicity shot where 2 of me could be physically touching. I saw one where a guy was grabbing the arm of another version of himself. I hope that makes sense? Thanks.
June
Hi Rebecca, having 2 photographs of yourself touching would be slightly more difficult to do. If it was just for example the soles of your feet or the palm of your hands then you could position something in the scene to line up yourself in each photo – you would still need to take a plain picture of just the background first. Grabbing arms would involve much more photoshop work. This could be done by taking a photo of 2 people together (ideally someone who would have the same size arms as you!) taking the second photo of yourself in their position and then editing them out of the photo. Hope that helps.